I went through the Infantry School in the fall of 1989 at Fort Benning Georgia. If you’ve ever been there, you know the joys of those 11 weeks. (Or was it 13? I forget… Old age I suppose. 🙂 ) While it all has a purpose designed to prepare a civilian to be an infantryman, some of it, looking back, was quite comical.
There were many ways that were used to make the point that acting fact, listening carefully, and vigorous execution were essential. And contrary to what many people think, it wasn’t brainwashing. Life and death were on the line. The idea was to teach a soldier to act with clear thought in the midst of chaos.
Some of the training at the time made perfect sense. Marching, firing a rifle, first aid, throwing a grenade, digging a foxhole, and all other manner of soldier skills were readily apparent. Others though, were not so obvious.
Facing The (Armored) Giants
For any infantry soldier, facing armor is a fearsome prospect. While there are methods to do so successfully, it’s still your flesh against giant hunks of metal. I recalled reading about the carnage that a single Nazi Tiger tank could bring against groups of Allied infantry. Just the thought of standing against those monsters created nightmares.
In the eighties, the assumption was that at some point NATO would be fighting the Warsaw Pact on the soil of Western Europe. And the image that was portrayed in media, and even in our training, was that of hordes of Soviet tanks, rolling through the Fulda Gap in streams as relentless as the waves along the seashore.
So it was a concern that was quite real in a practical sense.
We’re Going To Do What?
One particular bit of training that puzzled me was what I recall being referred to as “rollover”. (Though my memory may be failing on that…) It was part of a segment of the infantry training dealing with how to fight against armor.
The concept was simple, really. There was a small dirt track for an armored vehicle to drive around. In one section of the track, a heavily reinforced foxhole had been put in place. It wasn’t just a hole in the ground, but rather a proper position with reinforced sides. It was deep enough that even at my height of 6′ 4″ (1.9 meters), I could not see out the top. A small step had been built part way up one wall that soldiers could step on, allowing them to look over the top of the fighting position.
The drill sergeant explained what we were going to do. Working in two man teams, we’d climb down into the hole, equipped with training versions of the LAW (light anti-tank weapon). We were to sit in the very bottom, scrunched down (like we needed to be told that!), and the armored vehicle – this case an old M111 APC – would ride over. As soon as it passed over us, we were to pop up on to the small step, deploy our LAWs, and “fire” into the rear of the vehicle.
Here We Go
My buddy and I were near the front of the line waiting for our turn. The Drill Sergeant would take two soldiers out, make sure they understood the necessity of staying very, very low, and then moved off to the side. Giving a hand signal to the APC, the metal behemoth would lurch forward, driving around the track. The first time around was at a fast pace, and we were to wait for a slower second pass. After making one circuit, it slowed down a bit, rolled over the fighting position, and moved on.
Just as we’d been trained, as soon as it passed, two Kevlar helmets popped up, the LAWs were shouldered with a quick “back blast area clear” (said while standing in a hole… LOL), and then triggered. Of course, being training dummies (the LAWs, not the soldiers), nothing actually happened. The assumption was of course had this been real, the rounds would have found there mark, the APC would have blown up,and everyone would be home by Christmas.
Despite the fact that I saw this process play out several times before my buddy and I were at the front of the line, I was a bit nervous. What if the hole collapsed? Or if I had a complete brain fart and stood up before it arrived? What if, what if, what if.
Finally, the Drill Sergeant motioned us forward. As we jumped into the hole, he shouted down to us some brief, helpful instructions. “Bius, you’re kind of tall. Don’t stand up too soon or it will squish your brains out like a possum on the road.” With his thoughtful encouragement ringing in my ears, I looked over at my buddy. Trying to muster up some bravado, I said “Here we go!” Wide-eyed, he just nodded.
Fun Is Better When It Is Free
I’d not actually planned to build this Rhino kit anytime soon. I’d built the Razorback APC and Predator tank, both based on the same chassis, so doing a third rendition of this model wasn’t on my radar. However…
The Predator tank I’d ordered had a sprue mixup. The base kit was of course the Rhino chassis. Additional sprues contained side gun sponsons, and turret parts. Unfortunately, my box had two of the sponson sprues, and no turret sprue. While I briefly considered just punting and building the Rhino, I thought I’d give Games Workshop customer service a try.
I sent an email, explaining that I’d purchased it on Amazon, and it was past the time I could return it. I’d of course be glad to pay for the missing parts – I just needed the one sprue. A few photos, pics of the box, and a red circle drawn around the sprue diagram in the instructions clarified what I needed. I sent off the email, hoping for the best.
Within a day or so, I received a cheerful response that they’d be happy to replace the sprue at no charge – just send my address in. Quite happy, I did just that.
A few days later, a box arrived. Inside was not just the sprue, but an entire new kit. Worried that they’d made a mistake, I contacted them, offering to pay for the full kit. A cheerful reply followed, saying not to worry, that was deliberate. Enjoy the kit.
How about that?
Assembly Of The Kit
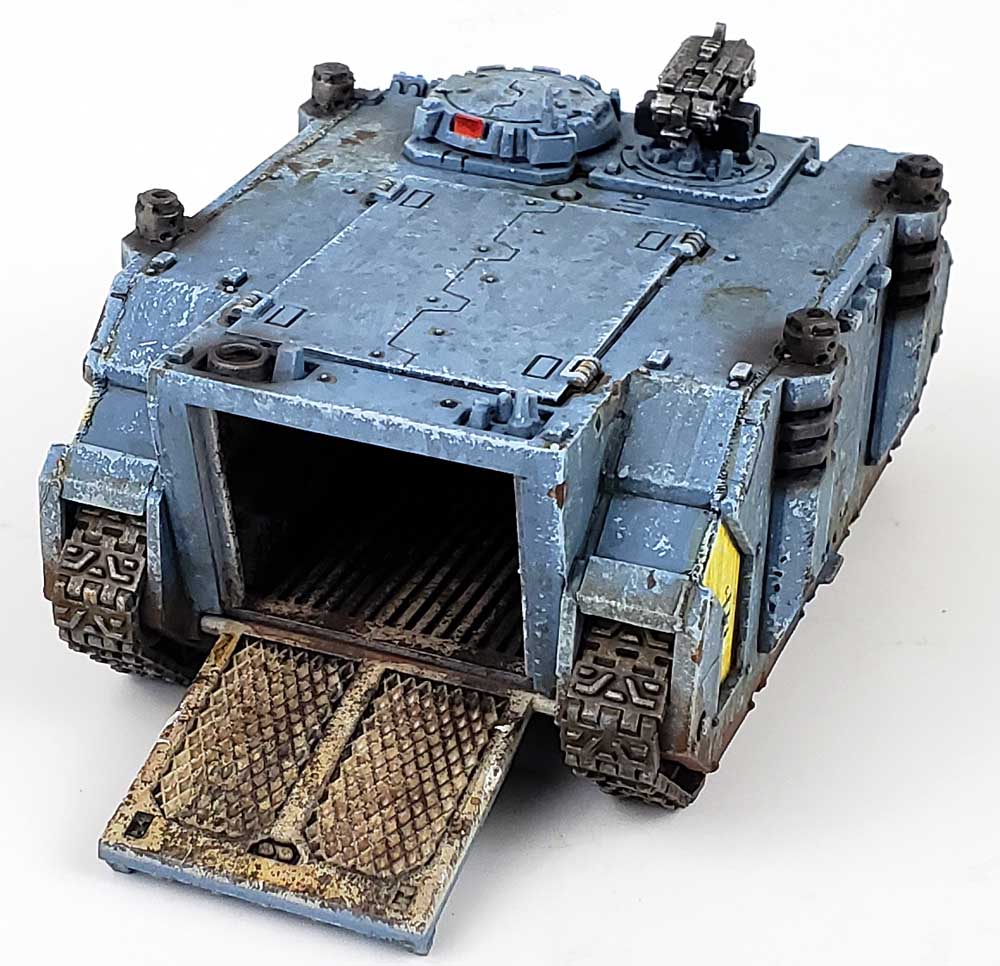
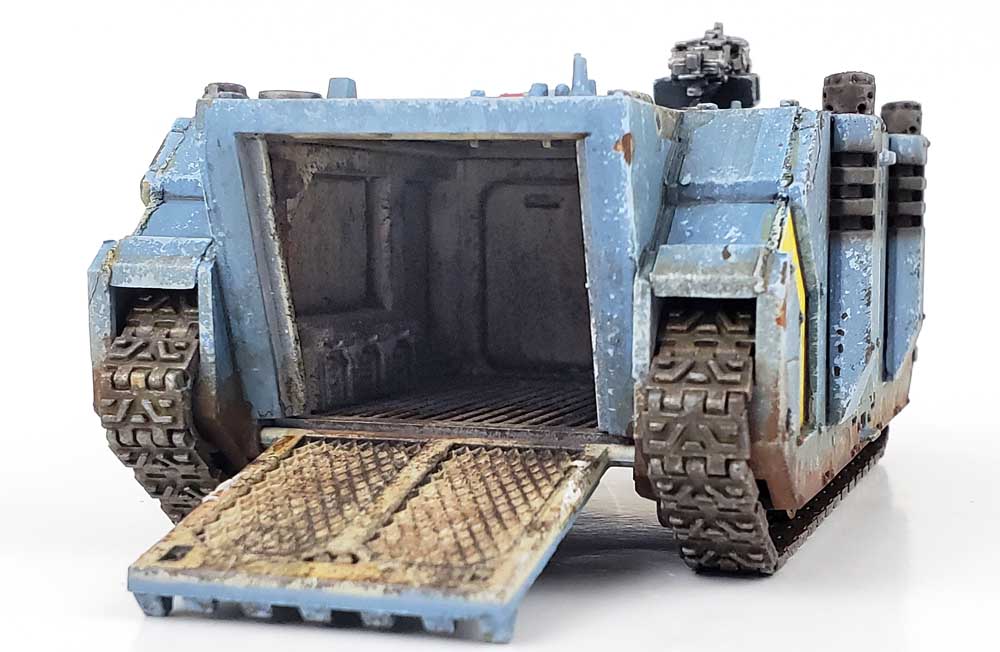
I’ve covered the basic assembly of the kit both in the Razorback build, and in a Patreon Exclusive video series about the Rhino, so I’ll not go into great detail there. Suffice to say, assembly is simple, and apart from the time spent cleaning up nubs on the parts, it all falls together quite swiftly and with good fit. There is a decent interior that can be painted and weathered, or the whole thing can be buttoned up.
Once assembled, I used Milliput to create some weld beads along the top edges of the side armor. I’d normally done this with stretch sprue, but I’d seen a video discussing the use of Milliput, so I gave it a try. While it did work just fine, I realized I’d need to do it a few more times to fully assess if I liked it better than sprue. I’ve learned that it’s often difficult to make a really good decision on the use of a new technique until after trying it a few times. So while I felt I could have done a better job with stretched sprue, it turned out well enough to warrant more attempts, so I can make a better comparison.
Because I planned to brush paint the model, I gave it a coat of primer. The tracks and guns were left off the model to make painting and weathering easier.
All The Painting
Every now and again I like to brush paint a kit. For one, it’s truly one of those “do it like you did when you were a kid” moments. Everything then was brush painted. But I also simply find it relaxing to do. There’s little prep work – stir the paint up, add it to the palette, thin it, and go. Just paint.
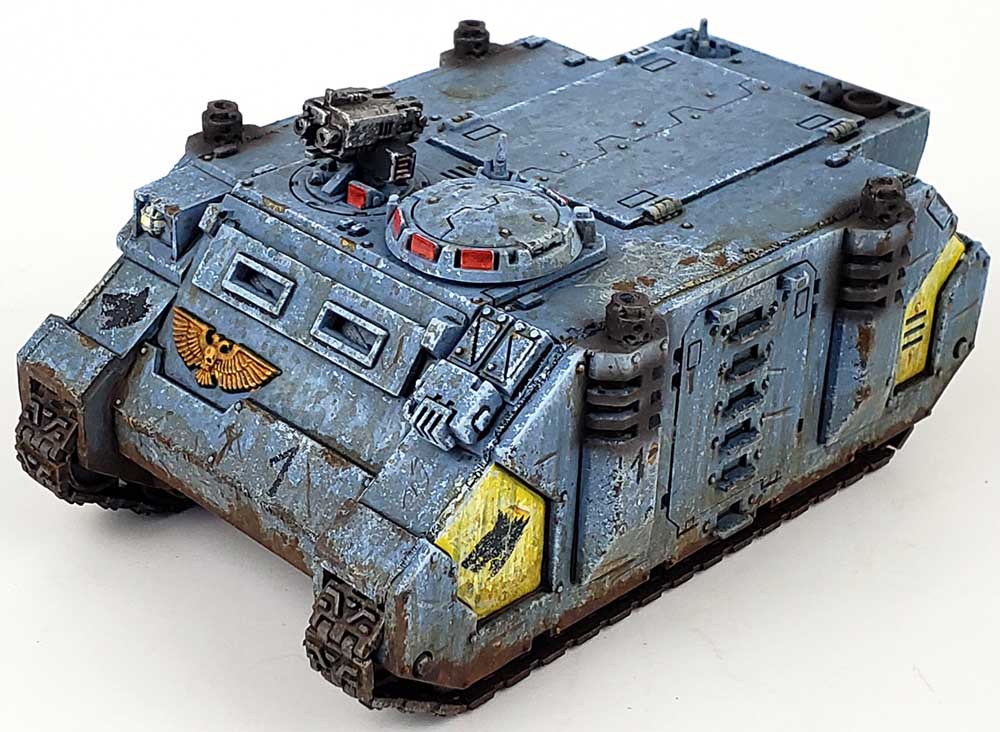
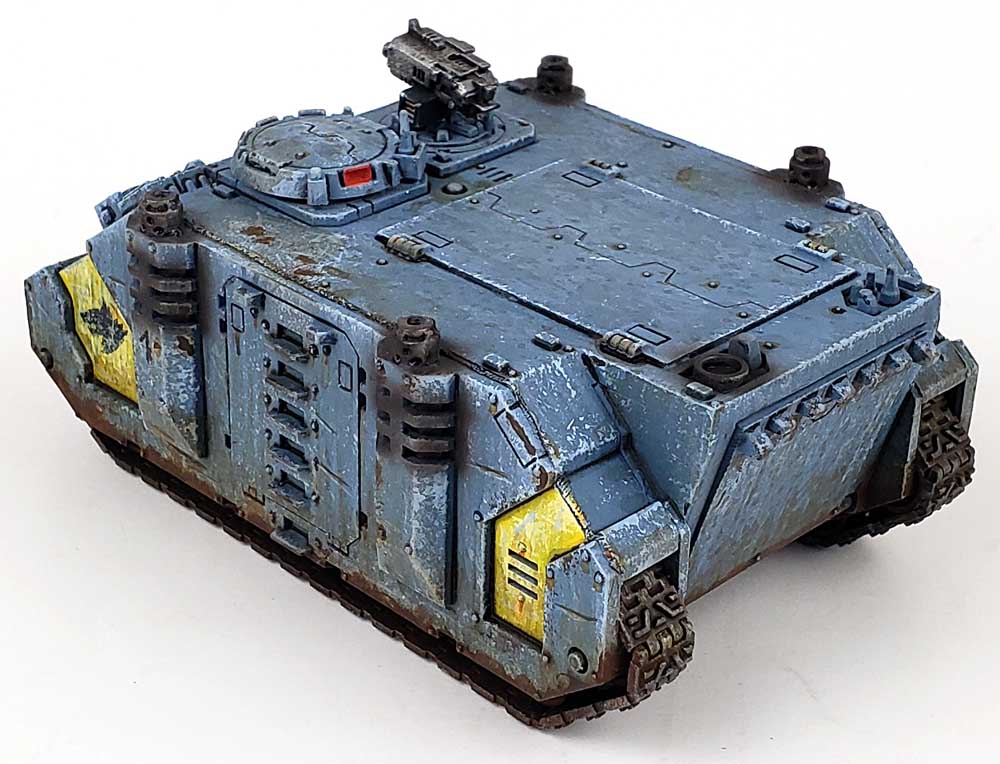
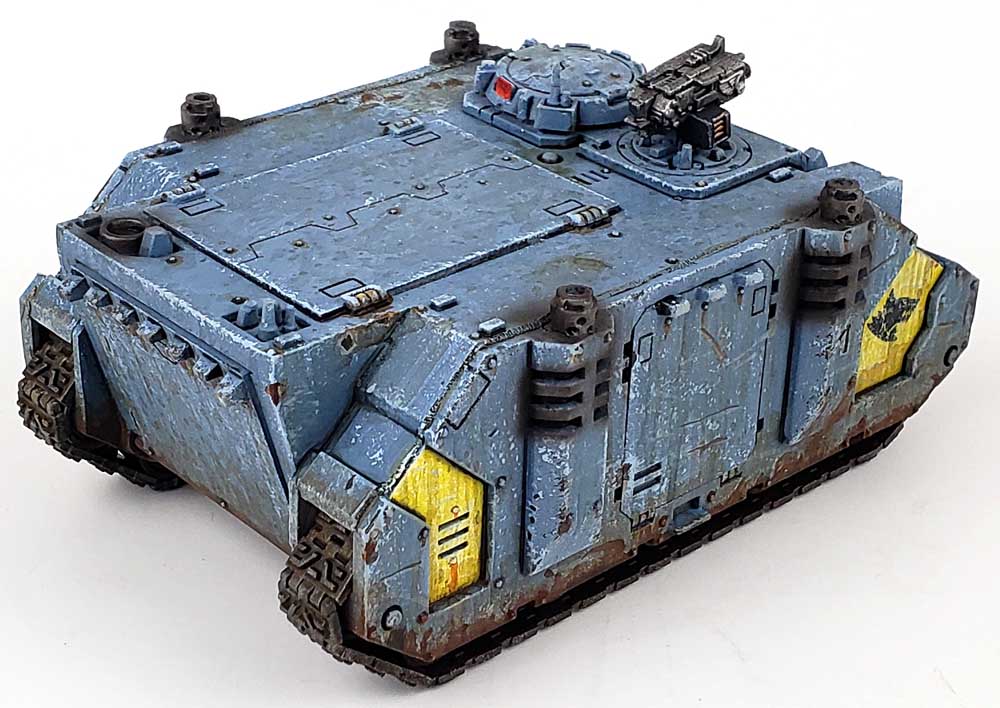
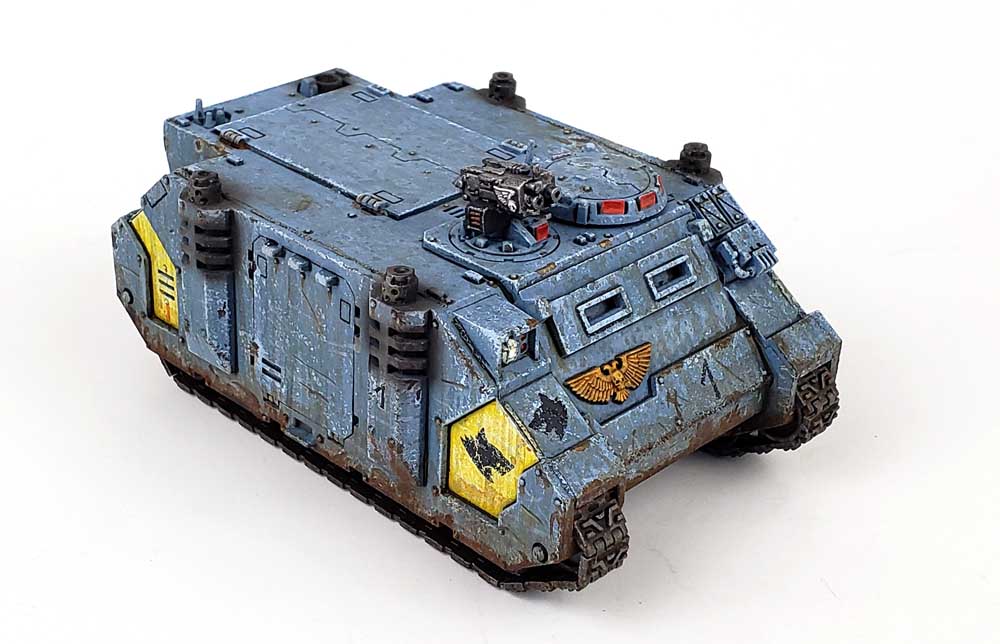
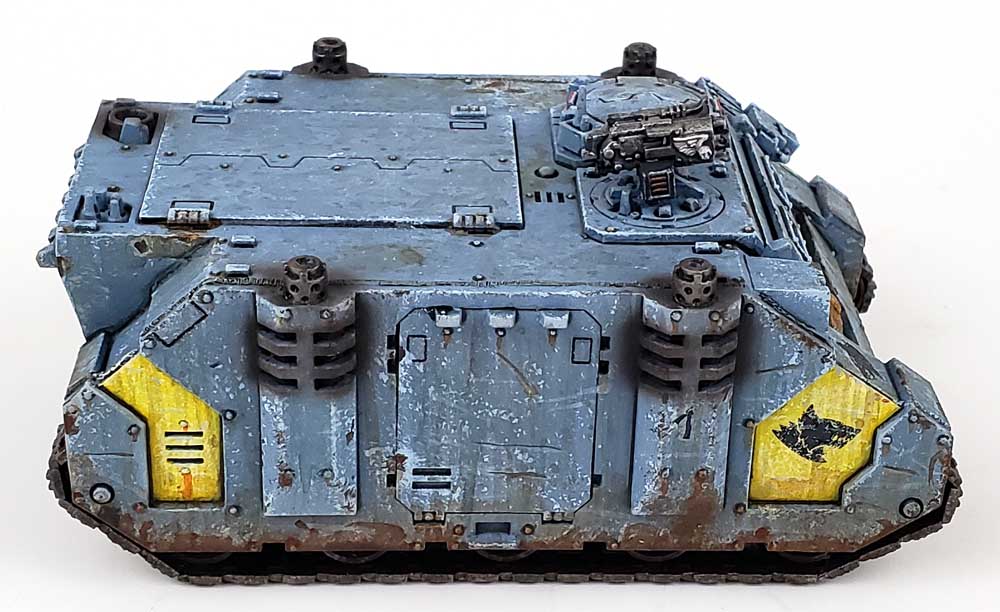
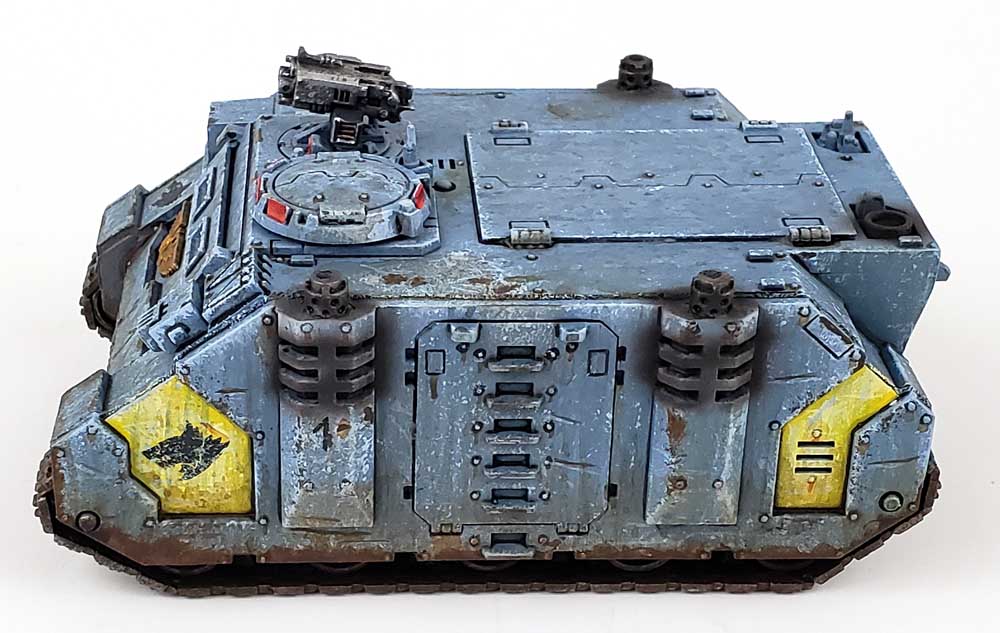
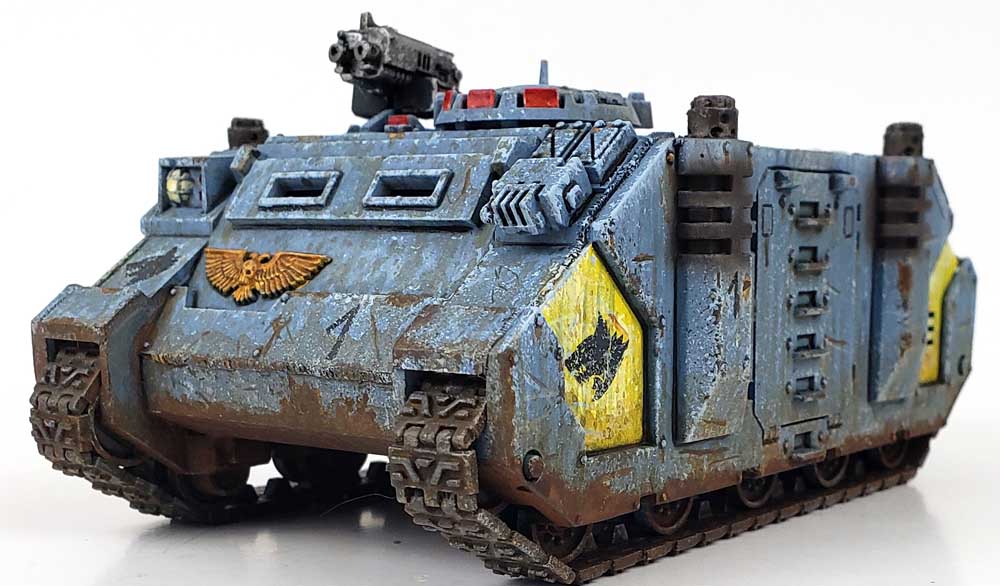
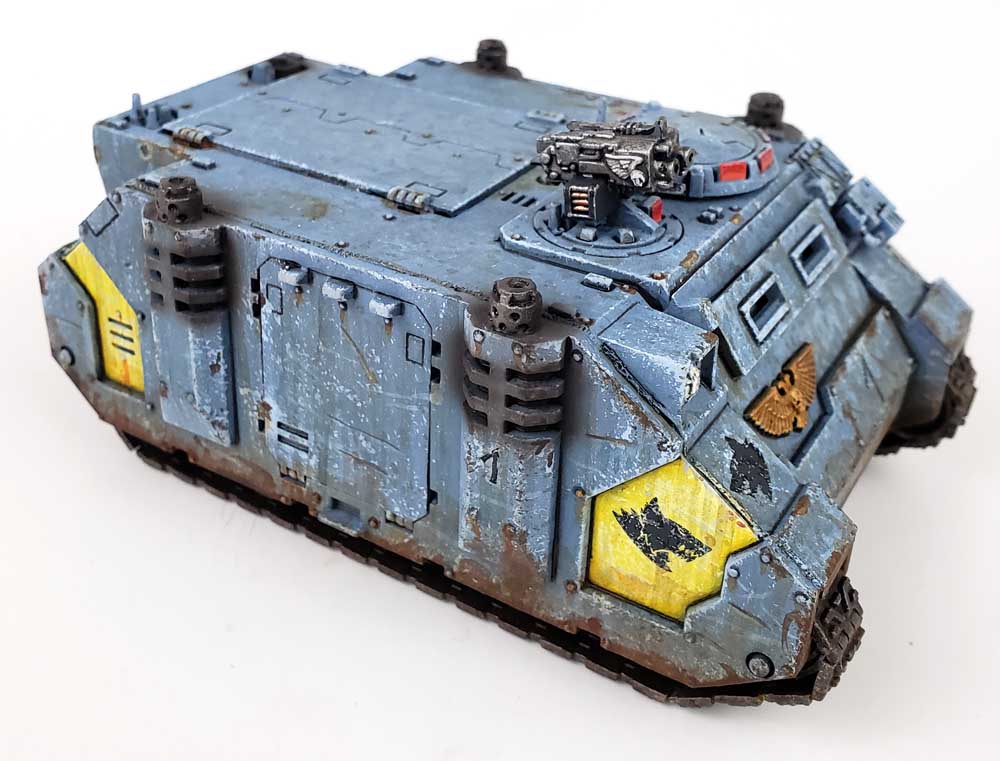
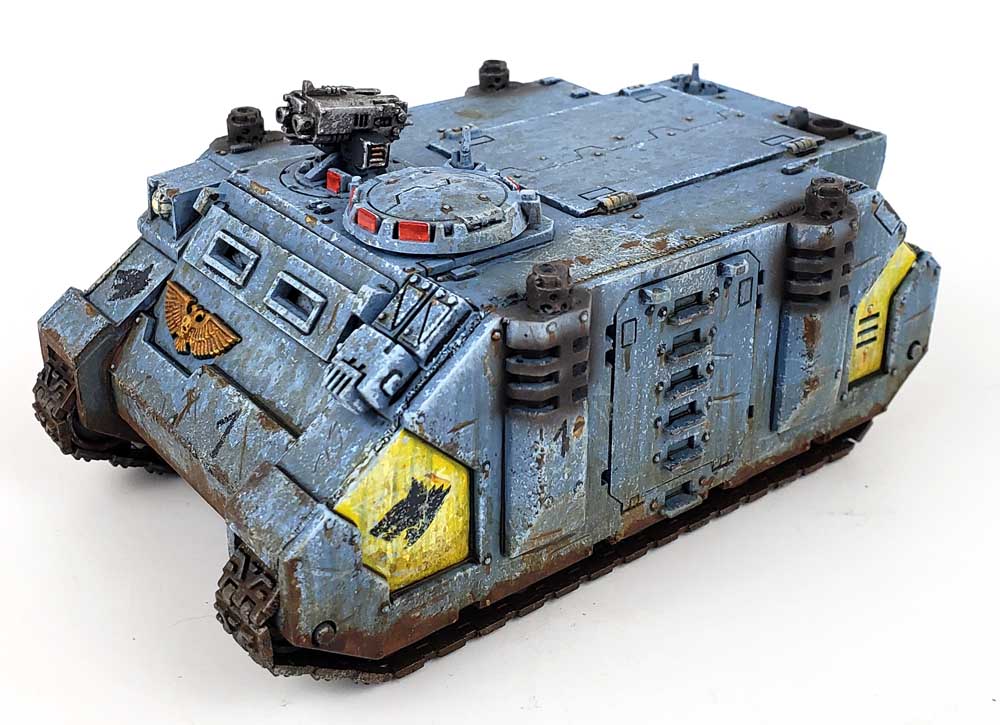
I used a larger flat brush to apply the paint, Citadel’s Russ Grey being the chosen color. The first coat was applied quickly, with not too much worry about being particularly smooth or opaque. A second coat would address the opacity issue. And I didn’t mind a slight bit of the “brush stroke” look… after all, this was an armored vehicle. A bit of surface texture fits.
What I did pay attention to were vectors. I made sure my brush strokes aligned with each other, and with the general direction later weathering would take place. So the sides and the front/rear were treated to vertical brush strokes, while the top was done in a more stippled fashion, especially on the last coat.
With the base color on, I gave the entire model a drybrush of a mix of Citadel Fenrisian Gray and Vallejo Model Color White. This helped the details “pop” a bit, making sure later weathering steps would not cause them to be lost in the mud. Other parts were painted with Citadel’s Leadbelcher and Retributor Armor, a gold color. Some adornments on the side of the hull were given a mix of Vallejo Game Color Yellow Gold and Vallejo Model Color Yellow, in a 1 to 5 ratio.
The Weatherings And Such
A panel line wash of both Citadel’s Nuln Oil and a .5mm mechanical penciled was applied next. The Nuln Oil was used in the recessed areas, and the pencil darkened edges of raised detail. I like to employ this to avoid the acrylic wash tide marks. If later acrylic washes are needed, they can be applied much more neat and precise, as the pencil serves to make things heavily shadowed to begin with.
Chipping the model came next. Scratches were added to the yellow areas first, with both a near-white yellow mix being applied via brush and sponge, as well as some Fenrisian Gray, as this implied the yellow was painted over the gray. The blue/gray portions of the hull received more of the lightened Fenrisian Gray/White mix, these too being applied via sponge and brush. The sponge chipping establishes the general patterns, and then later brush applied chips connect the sponged areas, and also introduce deliberate streaks and scratches. A few places also received even further chips, with Vallejo Mecha Color Chipping Brown being used. These were mostly applied via brush, though a few larger areas were sponged. The idea with these sections was to suggest paint had been scraped right down to the underlying surface.
You Can’t Weather With Acrylics
The various stains, streaks, mud, splatters, and fluid marks were all applied using various Vallejo acrylic weathering product. I generally do this by starting with a few shades of washes, creating streaks down the side, and stippled application on the top. the goal is for the streaks to build up the further down they are on the sides. These were followed by more washes, with colors being more on the earthy side, to start a mud/dirt/dust build up along the lower part of the hull. Vallejo pigments were added into some of the washes to give just a hint of texture, and these were applied lower down on the hull.
Additional abuse was applied all along the way in the form of various splatters from the washes, applied by flicking a loaded brush against a toothpick. (Test it on paper towel first!) Some was applied neat, other thinned down with water. A few areas were given additional focus, principally the areas on the left side were the crew would climb up and enter via the track commander’s hatch.
The tracks had been painted and given some initial weathering off the model, a process covered in this video. Once glued to the model, more weathering was added. I’ve always found it easier to weather most of the model with the tracks off, and only after adding them proceeding with final weathering to make sure the look is “organic” to the final piece. Both muddy acrylic washes and pigmented washes were used for this.
A few final oil and grease stains were added, some touch-ups applied, and the Rhino was given a matte varnish coat and declared “done”.
Nothing To Fear
The first time the APC passed over our heads, it was as much of a terror as a thrill. It was LOUD. All manner of dust fell on us, and the ground around us shook. The whole time I had my hands over my head, praying the walls would hold. As it rolled on, my buddy and I looked up at each other.
We broke out into the biggest, dumbest grins you could imagine. We’d made it through. Sure, it was coming around again, but here we were. Our celebrations were short, as the training took over.
After the next pass, we sprung up almost simultaneously with the back edge clearing the hole. Our LAWs deployed, we depressed the firing activator, which only clicked. I couldn’t help but make a loud “Psssssshhhhh – BOOOOM!” sound verbally. That’s how we did it as kids, and that’s how I did it then.
The Bogeyman Of Weathering
Weathering, like that tank rollover, is not anything to fear. Sure, outcomes can be better or worse at different times and with different people. But eventually, you get over the initial concerns, and just like the second pass of the APC, you’re essentially ready to pop up and actually get the job done.
Applying weathering in a way that is pleasing to you requires the initial steps of applying weathering in a way that is not pleasing. As with all other modeling skills, it’s really a long process, and not an ultimate destination. Even the most experienced modelers continually learn new techniques to make their models look used.
So don’t be afraid to jump in the hole, get your weapon ready, and jump back out to make stuff look “bowed up”.
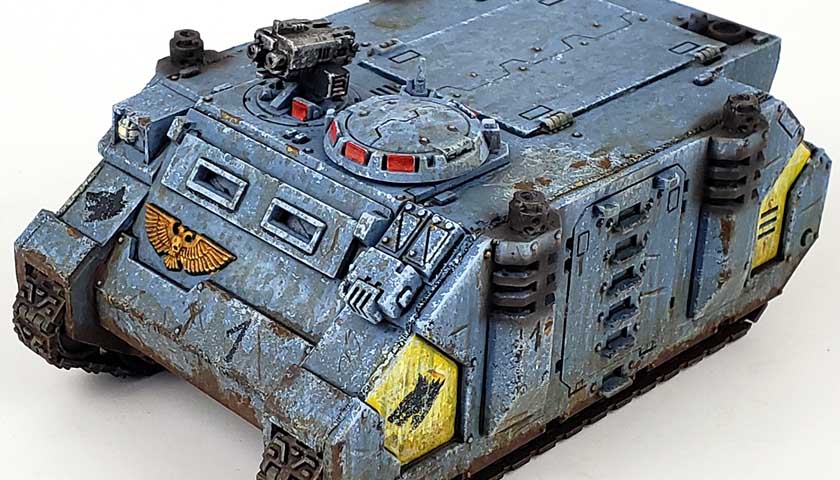
I’m really happy with ow this Rhino turned out. It’s not the best things ever, certainly, and doesn’t hold a candle to what experienced armor modelers produce. But I’m kind of happy with it – something that I don’t often say. This was one of those rare times I was able to execute on plastic most of what I envisioned in my head.
If you’re looking to try a Citadel Warhammer kit, I highly recommend this one.
Postscript
Years later, after I’d been a soldier for a while, I asked a friend who had been a Drill Sergeant if the Army really expected us to hide in holes, popping out like angry, armed meerkats to deal death upon our foes. He chuckled.
“The point of the training was to get over some fear of tanks, yes. But it was also just another step in getting the new soldier to see that their training and discipline has to overcome their fears.”
Huh…
Kind of like weathering, I suppose. 😉
Let your tools and experience overcome your doubts about doing it.



Leave a Reply