I suppose my childhood could be described as “typical 1970s American”. Time not spent in school or doing homework was filled with riding my bike, playing baseball, climbing trees, building forts in the woods, swimming anywhere I could, and of course – building scale models.
Of all the things I did for fun in those long ago days, none kept my attention quite like building plastic models.
My Own Place
Part of the lure was the fact that I had my own place to build them. It was in a large storage area that ran the length of our carport. One end of it was mine. Dad had rigged up a folding table that lowered down from the wall. Behind me were shelves, going all the way up to the ceiling. Mom had found a wooden stool for me to sit on, as Dad had mounted the table a bit high.
As with any modeler regardless of age, my paints were lined up in easy reach. Paint brushes were stored in an old jelly jar. It wasn’t like the modern jelly jars though, having a pop-top lid rather than the screw type. The jar was shaped so after use it could be a drinking glass. It wasn’t until I was a bit older and met my wife that I found not every family had matching jelly jars for their iced tea and such. Who knew? 😉
I didn’t have an airbrush. I’d seen one at a store, but it seemed to be something magically mysterious that was reserved for the rare air of the old guys who built models.
Just Build
Though certainly not a loner, I never worried if my friends weren’t interested in playing. If it was too hot for baseball, too cold for bike riding, too early, too late… I had a fallback. I’d build.
People ask me how I build at the pace I do, but to be honest… I don’t have a good answer. It’s just what I’ve always done when building models. Even back then, I churned out kits at a fairly significant rate. I just build.
And I wasn’t one to just slap them together and paint the outside. Though my skills were quite raw, I’d spend a lot of time painting interior parts, engines, wheel wells, or whatever else featured on the model. I tended to avoid models that I knew lacked good detail. The fun was in the doing.
Neither Snow Nor Rain Nor Heat Nor Gloom Of Night
The weather never really bothered me. Being along the Georgia-Florida line, the winters never became too cold. Still, I can recall days spent with the door shut to avoid the frigid winds, and extra light bulbs going to generate some heat. I could have easily taken my work inside – no one ever said I couldn’t. But it was my place. Frozen fingers and red nose aside, there were models to build.
Summers brought heat and humidity. Many a night I’d spend in virtual tropical conditions. Sweat would literally run off of my nose, to the point I’d need to take care to not let it get on my model. Yet I built. The place would be swarming with mosquitoes, beetles, and moths, but I paid them scant attention.
The Lure Of Bandai Star Wars

Bandai’s Star Wars kits, in my mind, are probably the best plastic model kits ever produced. While the genre may not be your favorite, I’d dare any scale modeler to build one and not be impressed by them. The casting exceeds anything Eduard has done with regards to surface detail. Fit of the kits leaves Tamiya scratching their heads. The likes of Airfix, Revell, and TrumpyBoss stand off to the side with an embarrassed look.
Yet for the most part the Bandai Star Wars kits are affordable. And by affordable, I mean a kid can mow a few lawns and buy them, much as I did growing up. And when craft stores in the US offer 40-50% off coupons every day, they’re almost a no-brainer.
As I’ve built through the series, my esteem for them has only grown. They’re just that good.
Finishing The TIE Fighter
The TIE Fighter has been one of the most relaxing builds I’ve had in the series. While all the others have been quite fun, this one has come along at a time that I need a break. Something simple.
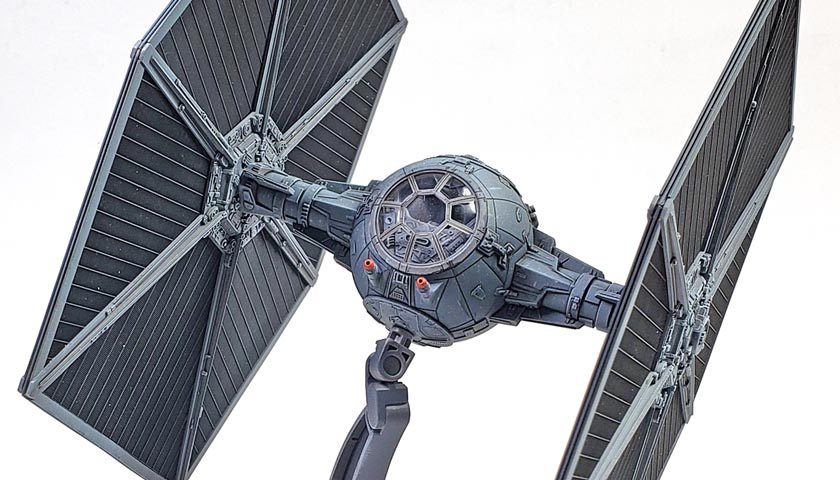
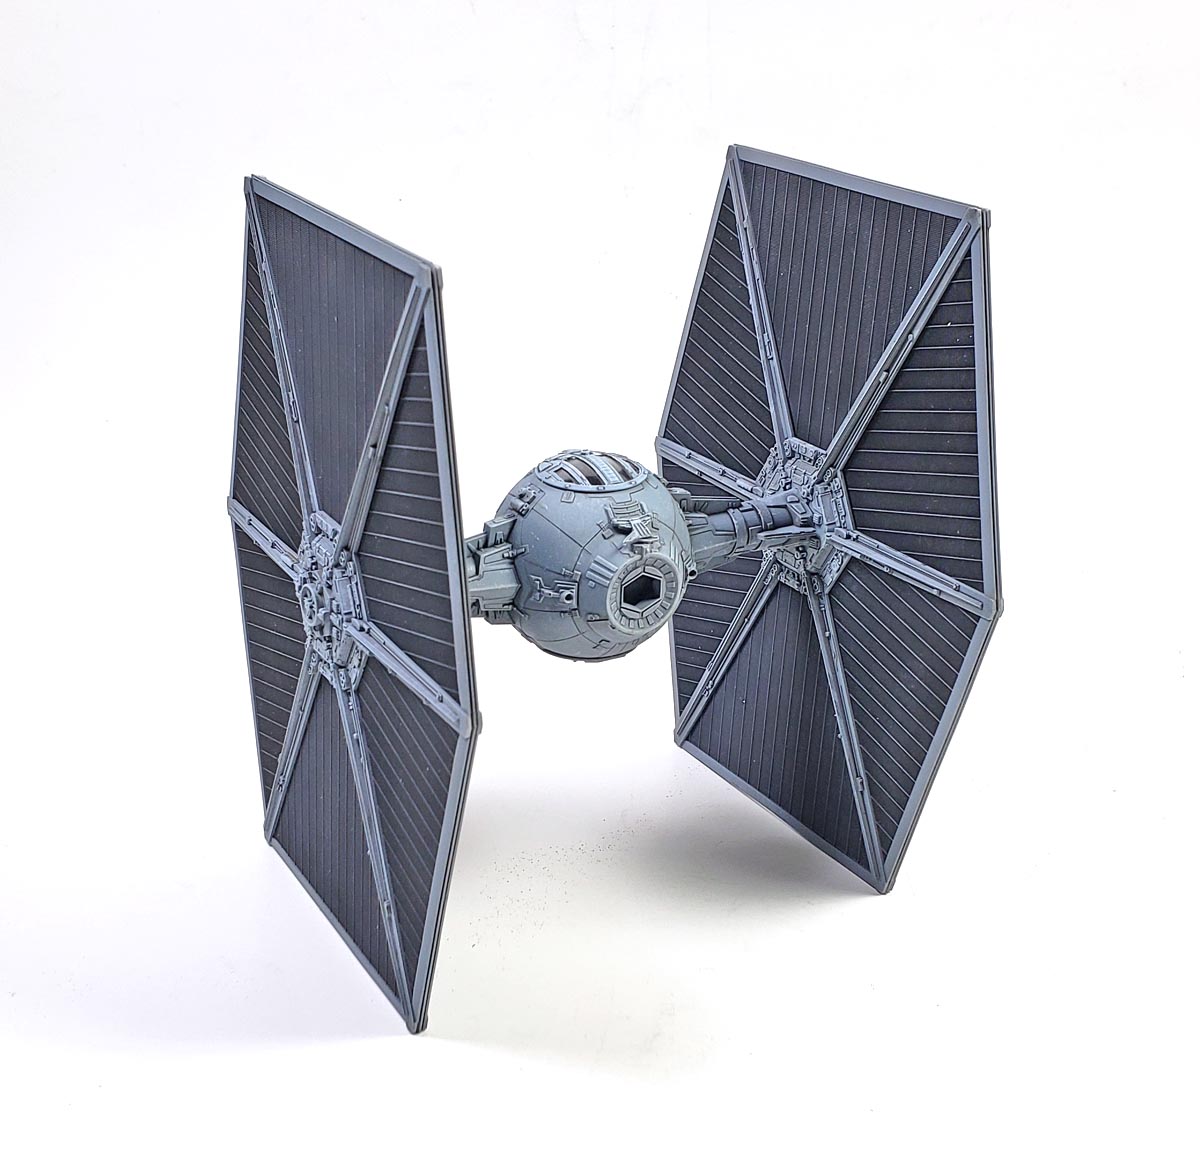
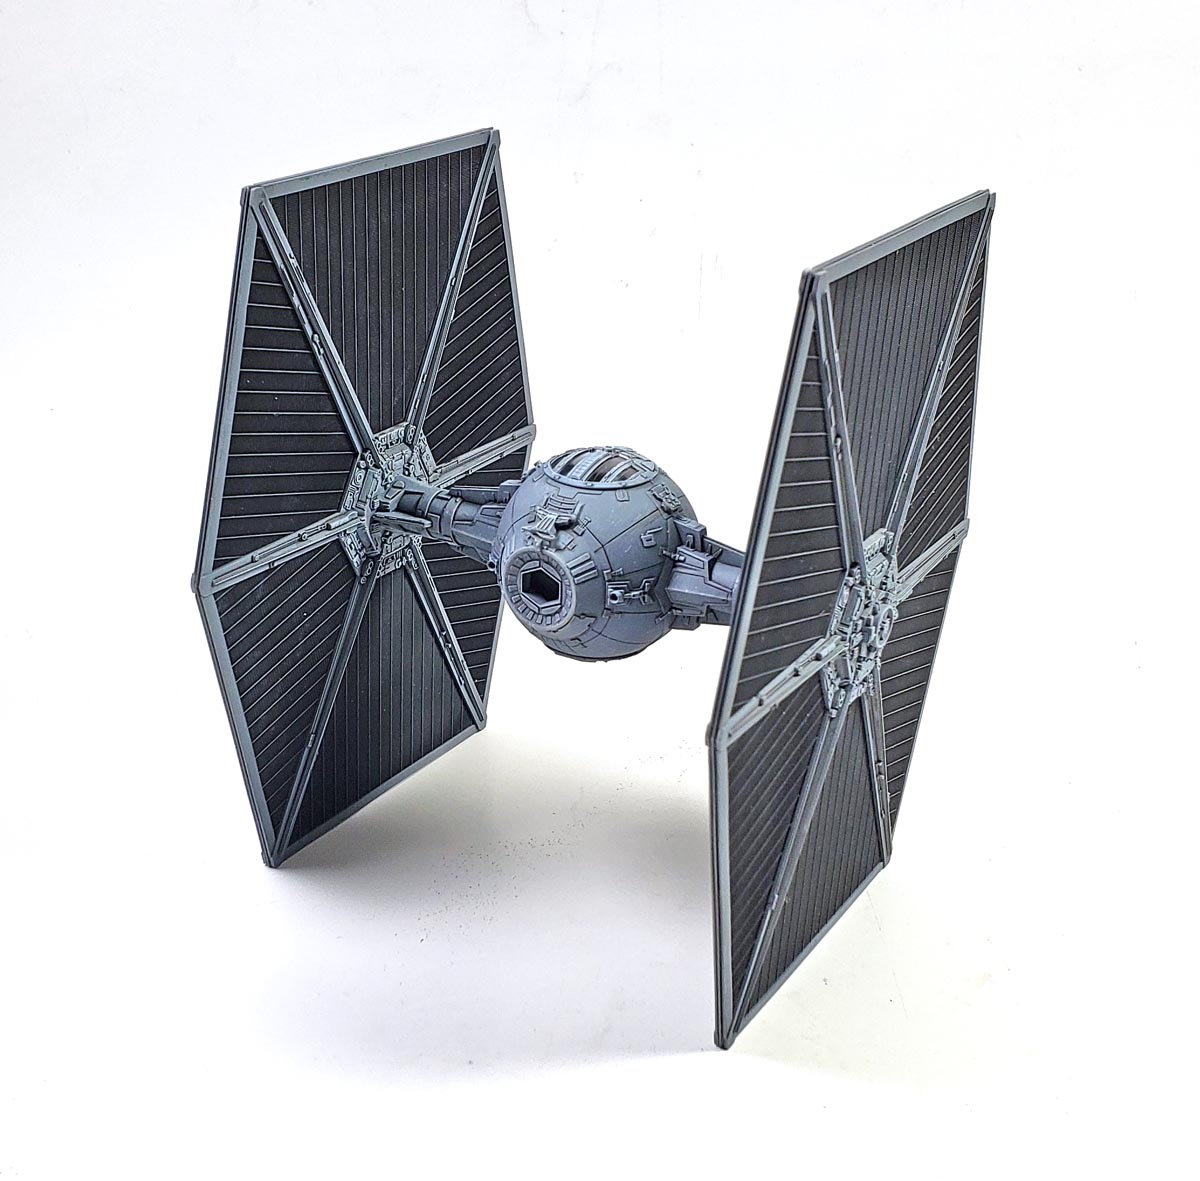
After finishing the interior, the work on the rest was almost ridiculously simple. Bandai’s engineering was well thought out. The kit, as all of theirs are, is cast in various colors. Bandai helpfully made sure that the gray framework parts that were on the black solar panels were all separate pieces. The structures that sit on the flat part of the black panels are gorgeously cast single pieces for either side. The edges of the panels have six smaller parts. All snap together and fit perfectly.
The breakdown means painting is quite easy.
The Plan Of Attack
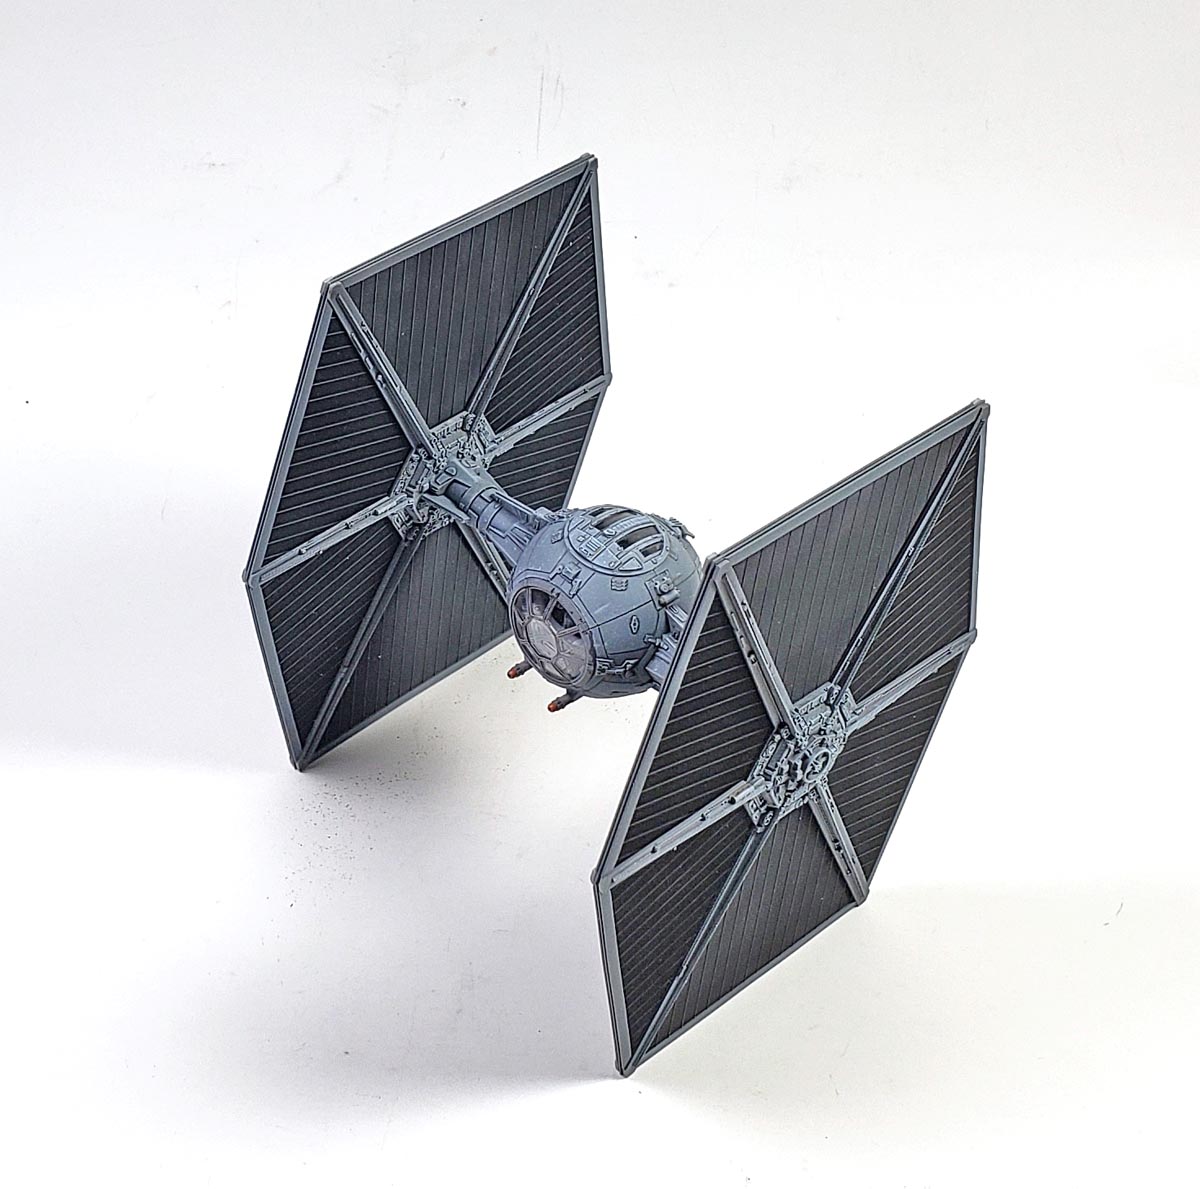
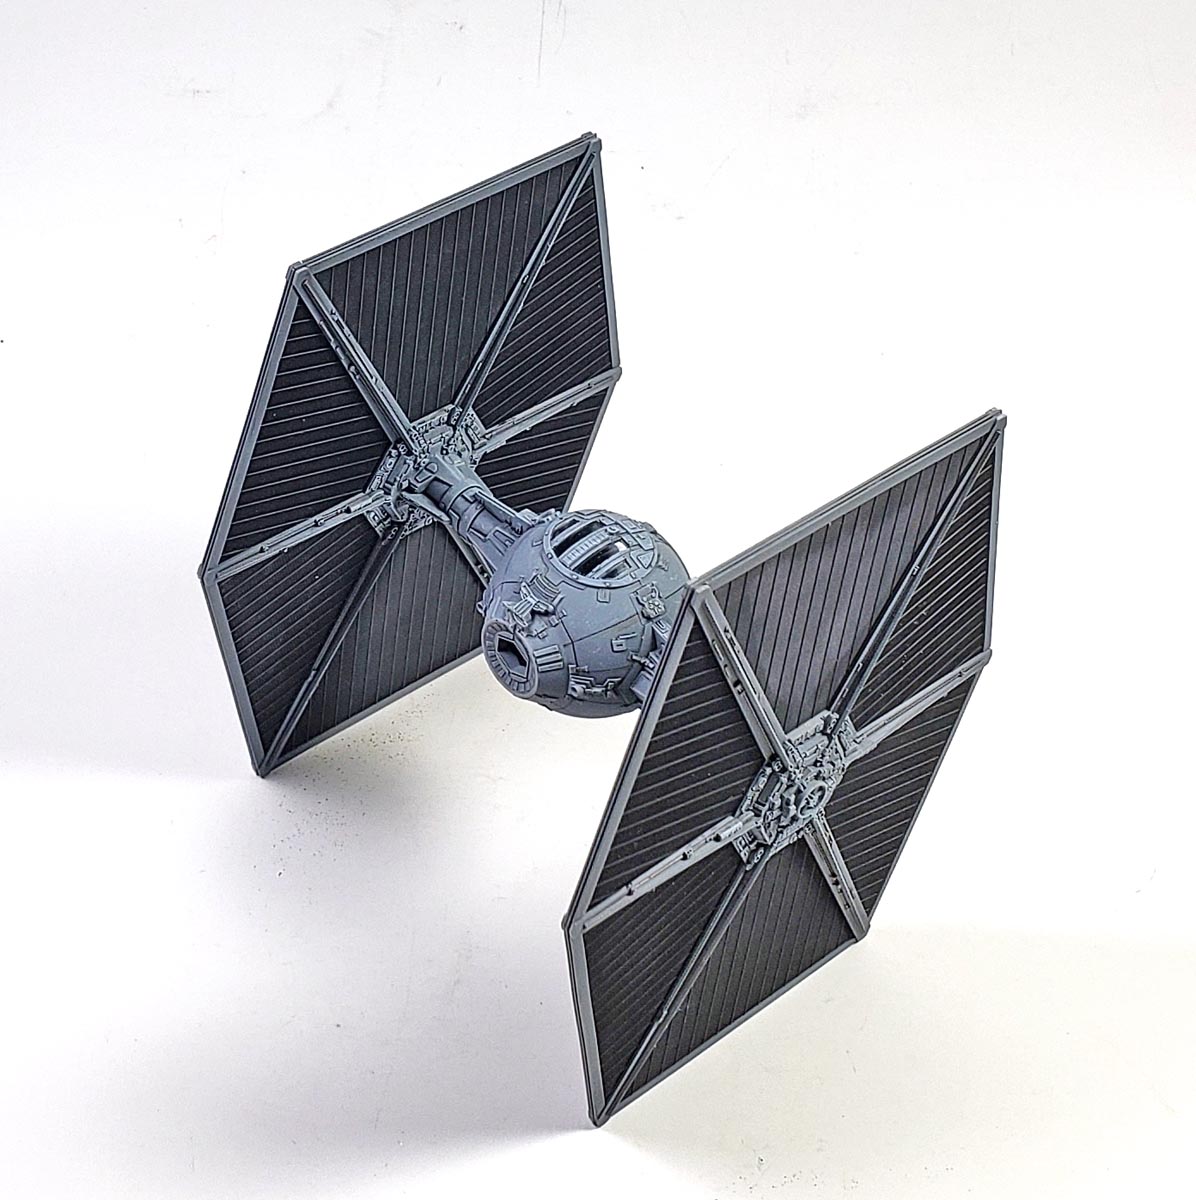
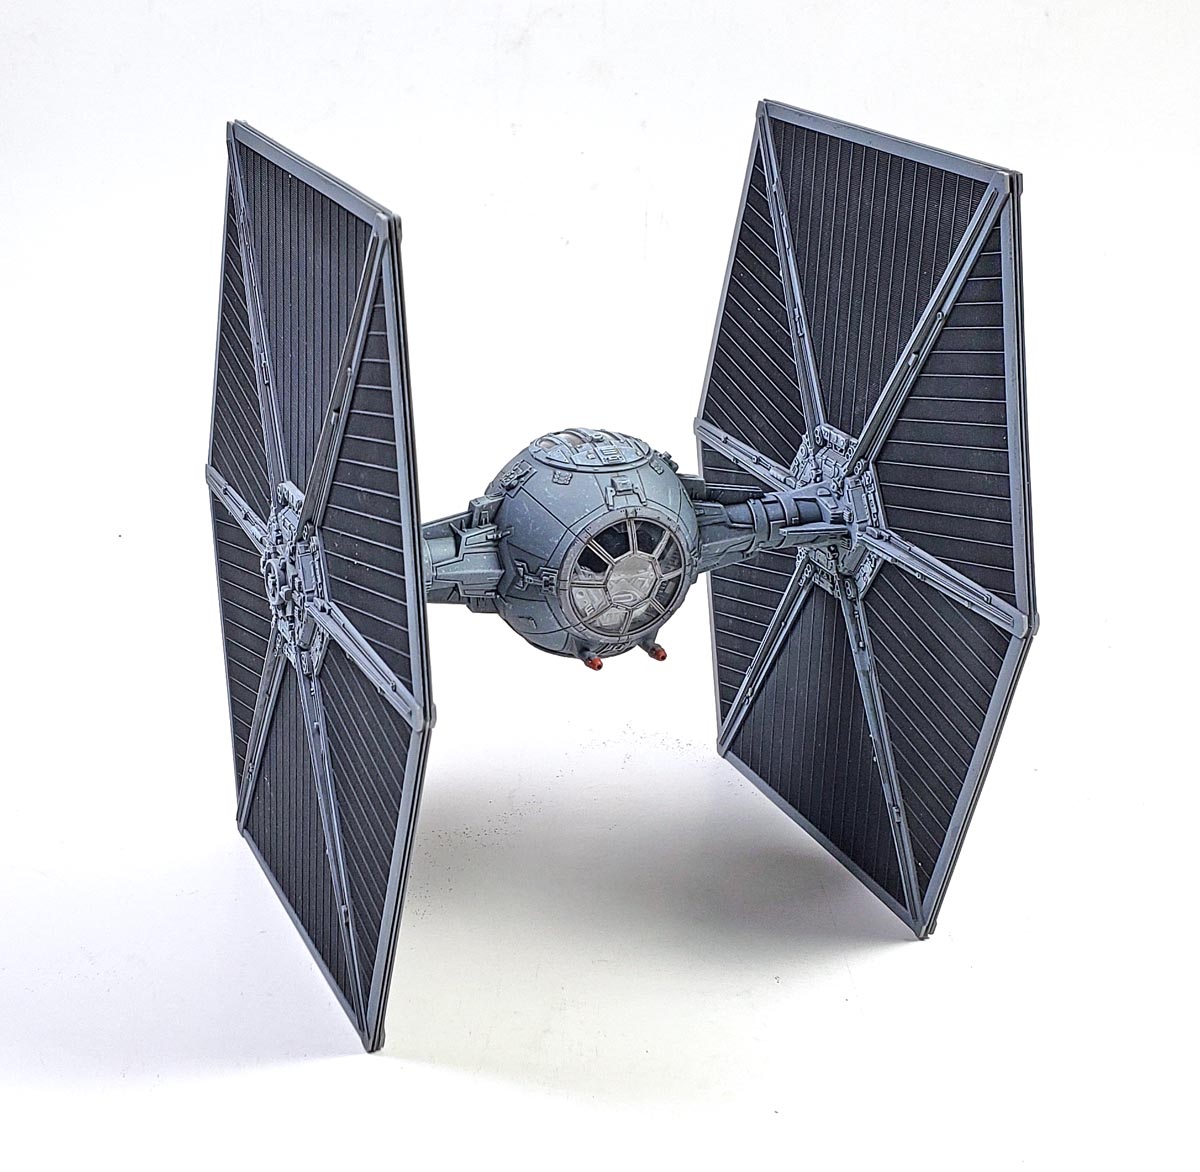
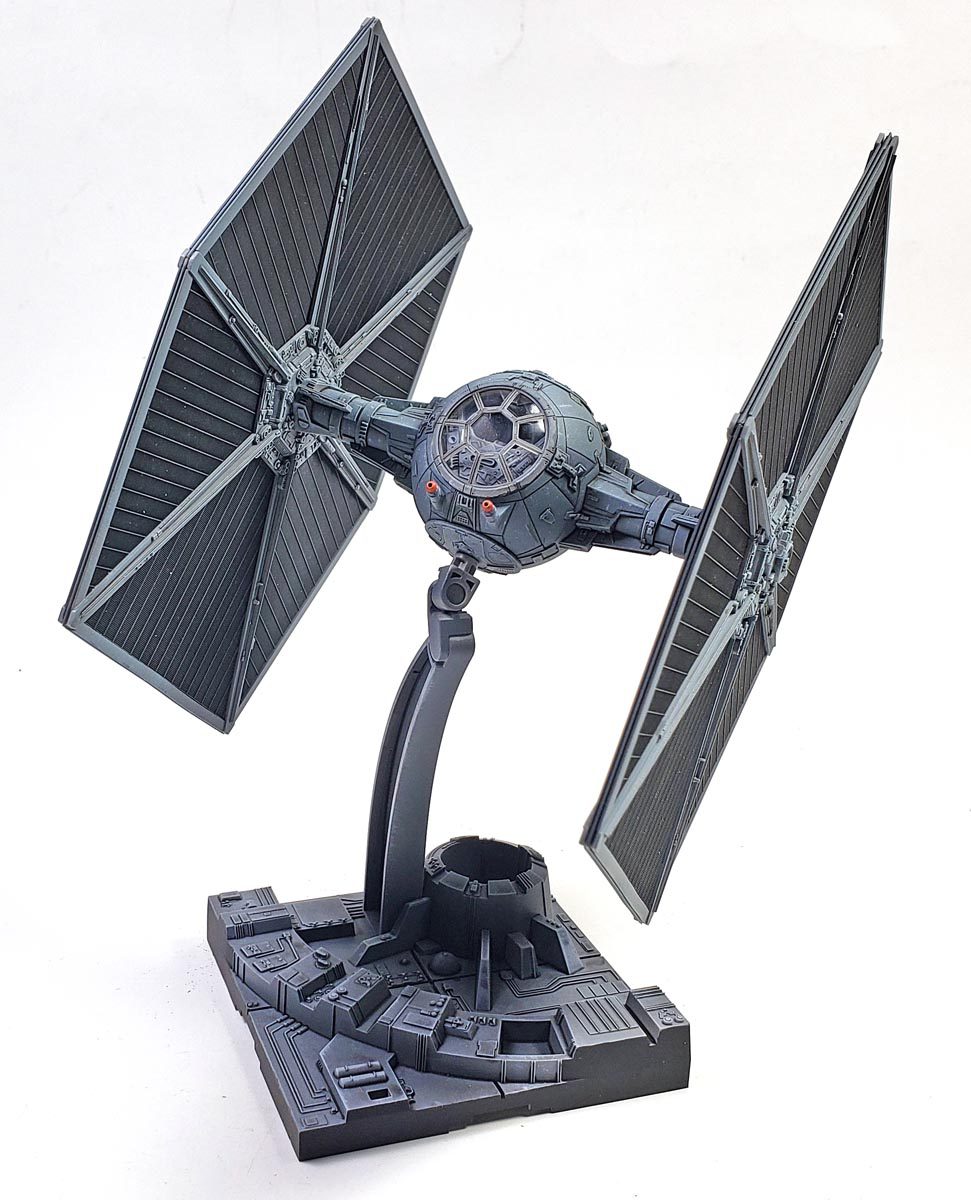
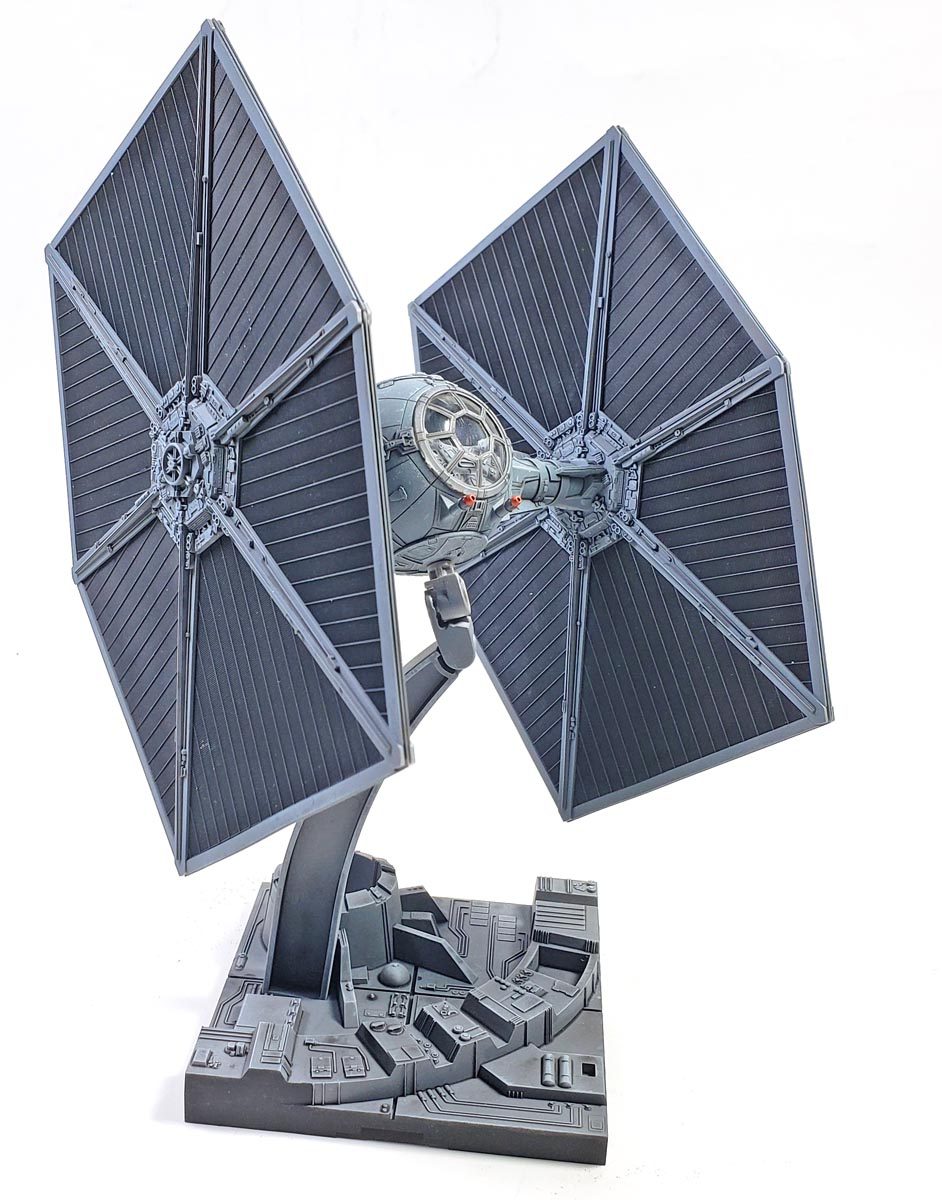
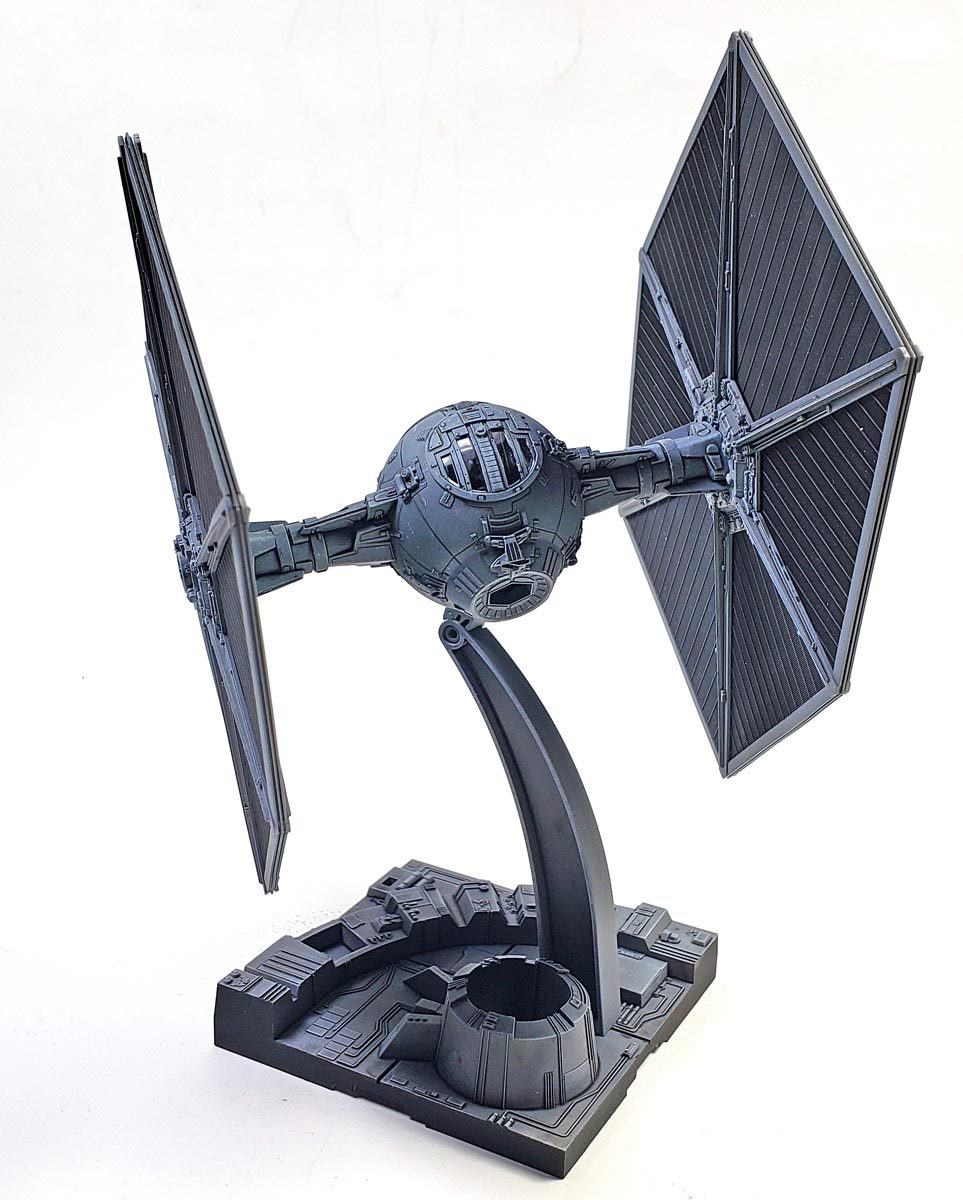
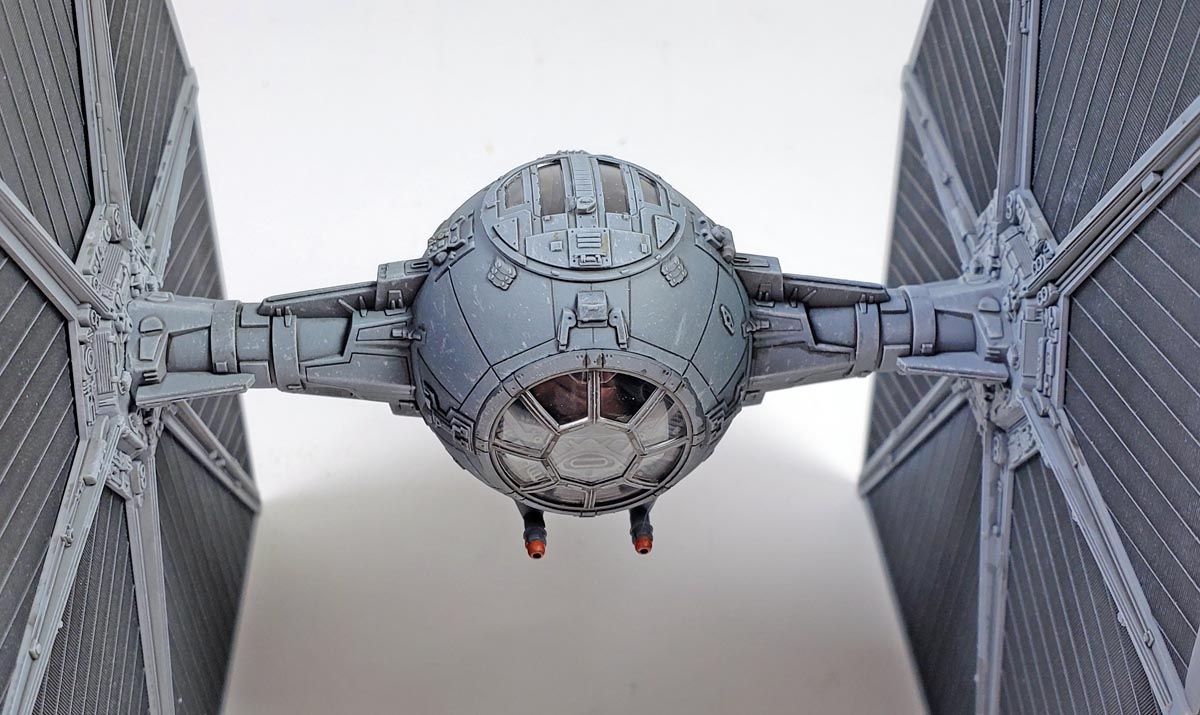
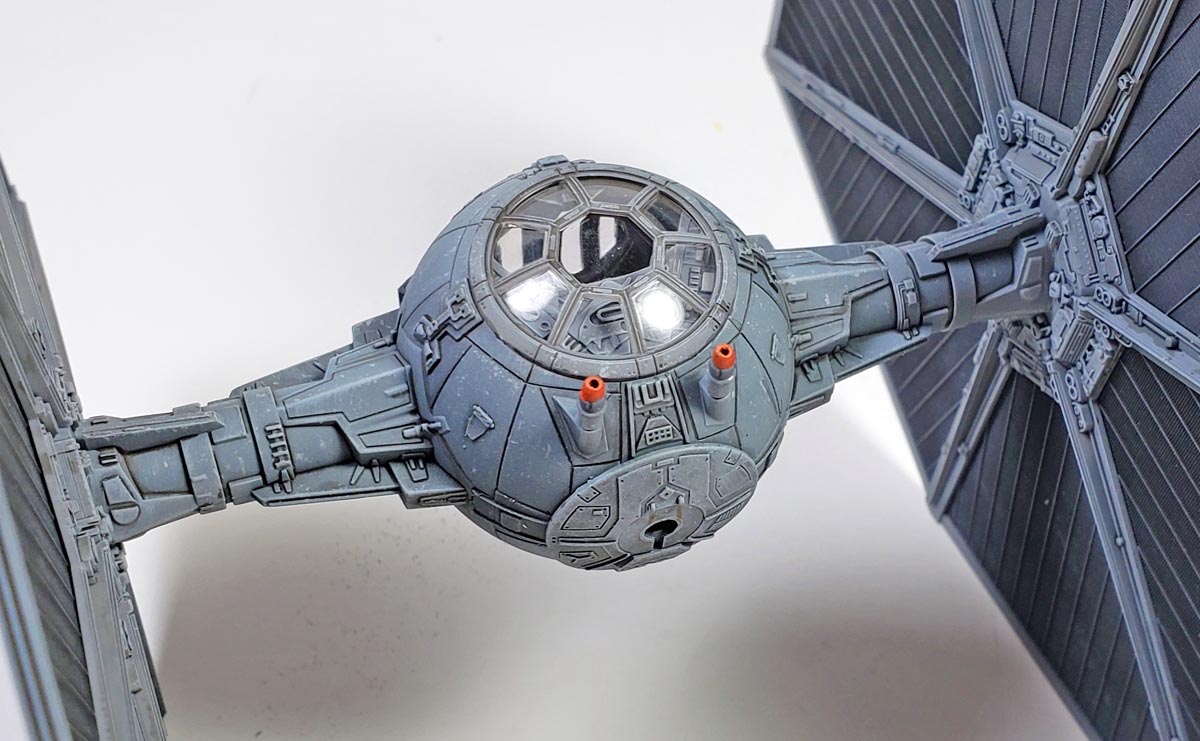
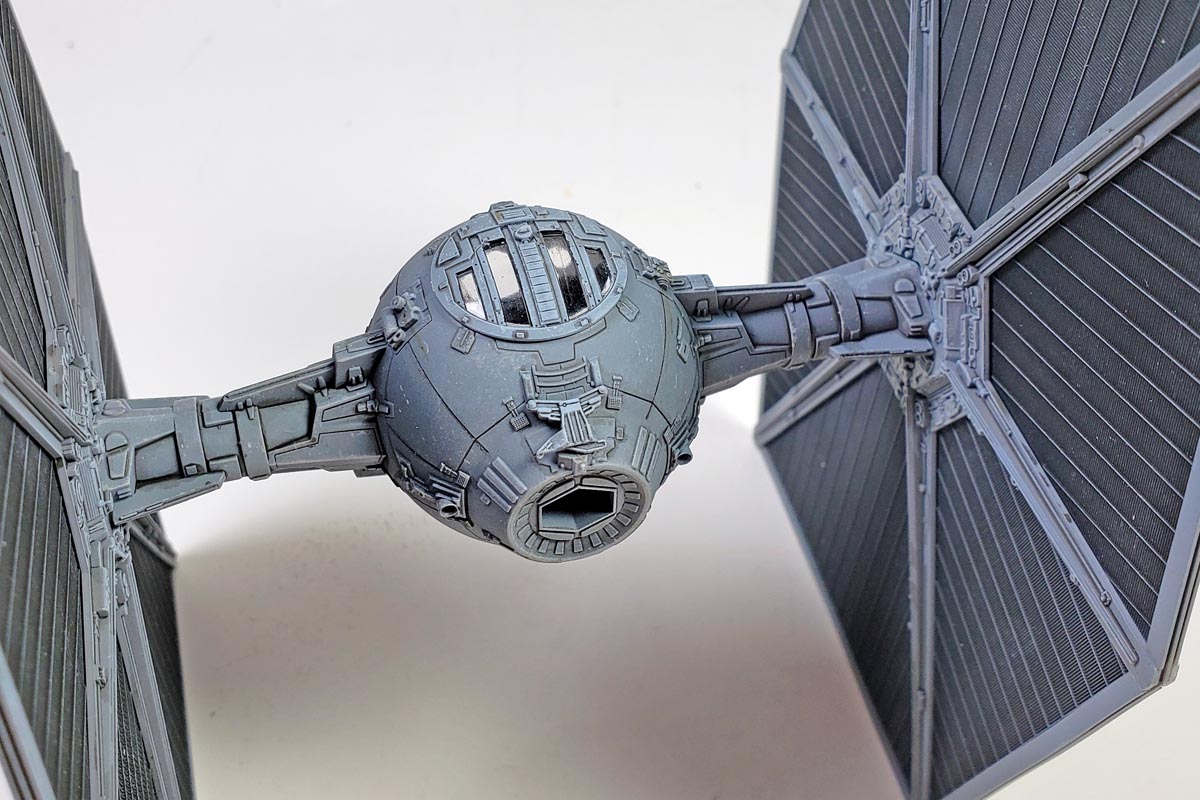
I decided to assemble the main hull assembly fully, but leave the panel structure separate. The forward opening where the clear part fit was masked with paper towel, as that part was a different color of gray. I also kept the upper hatch separate. As I chose to use the clear plastic versions, I wanted those painted separately. This would allow the interior and exterior to be masked and painted, so the eventual owner could remove it and see some of the cockpit. Masking fluid was used for the clear parts.
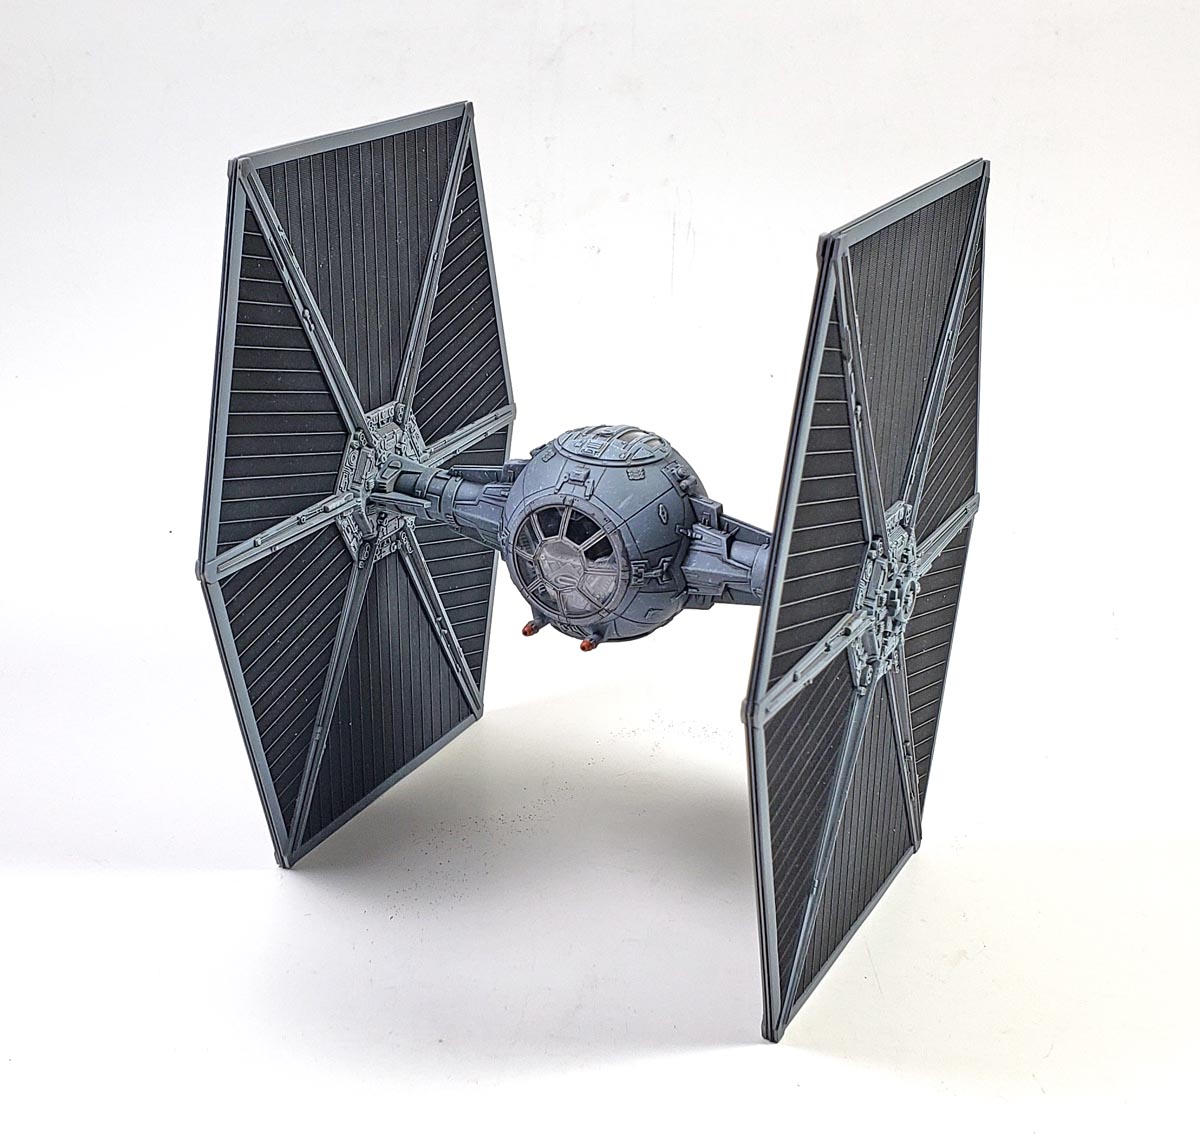
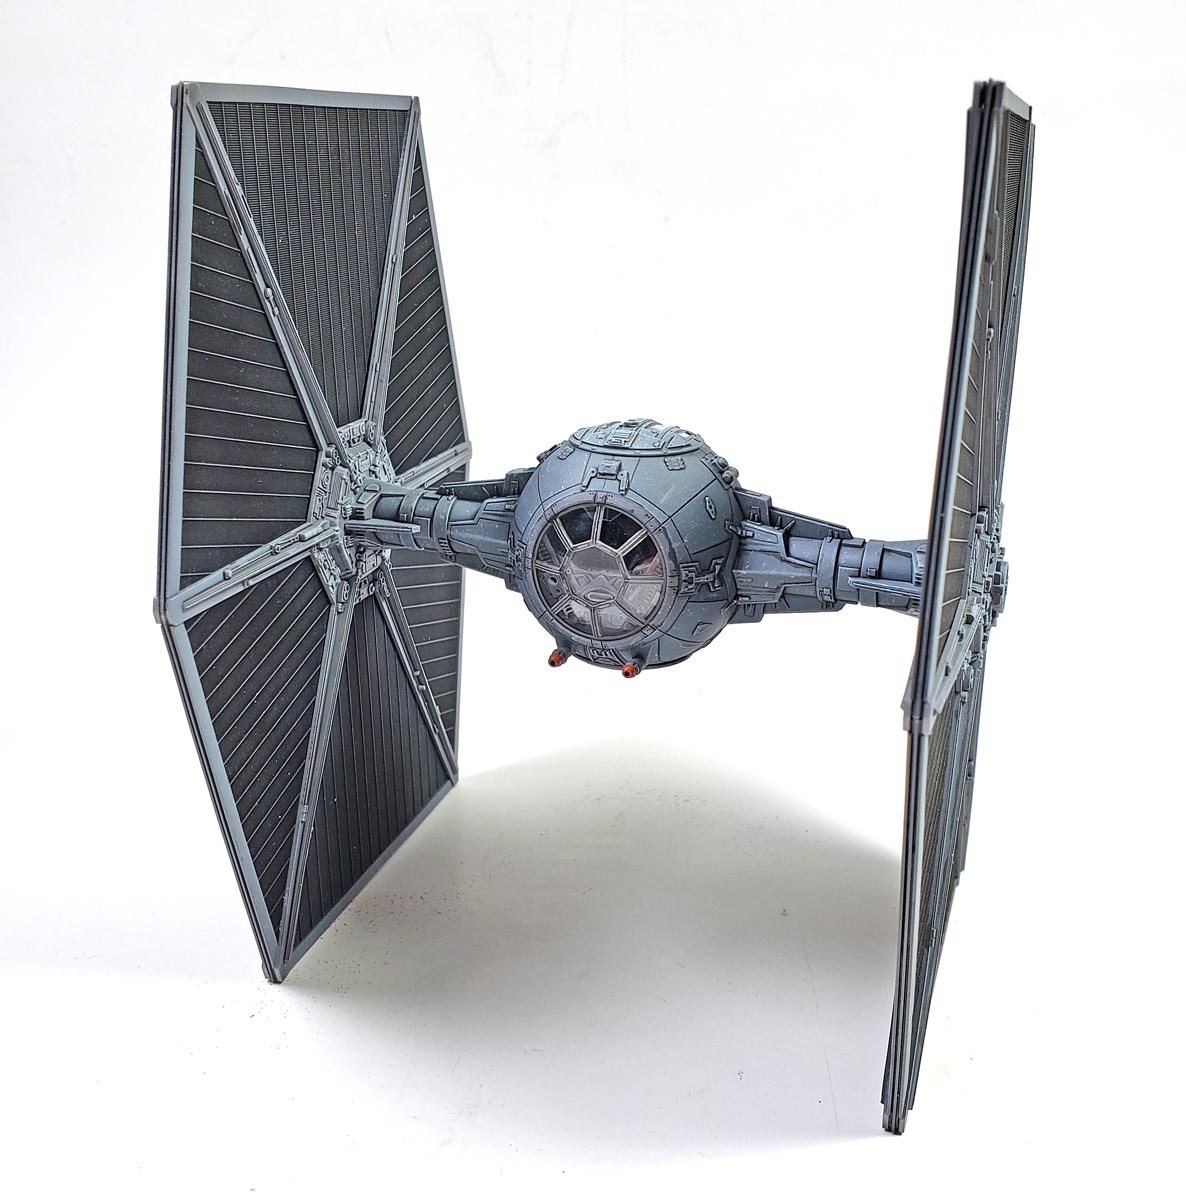
The rest of the exterior was quite simple: paint it gray. To paraphrase Henry Ford talking of the Model T, the TIE Fighter comes in any color you want, as long as it’s gray. However, I did have a bit of a decision. Reading on the interwebs told me that the TIE Fighter of Star Wars fame was gray, while Empire Strikes Back and Return of the Jedi was a blue gray. Ultimately I opted for the blue gray.
Mixing Some Paint
Bandai’s instructions suggested 7 parts neutral gray, 3 parts white, and a “dose” of blue gray. Happily, I had what I needed in my “new found” favorite paints, AK Interactive Real Colors (AKRC). Going with the suggested mix, I made up a small jar of RC261 Neutral Gray, RC004 Flat White, and a few dots of RC010 Pure Blue.
I started the mix with the neutral gray and white, getting that combined in sufficient quantity so I could complete the model. There’s few things worse in modeling than mixing too little of a custom color. Mix more than you need, I say.
Once that was finished, I started adding single drops of the blue. Blue is a powerful color quite often, and can go from “subtle” to “it’s fully blue” really quick. Thus, I’d add a drop, stir it up with my electric stir tool, and eyeball it next to the Tamiya instructions. It took about 4 dots – basically a drop on the end of a toothpick – to get the color I wanted.
I finished off the mix with a bit of R502 Gloss Varnish, just to give it a nice, smooth application.
Just A Few Steps
The AKRC paints spray beautifully. I thinned them a bit more than their suggested 70/30 mix, taking it down to 50/50. I used their High Compatibility Thinner, which is remarkably low odor for a lacquer paint. Though I’ve heard people say “it’s just repackaged Tamiya”, or “it’s Mr. Color in a different bottle”, you can ignore those rumors. It’s a different paint, a proper lacquer, and it’s not made by either of those companies. (I checked. 😉 )
Suffice to say, it’s good stuff.
I applied the paint through my Badger Patriot Extreme, which has a .3 nozzle. The paint seems to go really well through that smaller nozzle. I have tried it with my Patriot’s .5 fitting, and while it did fine, the paint is so smooth and almost buttery in application that I felt the control of the .3 worked better.
The solar panels were painted with AKRC RC001 Flat Black.
The Basics Never Go Out Of Style
While the Alliance ships seen in the Star Wars movies were dirty and grimy, TIE Fighters tended to be fairly clean. So while I wanted to provide some surface interest, I knew it would need to be heavily restrained.
I started by giving the exterior a light dry brush of Vallejo Model Color Sky Gray 70.989. While I know some look down on drybushing, I’v e always felt it was a legitimate technique to have in the toolkit. On a model with so much surface detail, nothing helps the eye catch it all better than some contrast. Dry brushing does that easily.
The trick is to not overdo it. I used a very soft makeup brush for the work, as it allows a very minimal amount of color to be deposited, but generally avoids the dusty, streaky look proper paint brushes can leave. Everything was given a good, light coat, and then set aside. I find that giving 30 minutes or so between major steps allows the eye to “reset” and view it with a fresh perspective.
After returning to the workbench, I decided one more light application was needed, this time focusing on the major highlights. Happy with the look of that, I moved on to adding shadows.
Into The Shadows
For the shadows, I opted for Citadel’s Nuln Oil. I like this product because it’s Bandai plastic friendly, and it dries really fast. An initial application was done with a very thin Nuln Oil and water mix, in a ratio of about 50/50. This allows the Nuln Oil to establish shadows, but at a lower intensity level than it would if applied neat. For the finer detail across the model, this works very well, and avoids unwanted puddling for the most part. I used a #0 liner brush to apply this, focusing on a mostly neat and tidy application.
To fill in the in the heavier shadows, I switched to straight Nuln Oil, again applied with my #0 liner brush. This application was reserved for more dramatic recesses and angles, to give a greater sense of depth. If a bit too much is applied, I use two methods to fix it.
If I have thought to place a second brush nearby, I’ll use it to quickly dab up the excess, and wipe that away on a paper towel. Sometimes a touch of water on that second brush helps.
Other times, especially if I am “in the groove” and don’t want to slow down, I’ll wait for the Nuln Oil to dry a bit. By a “bit” I mean just that – 5 minutes or so. I’ll damp a second brush with Vallejo Airbrush Thinner, and offload most of it onto a paper towel. The brush tip can then be used to gently rub away the stray marks. If in doing this the thinner begins to foam up a bit, you have too much on the brush. Unload it and try again.
(Note: This worked because the underlying paint was lacquer. If the underlying paint is acrylic, I start with a barrier of Pledge/Future.)
Not Much Weathering
With the shadows addressed, I went back to the Sky Gray for one more light drybrush coat. This reestablished any highlights that had been lost in the shade process.
Using the same color, I did some very minimal sponge and brush chipping. My goal in that process was not so much to make it look beat up, but rather to help the eye have something to “latch on to” when viewing. Because I planned for a matte finish, I knew that the basic shapes would be a bit lost, especially on the few flat empty surfaces. By applying a bit of contrast in the form of chips, the viewer’s eye can pick out the various points, and it (hopefully) gives definition to it all.
A few very minor stains and streaks were added, mostly to see if they helped. I did not impress myself in the process, so after a few drops of Nuln Oil streaked here and there, I abandoned that effort.
Going Solar
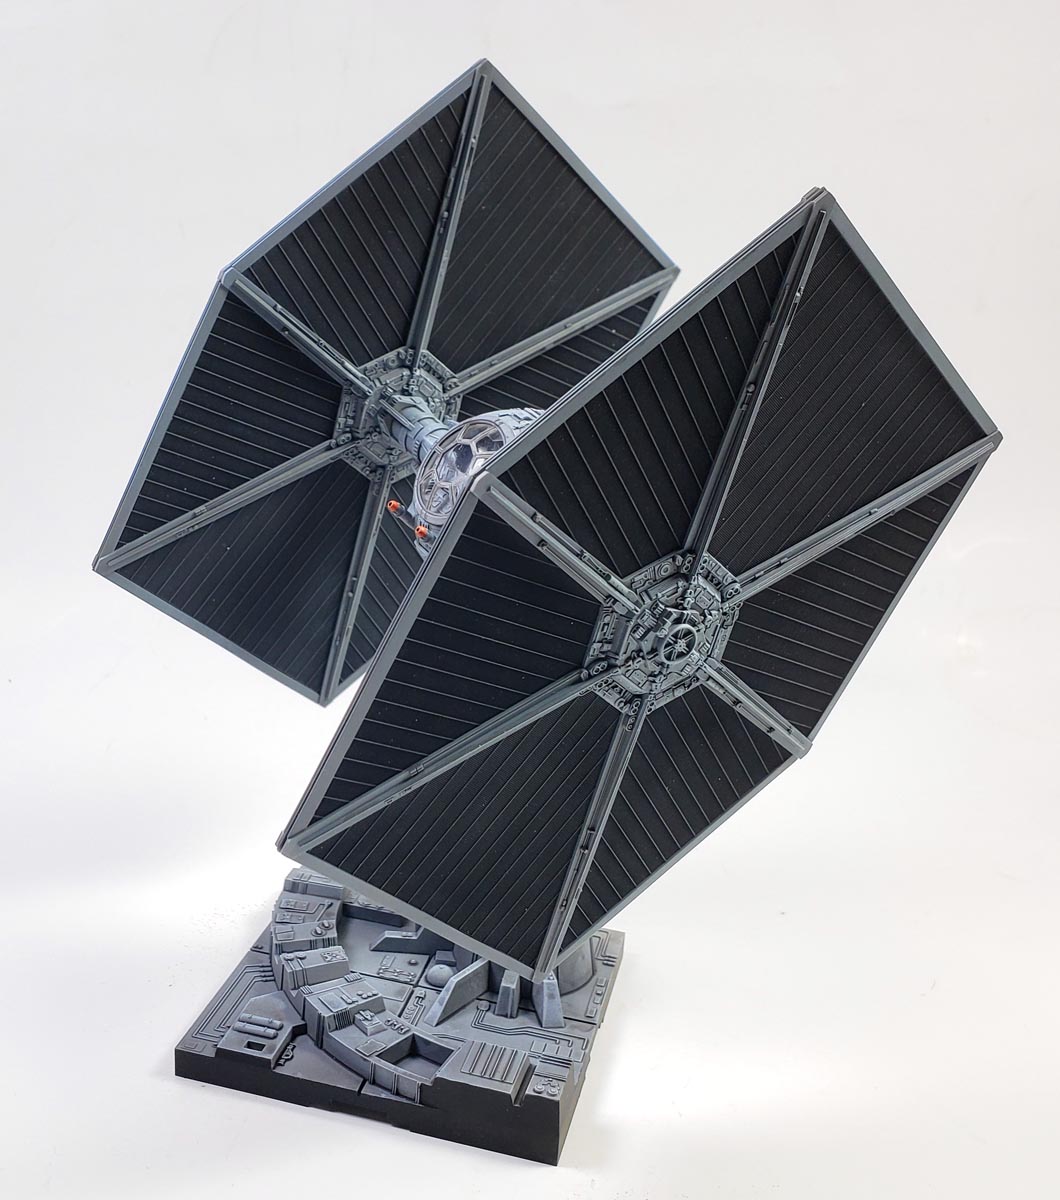
The solar panels presented a bit of an issue for me. In some shots they appear quite monotone, both matte and glossy at times. At other angles, depending on the light, the minute grid surface pattern is evident. After trying a few methods to see what I liked (including drybrushing gloss – a first for me!), I settled on a simple solution.
The whole thing was painted matte black, using AKRC Flat Black. I then switched over to the aforementioned makeup brush. Being very careful to offload almost all of the paint, I gave the panels a light drybrush of Vallejo Model Color Neutral Gray 70.992. I wanted just a slight bit of contrast between the grid pattern and the black background.
I then switched to the Vallejo Sky Gray. Again using the makeup brush, I carefully and lightly drybrushed each panel, trying to hit only the solid raised lines radiating outward from the center of each panel. This gives the eye three things to note – the more prominent radial lines first, the more subtle grid panel next, and finally the pure black of the background.
Happy with the result, I gave the model a matte varnish coat, assembled the parts, and removed the canopy masking.
Because It Was Fun
I have no idea how many hours I spent out in my little model room those many years ago. While I have lots of memories of doing many things, the time at the model desk stands out as a sort of current along which everything else flowed.
At times it was a creative outlet. In other cases, the work prepared for battles with the models against my friends. Other times the model room and my plastic work was a retreat. A bad report card, the first girlfriend breakup, a fight with a friend, or just a need for reflection… all worked their way out in the confines of that small space.
And through it all, I did it for one overall reason.
It was fun. The models weren’t built to impress anyone. I was the intended audience. They allowed creative freedom, a desire to build things, a bit of imagination, and a sense of play to all merge into one thing. While other things I did were fun, only modeling combined so many elements into one activity.
Of course, at the time, I just knew I liked it.
Keeping Focus
It can be quite easy as an adult modeler to lose focus on the fun in the hobby. Yes, how fun is defined is a very personal thing. Yet the fact remains, and I say this a lot, if you’re not having fun, you’re doing it wrong.
Many modelers are having fun, and I am always happy to hear from them. They do it for the enjoyment, and don’t worry about the things that detract from that.
However, if you’ve lost a sense of fun, that childhood wonder that comes from simply building and painting something, maybe take a look at this TIE Fighter. Or an X-Wing Fighter. Any of the Bandai Star Wars kits. Buy it, built it, and paint it. Don’t worry about those things that may detract from the fun. Build it like a kid.
There’s enough drama in our adult lives to cause all manner of problems. The hobby should not be one of them.
Have fun my friends. 🙂

Leave a Reply