
I think one of the parts about any build I really enjoy is the weathering. Especially heavy weathering. The more the merrier.
Now, many people will say “but that much weathering is not realistic.” I get that, I truly do. But I have a well thought out, coherent reply always ready to be employed.
Meh…. so what?
🙂
Because I see building models as an artistic endeavor, I’m OK with “unrealistic”. (Although to be fair, many people’s notion of “unrealistic” is, well…. unrealistic…. but I digress.) I don’t so much want to recreate to the nth degree what the real object looks like, but rather, what the viewer- of which I am one- expects to see in a replication.
I expound on this more in my Mick Foley article, but essentially, we all KNOW we’re looking at a plastic scale model. My weathering method is an attempt to get the viewer to set aside that reality briefly, to suspend their disbelief, and instead “step into” the world of the model. To use the vernacular of professional wrestling, I want the model to “sell” the reality.
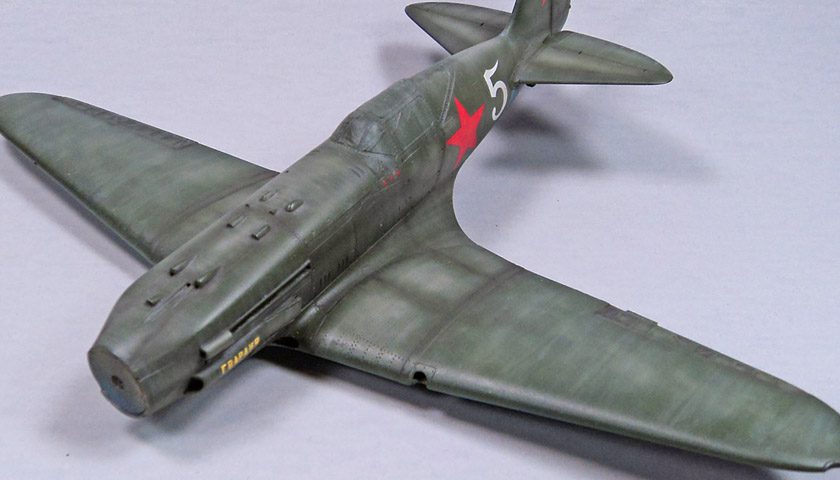
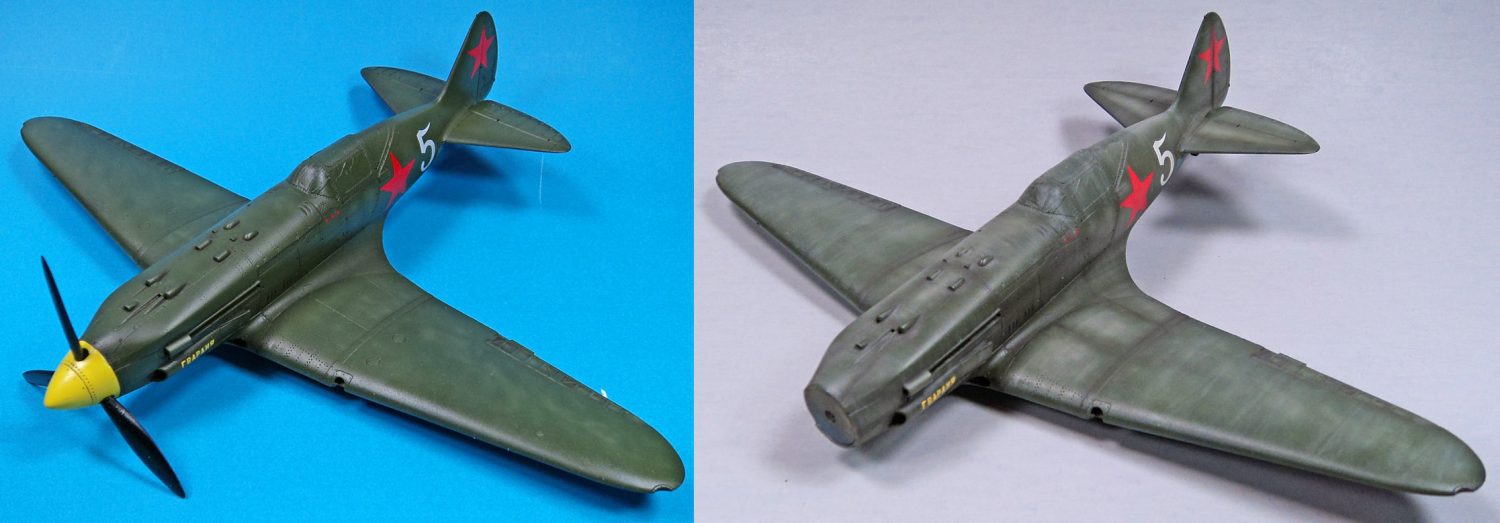
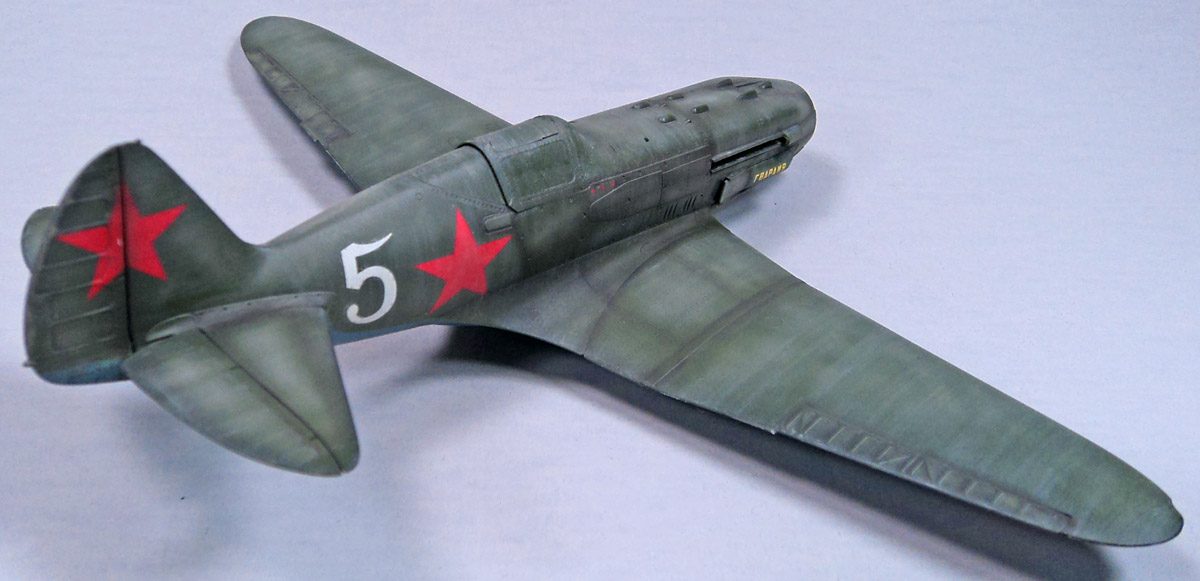
For weathering this Mig-3 build, I employed some of the steps I listed in another article about my weathering method.
I’d already done some post-fading with Tamiya Deck Tan (XF-55) to the green upper surfaces. With decals applied, and a gloss coat sealing them in, I started with applications of oils.
On some builds, I prefer to do more airbrush weathering, but for this one, I thought the use of oils, and the “dot filter” technique specifically, might work well. Using three Ammo of Mig Oil Brushers- Yellow Bone (A.Mig3521), Dusty Earth (A.Mig3523), and Starship Filth (A.Mig3513), I began applying dots all over the surface of the model, working one major surface at a time. For the wings, I placed the dots all over, but for the fuselage, I placed them near the bottom of the camo demarcation. (More on that).
Using a wide, flat, soft brush, just damped in odorless thinner, and dried a bit on a piece of paper towel, I began to slowly streak the oils on the wings back in the direction of the airflow. (Front to back if you are not up on aeronautical theory… 😉 ) I don’t do it quickly, though. Rather, I work in slower, deliberate motions, front to back, allowing distinct colors to remain distinct. If you just blast through it, all of the color mixes, and you get no tonal variations. I’ve found I like working this process until it’s just to the point that I think “OK, it doesn’t look to terribly horrible”, and then I stop.
For the fuselage, I like to work vertically, bottom to top. If I work top to bottom, I have to then reblend streaks that go onto the wings, which just muddies things up, and it can also make it a bit odd to work under the fuselage, trying to resolve those blends.
I do the whole model like this- top and bottom. You can use different colors on the bottom, but as I’m lazy, I went with the same three. The only real difference on the bottom was I used fewer “dots” of oil, and then blended them out more, so they weren’t as stark as the top.
The reason I leave them a bit stark is because when I add another gloss coat, which will allow for further weathering techniques to apply, it will mute the lighter colors, and bring out the darker colors. It can take a few attempts to figure out how much is too much, and how much is too little, but the randomness works for me. Also, later flat coats will further tone it all down. So if you you remove too much, it may not even show up at the end.
If you do feel that your oil application is a bit heavy- don’t panic! Simply keep blending them away. Also, a really nice effect can be achieved if you carefully mist over a highly thinned solution of the base color. That tends to “knock back” the streaking a bit more. Experimentation is the key! (And avoiding the decals…)
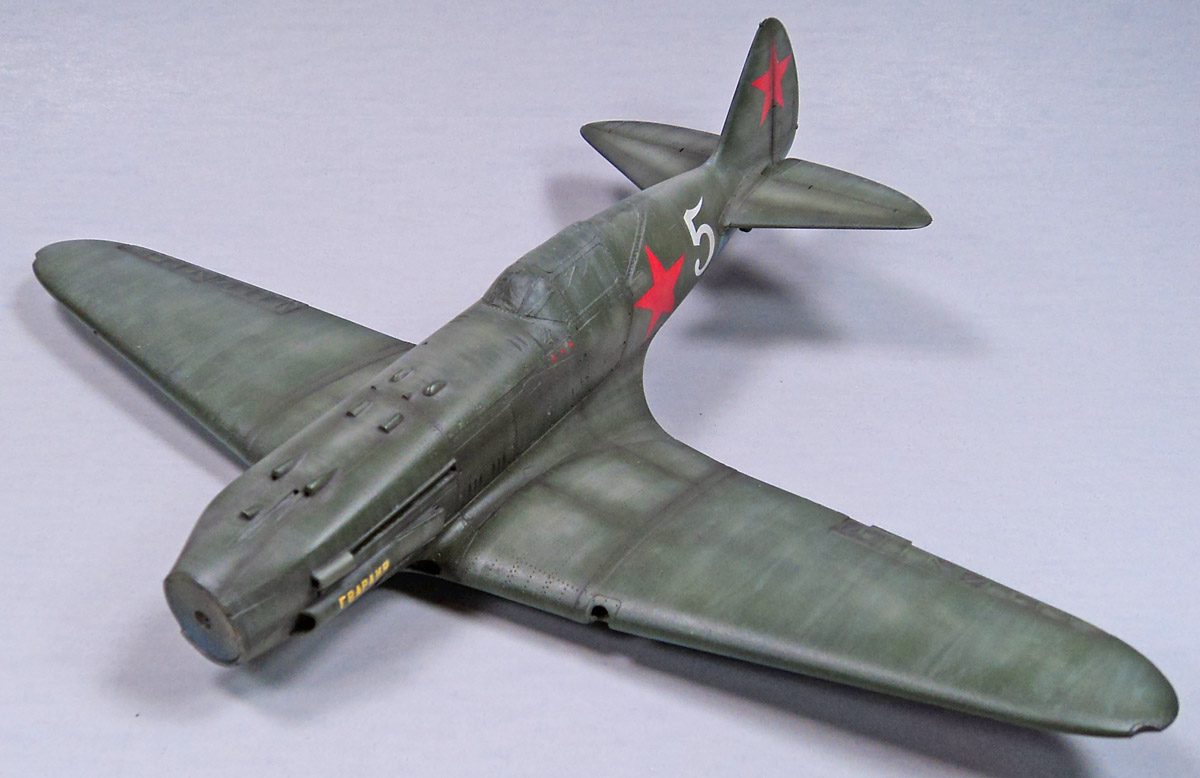
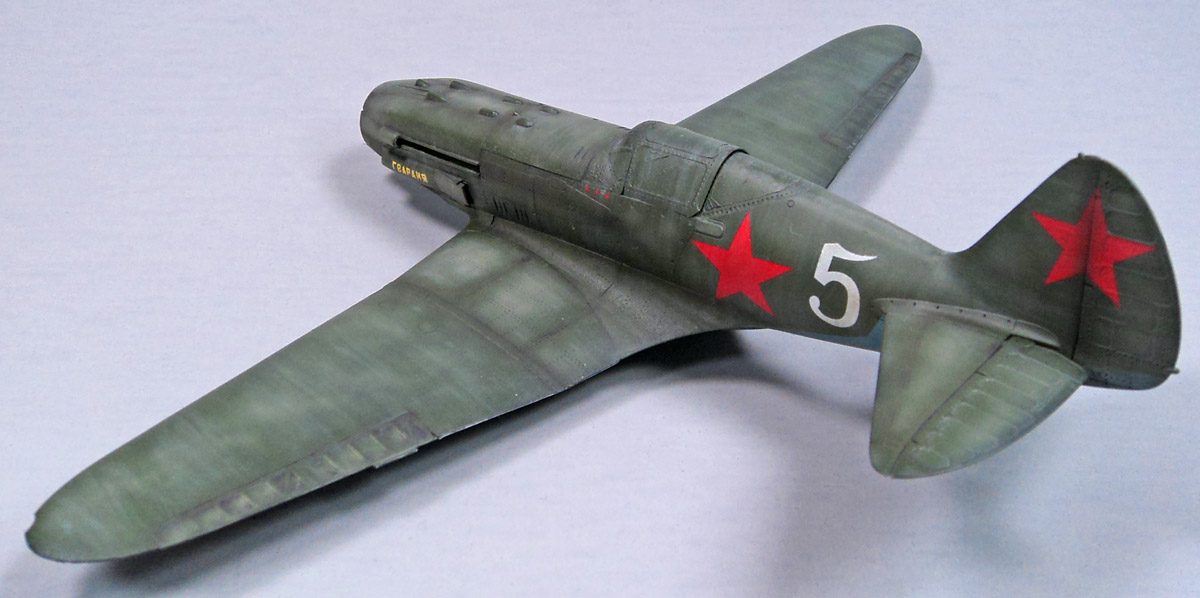
After the oils were applied and given time to dry, I wanted to do some post-shading. For this, I used a color I call “Wauchop Brown”. It’s named after Chris Wauchop, a master of aircraft modeling and weathering. Some years back, I’d seen he used a mix of Tamiya XF-69 Nato Black, and XF-9 Hull Red, to make this, grimy, brownish red color that I thought was perfect for post-shading, streaks, and grime. I mix mine in a ratio of 3 parts XF-69, and one part XF-9.
To apply, my favorite method is to fill my color cup with isopropyl alcohol, and just a small brushful or two of the Wauchop Brown. It should be thin enough that it takes 5 or 6 passes to get the color to start showing. The alcohol evaporates quickly, and is less prone to spidering. Do be careful to keep the airbrush moving or it will run. I built this color up along panel lines, going for a very grimy look. If you apply a bit much, you can actually gently rub it away with a bit of t-shirt cloth.
That was followed up with some post-fading, using the same method, only this time with Tamiya’s Deck Tan (XF-55), to furhter add to the randomness and splotches.
With that part finished, I added a bit of the Starship Filth Oilbrushers to mimic mud being thrown up on takeoffs and landings on the underside.
I’ll give all of this time to dry, and then seal it in with more gloss coat. I plan to add some further, more precise streaks and stains to represent oil, sot grime, etc. Afterwards, I’ll add some weathering powder effects, then a flat coat, and then some chipping.
So far, I’m liking how this kit is turning out!


Leave a Reply