

(Just to set the stage, this is an opinion piece… opinion… right? Good! 😉 )
There’s no denying it. I can’t stand resin. To me, it’s a politician’s promise. It sounds good in theory, but in reality, it’s generally not worth much. As I often say to clients in my day job, “it sells better than it installs.”
Now, of course, some resin works just fine. I won’t deny that. I’ve used many resin parts that do just fine. I recall putting a Cutting Edge cockpit in a Hobbycraft P-59A. It was truly “drop fit”. Perfect. A wonderful example that it can be done.
But for the most part, adding aftermarket resin turns into a royal pain for me. The fit is rarely very good, requiring excessive sanding, cutting away of plastic, and generally turning into a major production.
Still- all that can be accounted for. I’ve built well over one hundred models that had some sort of resin parts. Everything from seats, to cockpits, to wheel bays, engine… you name it. Even full resin kits.
I even built the Silver Cloud MB.5 and the Magna Models Firebrand…. and survived.
Now, at the end of the day, it’s not the amount of work… work that quite often leaves obvious signs, scars of battle, so to speak. It’s not that.
The part I dislike the most is that in most cases it’s simply not needed.
I do quite a few commission build models. (No longer though… ~Jon) And quite often, the client asks for resin additions. When you build models for hire, you normally just say “OK, fine, no problem”, and add it as a line item on the estimate. Yet I often want to ask “what exactly is this buying you?” Because, for the majority of resin additions, the end result, from a purely bottom line point of view, is generally not worth the expense.
Here’s what I mean. Say the kit cockpit is reasonably detailed. A bit plain, but workable. In most cases, all that is really needed is maybe some new seats, or just photoetch belts, and a few bits and bobs of simple scratch build to liven things up. Clever painting, shading, highlighting and washes will go a long way into turning the ordinary into something nice. And given the fact that most times the work will be glanced at maybe two or three times in a serious manner, I’ve never felt that the additional parts are warranted.
However, good money is paid out for resin cockpits that often cost MORE than the model itself. And knowing what I know of the process, believe me- I factor that in to the cost. All of the adjustments, filling, sanding, adjusting, and everything else often add an extraordinary number of hours into a build. And if such a thing could truly be quantified, the visual gain is often maybe 20%. Maybe.
Of course, I’m not telling you NOT to use resin. It’s your hobby, do what you like. If you enjoy it, go for it.
But…
If you are new to modeling, or have not jumped into the aftermarket end of the pool, I would urge you to simply stop, think, and ask a few questions. Because your typical Idiot Preventing Modeling Sanity (US variety) will almost inevitably get a glazed look in their eye, and tell you how beautiful a resin set is, and how inaccurate the kit parts are. And if you’re a serious modeler, you must add them in.
Nonsense.
Take the time to look at the kit parts. Is there some reasonable raised or recessed detail to work with? How much will actually be seen? Could the cockpit be dressed up with a few bits of scrap plastic, punched out discs, and wiring? And most importantly… what is your goal for the build?
If you have good reason to go for it, then do so.
But let no one tell you it’s a must have. I’d venture to say you’ll get much more benefit from stretching your skills by scratching building and improving what is in the box than you would by taking a nice resin set- and simply sanding everything down to paper thin tolerances just to get it to sort of maybe kinda fit.
{sigh}
So what has me all caffeinated about this subject?
I’m building Revell’s 1/32nd F-4G Wild Weasel as a commission build. The list of resin is long… cockpit, seats, nose, outer wings, intakes, exhausts, wheels, and various other bits. I am confident, in the end, I’ll be able to pull it all together into one GIANT hunk of resin and plastic that the client will like.
But most of it won’t make much of an improvement in the long run. In fact… the poor fit of most of the parts will mean many shape compromises, which will affect other parts. That nice nose, designed to correct the undersized kit part? Its fit is so poor that the corrections to make it fit will alter the profile. It will still be wrong.
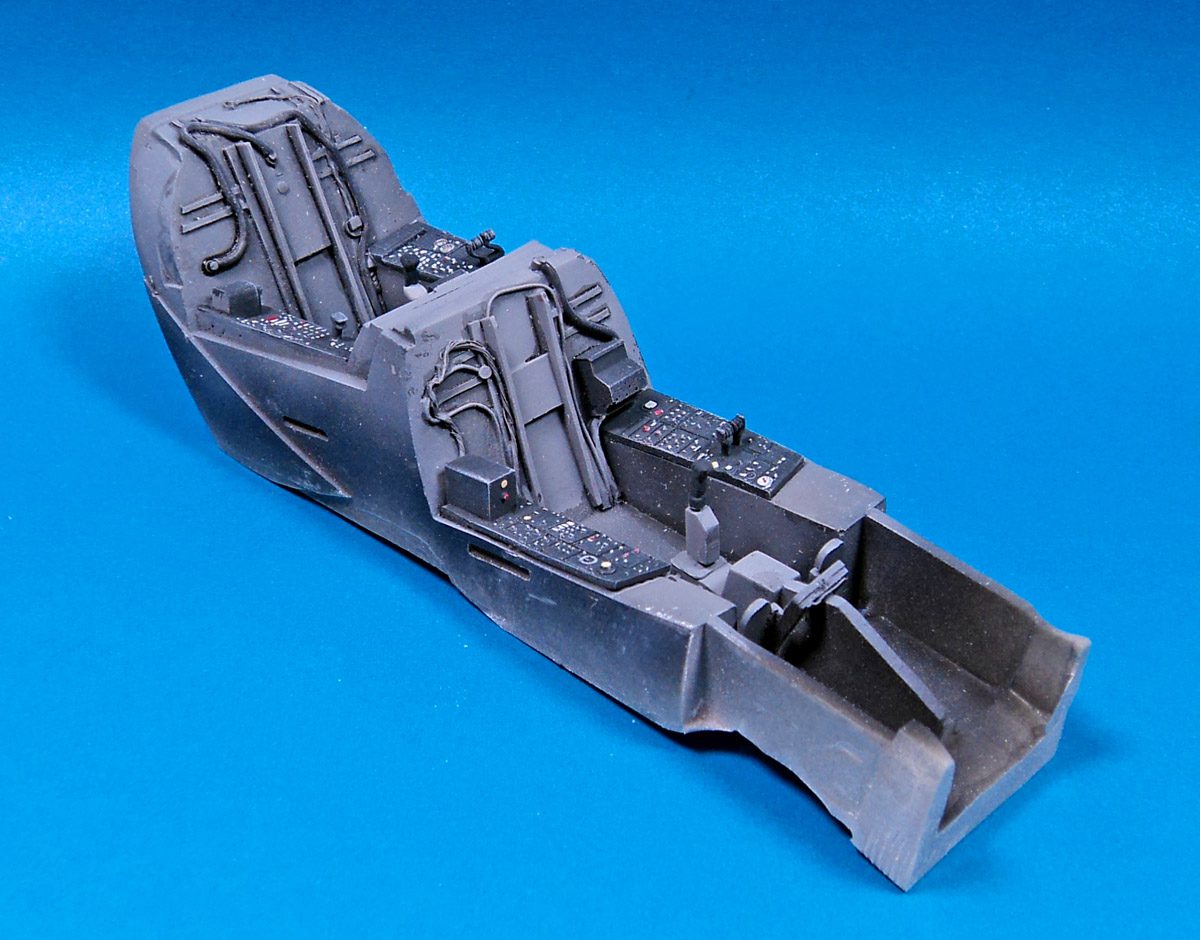
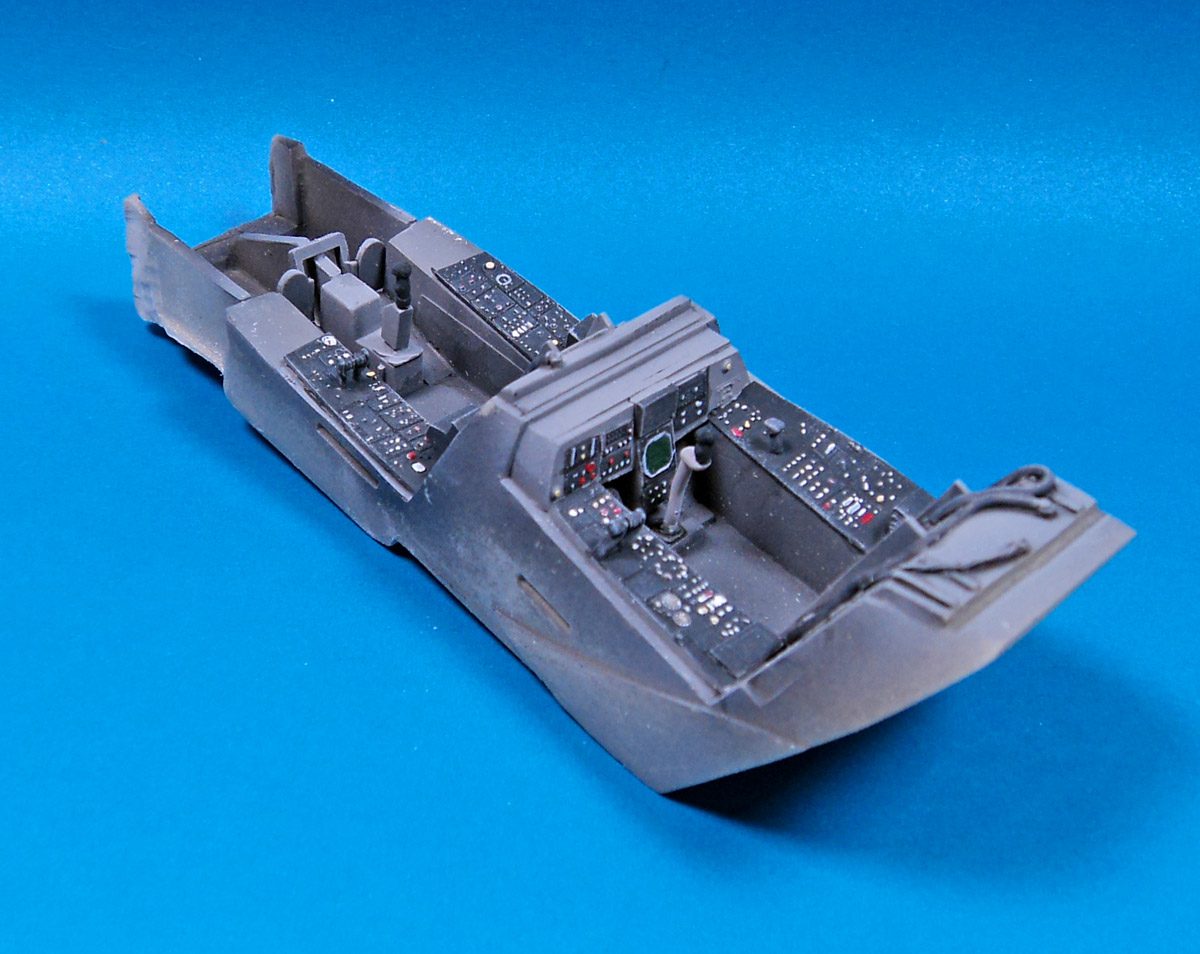
And this cockpit. I don’t even know the brand… it was just in the box, along with seats. It’s supposed to fit the kit. Supposed to…
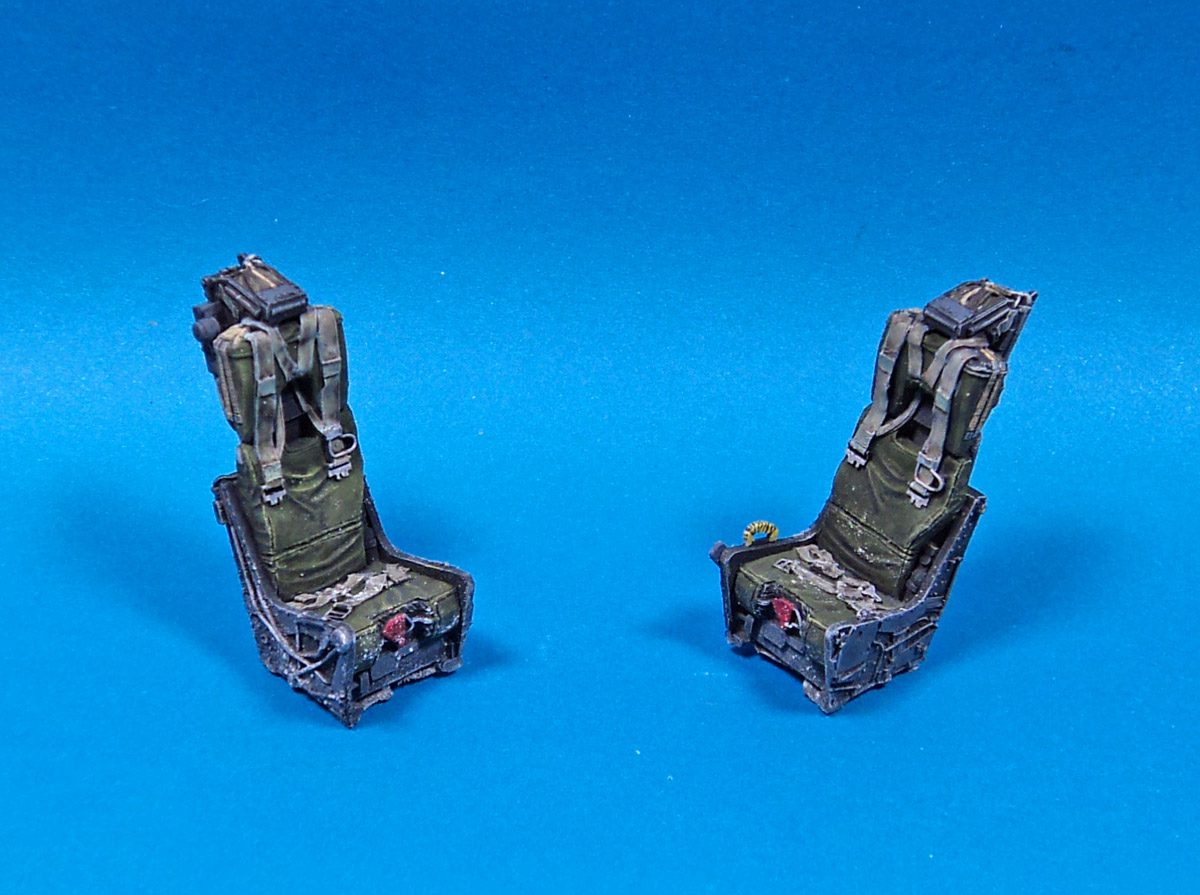
Now- it looks nice. When painted, it looks the part. I loved working on the seats. When the client looks in to the interior, they’ll see a nice representation of the real thing’s innards.
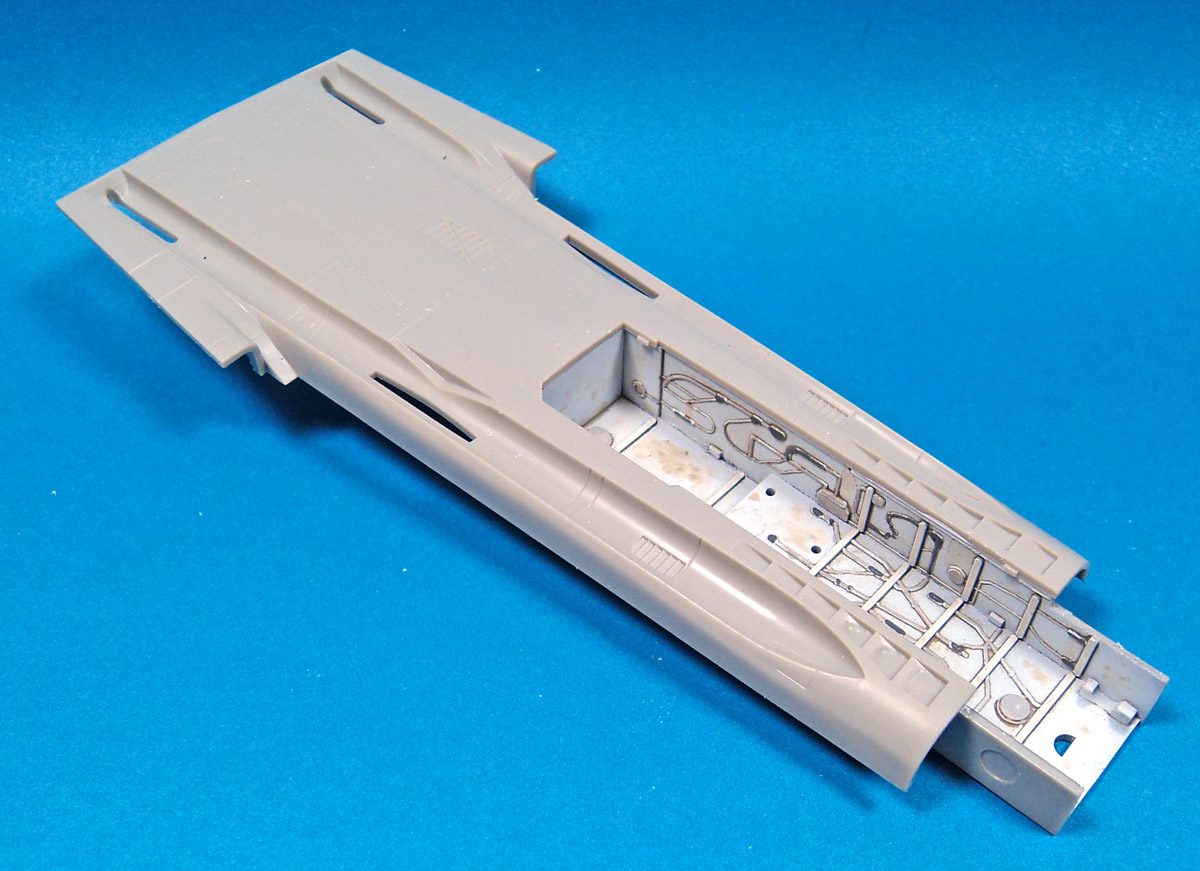
But the fit… it’s the fit…
The underside has been sanded to the point of breaking through, just so the nose gear bay- itself sanded almost away- will fit into the forward fuselage. Various hacked together bits of sprue, and even blue tack, will need to be used to insure it all holds in place for shipping and (hopefully) years of enjoyment.
Yet aside from the seats, it has nothing that could not have been equaled with some simple scratch work on the kit parts. And those FIT. No extra costs from buying the resin, and no extra line item for charging for the work.
Now, for the details of the work-
All parts were primed in Badger Stynylrez Black Primer. A coat of Tamiya XF-66 was applied to the interior parts, and the seats were given a coat of Tamiya XF-69. Everything was then drybrushed in Vallejo Sky Gray (70.989). The various boxes and panels were painted black, and then another slight highlight of Sky Gray was applied to those. All the buttons, knobs and greeblies were picked out in white. A few were given dots of red, or yellow. A good coat of Citadel’s Nuln Oil was applied to select areas for shading, and then a gloss coat applied, a panel line wash went on, and then a matte coat of varnish.
The seats were given a treatment of green cushions, various grays for frame parts, and then several rounds of drybrushing for shading and highlighting brought out the raised and recessed detail. More Nuln oil was used, and then after a gloss coat, enamel washes. As with the cockpit tub, a matte varnish coat finished it off.
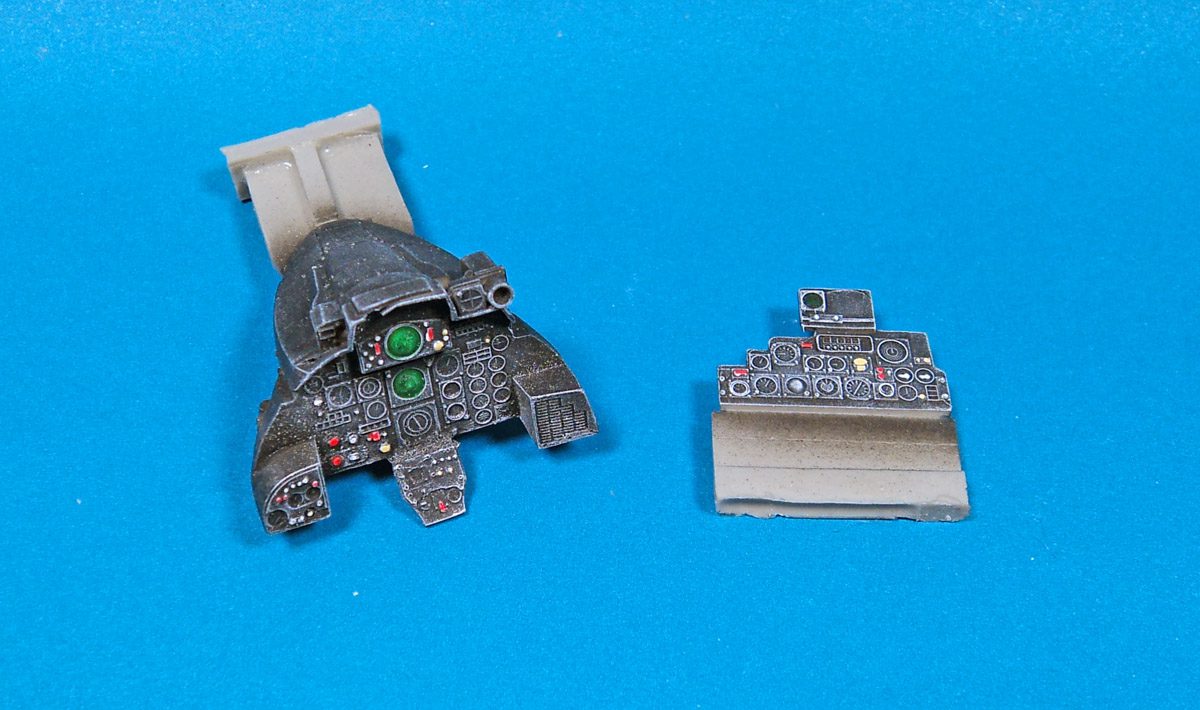
The instrument panels were simply painted with XF-69, drybrushed with Sky Gray, and various bits picked out. For the radar thingies (technical term…), I painted their faces chrome silver, then dropped in a blob of Tamiya Clear Green.
There is no big secret to cockpits, really. Paint the parts to show some contrast, and then work in shades and highlights to add visual interest. The various methods are less important than the layering. That is what gives depth, difference, and contrast.
In a later installment about this build, I’ll show the photos of what it took to get the forward fuselage together.
Eventually, this kit will be finished, and it will look nice.
Still, my assertion remains.
Don’t let anyone convince you that resin aftermarket is always better. “Better” encompasses more than just the final result. It’s quite often the journey that is the most enjoyable part. And if that journey is interrupted by needless off ramps, or worse, ends up as a partially finished kit sitting on your shelf for years, you really need to stop and ask yourself a question.
Am I really having any fun?
Remember, unless you are a complete idiot who makes part of their living doing this stuff- and I speak from personal experience, ’cause I are one of those idiots- building models is about having fun and enjoying the ride.
At least that’s what the 10 year old kid in me keeps shouting about. 🙂


Leave a Reply