
My pursuit of chipping that doesn’t look like dog pooh continues.
I knew on this one I didn’t want a lot of chipping. But for me, trying to be restrained in my Gunpla chipping is like asking me to not eat the chips at a Mexican restaurant. You must eat the chips! It’s a law or something.
I also ran into another issue- what color to use? I like the look of the “lighter than the base” color chipping in general, but I think it works best when the primary mobile suit color is a lighter color, and the lightened base colors are only on smaller areas… like you’d see on a GM/GM, for instance.
For this suit, though, it’s all blue. Now- I love these colors. I think they really work well together. Yet I wasn’t sure I liked a lot of light blue chipping. So I decided to give several different colors a try.
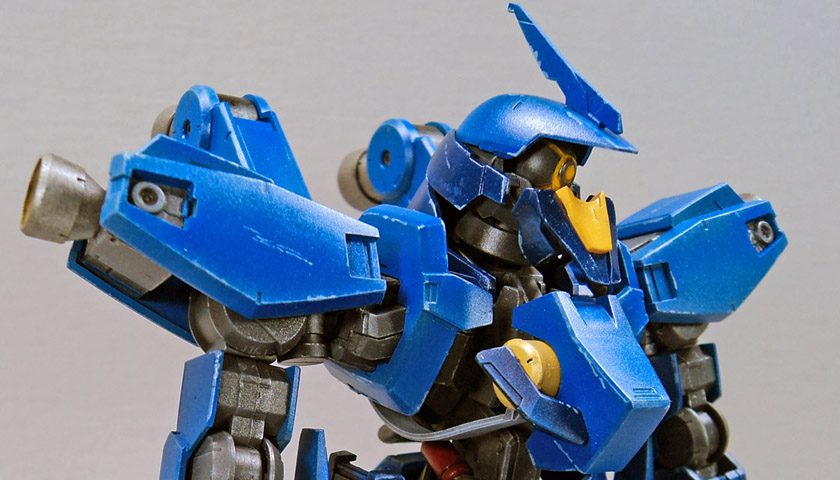
I initially went old school aircraft modeling, and tried some silver chips. Nope. Nada. Nyet. It just looked wrong. Knowing how much I like Ammo of Mig’s Chipping acrylic paint color (A.Mig0044), I gave that a go. On the lighter blue, it looked OK, but on the darker blue, it was too indistinct, and looked like mud. Various lighter grays looked OK, but still not quite what I wanted. White was tested, but it was far too stark. I finally went back to my original thought, that of light blue, and when I put it on, well… it looked the best of the colors I tried.
I used Citadel’s Fenrisian Gray, which is actually a very light blue/gray color. After I began applying the chips, the color began to grow on me. By the end, I was happy with it.
I really did try to restrain myself. As I was going with canon colors, that meant this was not just any mobile suit, but McGillis Fareed’s mobile suit. (Or “Gilly”, as his elementary school aged bride-to-be called him… how creepy was that? Anyway…) He did not seem like the kind of fellow to let his mobile suit get too dirty. It might get scuffed up in a fight- which is what I was trying to portray, but once back in the hangar, I just picture him throwing the keys to the techs and saying “Get it cleaned up and waxed. I want this thing shiny!”, and then he’d be off to order some coffee that required a long, verbose description, part of which would be “half calf skinny” and include a specific temperature, in Kelvin. All in that voice….
(Stay on target, Red 5….)
Right.
Anyway….
I tried the chipping this time doing the “Mig Jimenez” method- painting them on. While I’d used the Lincoln Wright “house brush” method on the GM/GM, I thought for this one, a more precise application would be in order.
I was reasonably pleased with the result. I’m getting better at brush control, and with getting my paints appropriately thinned to flow well. (Duncan would be pleased….)
After the chipping was applied, I gave everything a coat of Future, to get it all shiny. Next up will be the panel lines washes, and a bit of additional weathering, and I’m considering some airbrush fading and shading here and there. (Or maybe oils… who knows? 😉 )
I went ahead and assembled the mobile suit, to get an idea for how all the chipping looked as a single piece, and while I can never claim I did it perfect on anything, I was pleased with the results on this one.
Now if I Bandai would just include non-disco boots as an option….
If you’ve not tried one of these 1/100 scale Iron Blooded Orphans kits, I do recommend giving one a go. It is a great balance of scale and simplicity, at a very low cost.


Leave a Reply