
I have realized I am finally at the point that I am ready to sell all the other Spitfire Mk. VIII, IXs and XVIs in my stash. Despite some initial criticisms when it first came out, I am now solidly sold on the fact that there isn’t a late Mark Merlin engined Spitfire kit that can touch the Eduard offering in terms of detail, fit and shape.
You could probably make an argument for ICM’s kit being a more affordable option. But given the small price difference between those kits and Eduard’s Weekend edition boxings, it’s almost not worth the savings.
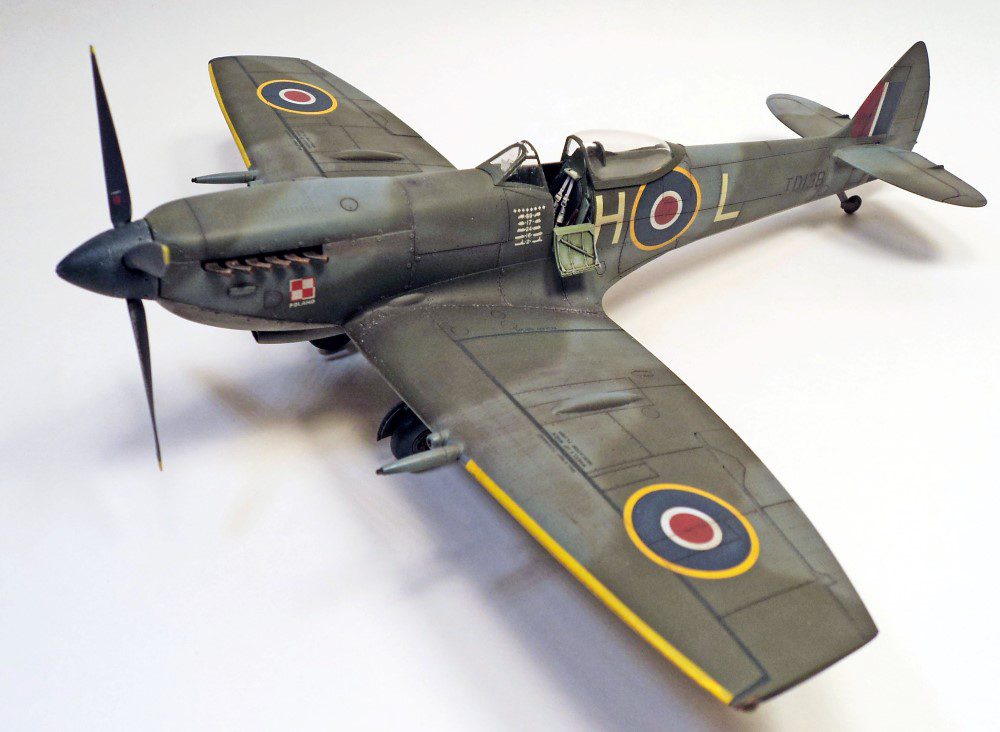
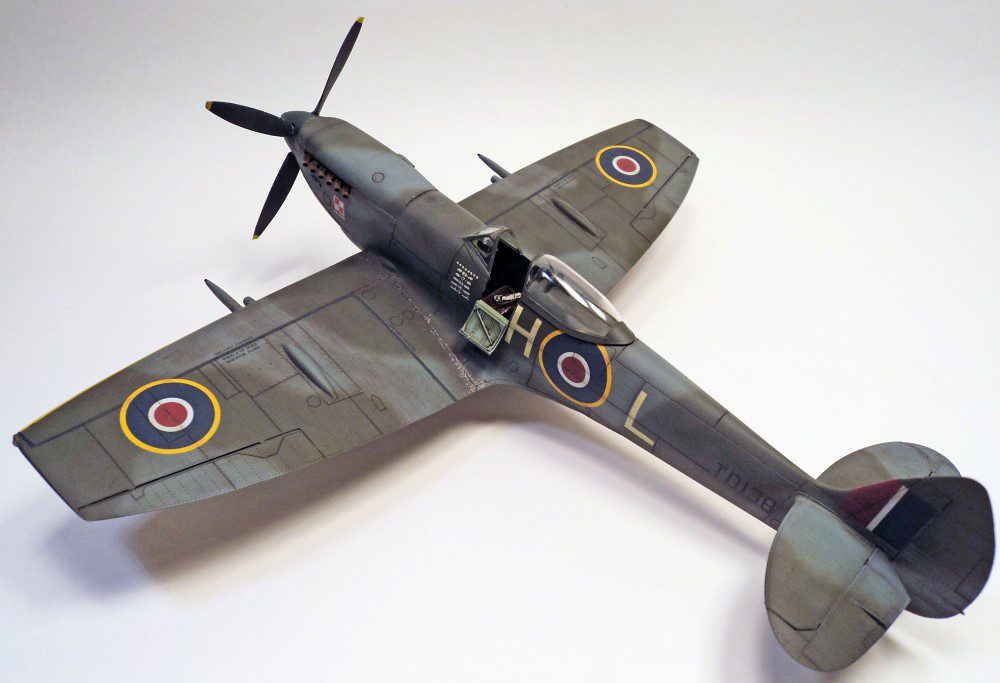
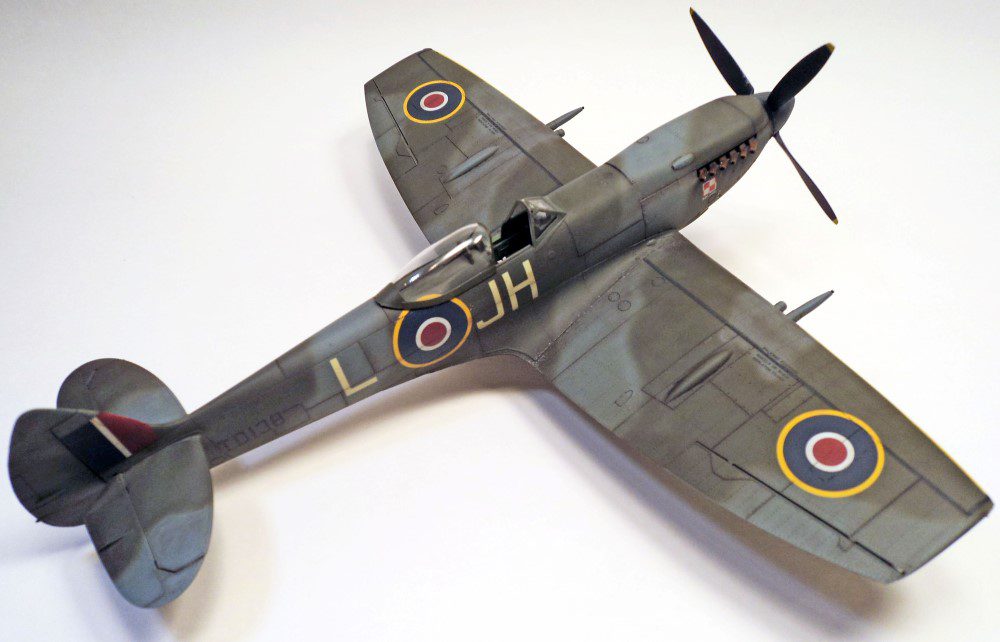
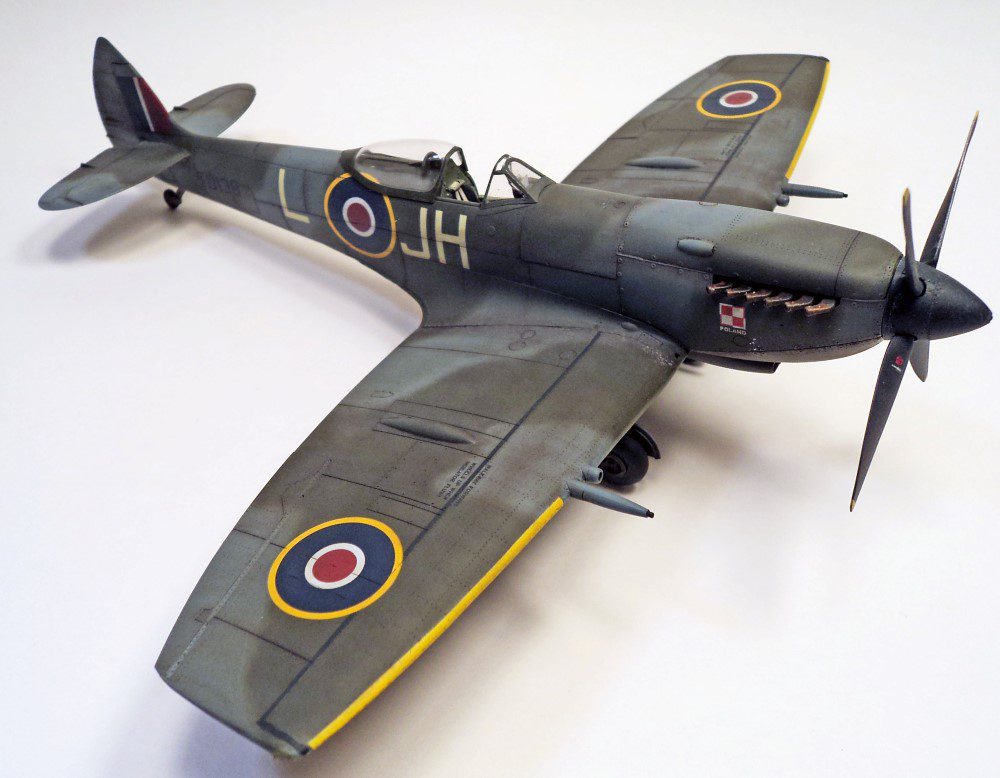
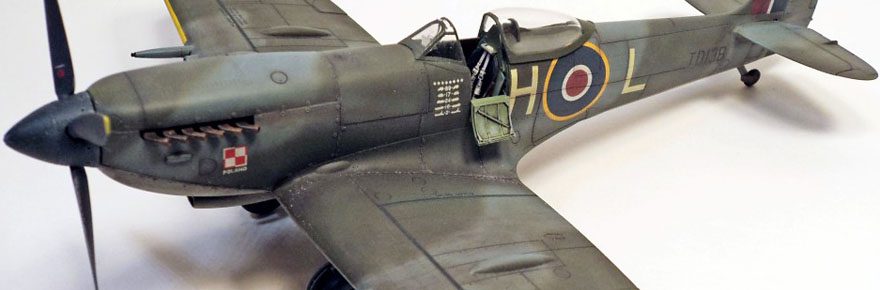
My latest Eduard Spitfire build is their gorgeous Spitfire Mk. XVIe Bubbletop Profipack kit. The kit includes the usual photoetch and canopy masks that make up the Profipack kits. Also included are five very interesting markings options- three in camo colors, two in silver colorful finishes.
The kit parts have quite a bit in common with the earlier Mk. IX kits, but as Eduard did with the Mk. VIII, the pieces unique to the MK. XVI are complete and specific- no inserts here! The fuselage with the chopped down back, additional cockpit parts unique to the Mk. XVI bubbletop, two separate wing options to accurately build any Mk. XVI configuration, multiple landing gear options, and a very, very clear bubble canopy top off the Mk. XVI specific parts.
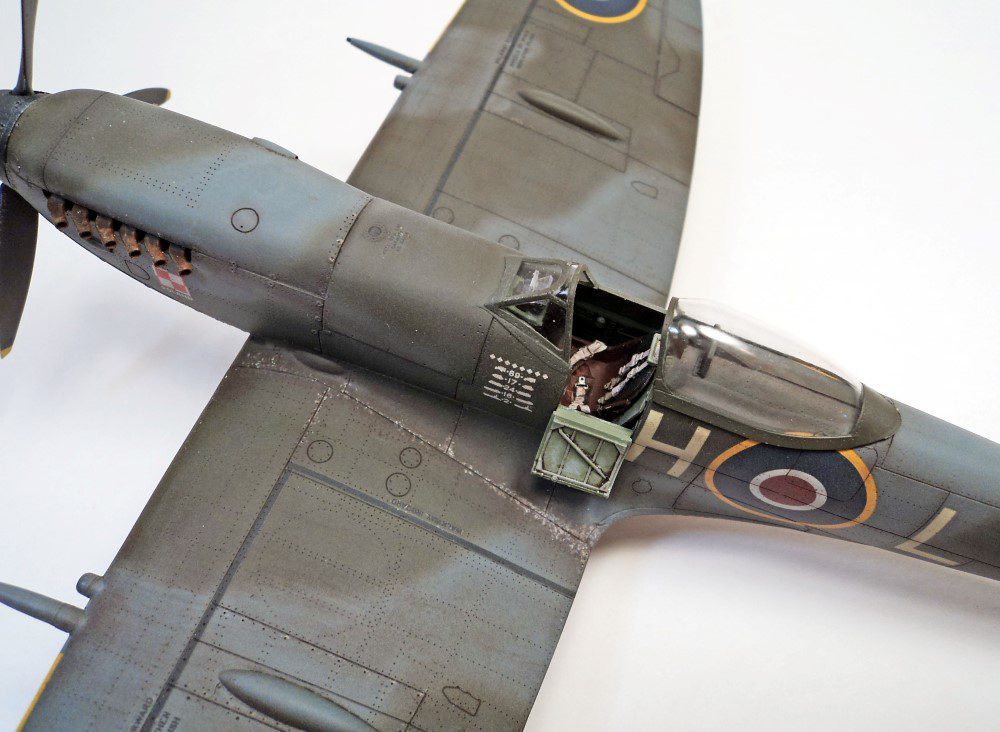
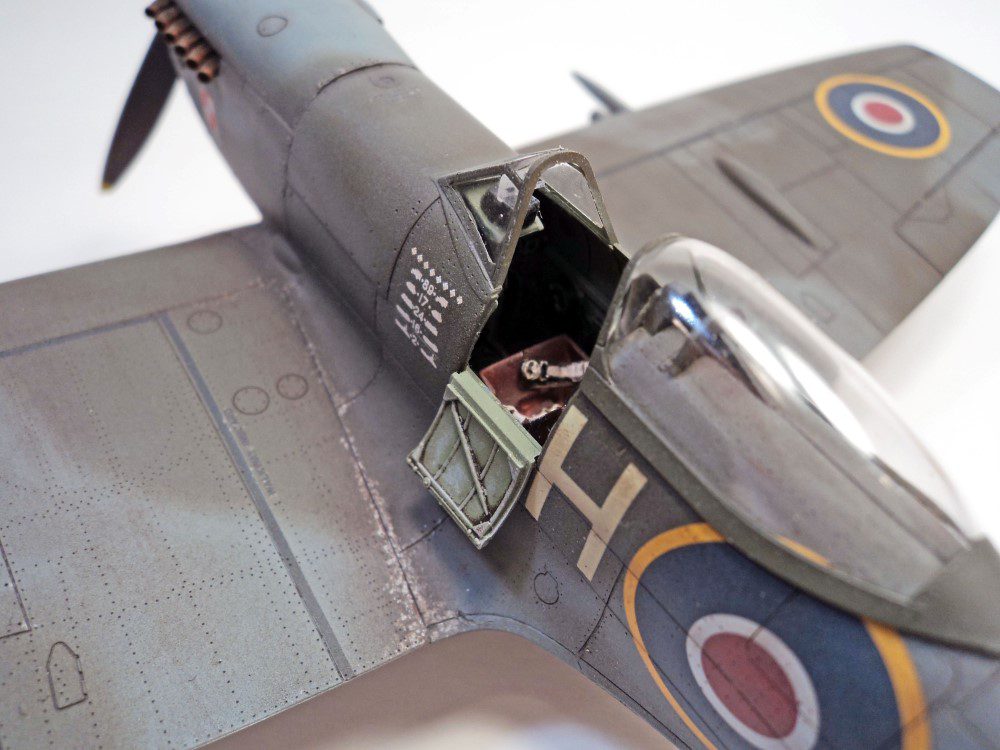
The cockpit build is very easy, and it looks very good. I have found that I prefer adding the rudder pedals before painting. The instructions have you add them nearer the end of the cockpit assembly, but I always found that to be a bit difficult to adjust. I also used an Ultracast seat, as is my practice for nearly every build. you won’t find a finer resin seat anywhere. It does require clipping away a bit of part F61, which acts as a seat support to the kit part.
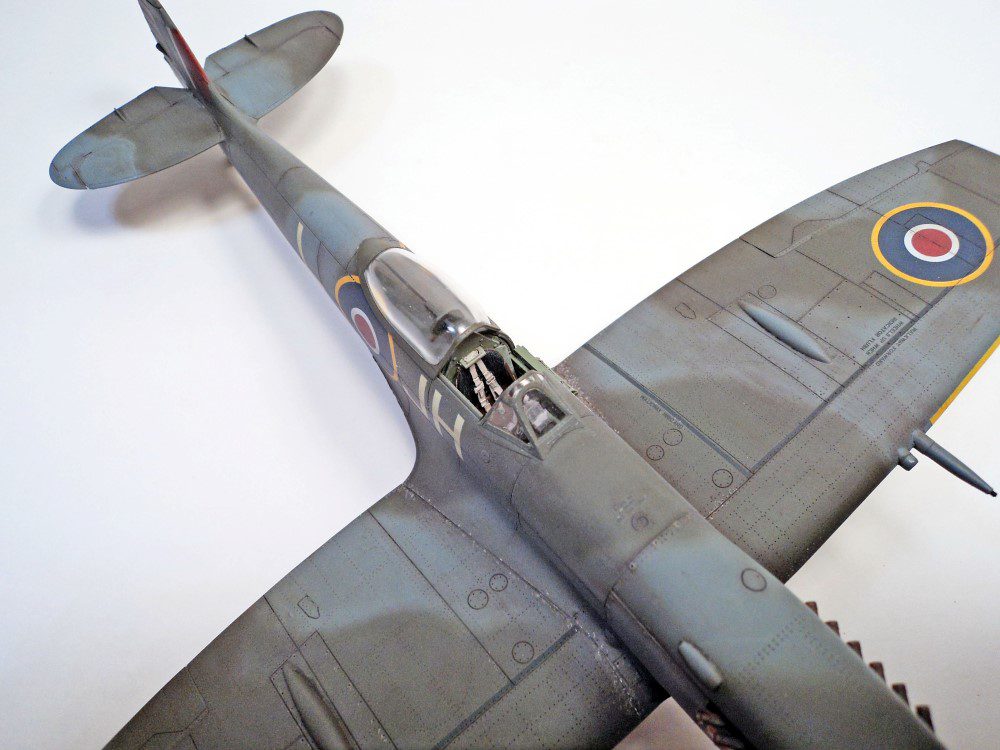
The fit of the cockpit into the fuselage was perfect, and the fit of the fuselage halves was very, very good.
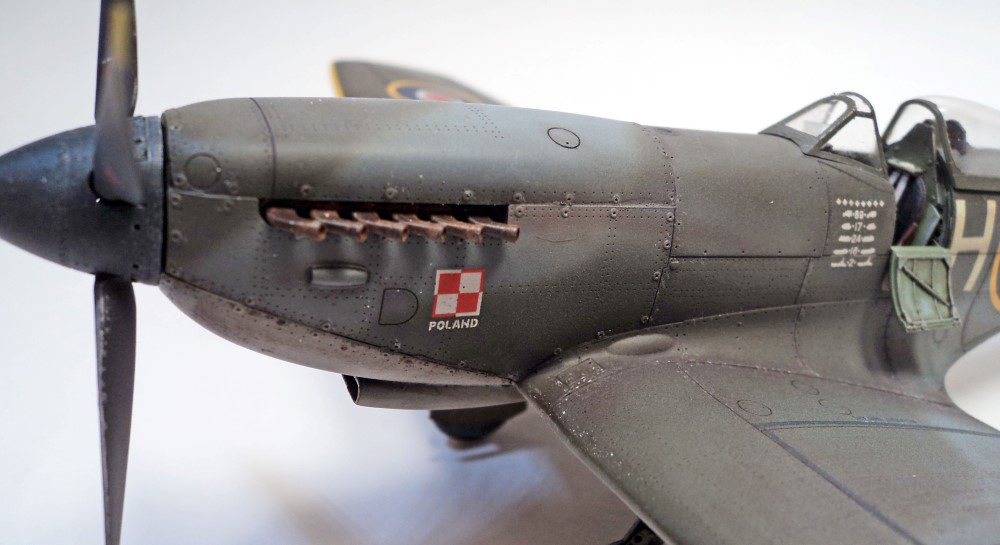
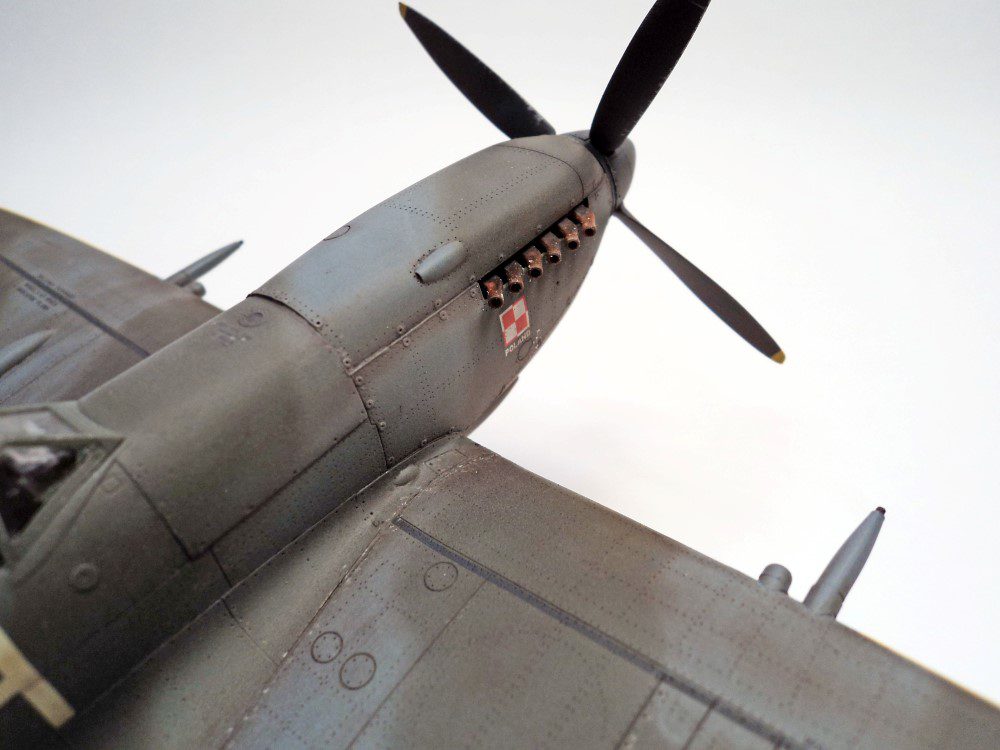
Eduard engineered the exhausts to be fitted before painting, with no practical way to do it afterwards. Also, the upper cowl is a split, two piece affair, which requires a seam to be dealt with, no matter how carefully glued. And dealing with that seam means losing some of the very fine surface detail cast into the cowl. While it’s not difficult to assemble the two components, I’ve found a solution that I now use on every Eduard Spitfire build.
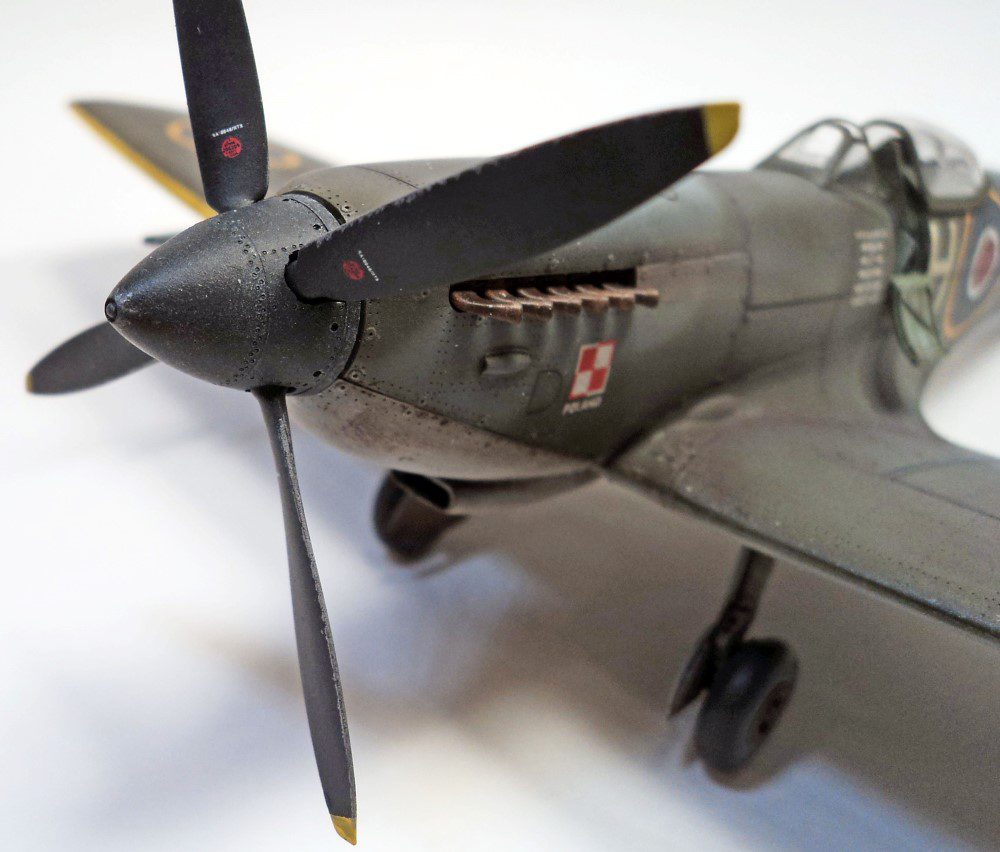
Ultracast came to the rescue with not only a very, very nice one piece upper cowl piece, but also some very nice resin exhausts that can be added to the model after painting. So for this model, I used both of those components.
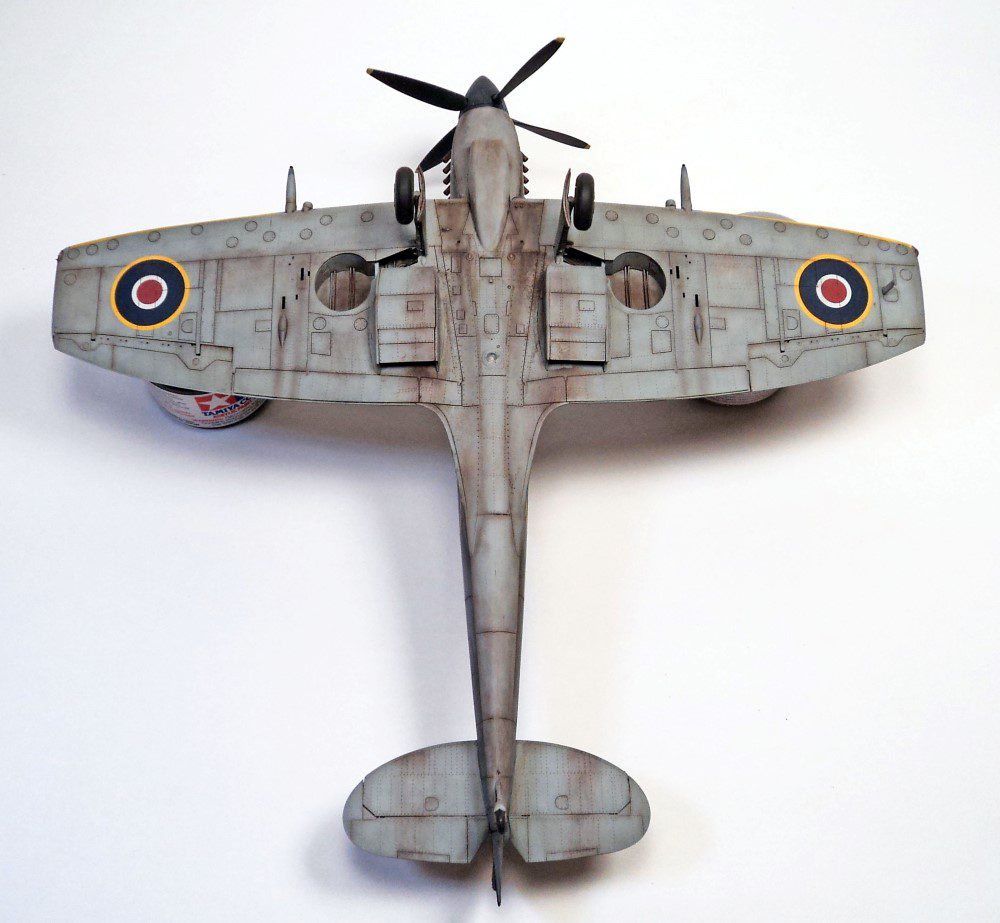
The wheel wells are very accurate, but in order to be so, it required quite a number of parts to really get the shape and angle correct. At first, it seems like quite a bit of fiddly work, but I’ve found if you simply take it one part at a time, and carefully check to make sure your placement and alignment are correct, it’s really no problem. Simply clip one part off the sprue, clean it up, place it, check it against the instructions, apply glue, and then move on to the next part. The first time I built one of these kits I made a mess of it by clipping off ALL the parts, cleaning them up, and then trying to glue them. It was a decision I immediately regretted. But I did learn my lesson!
Once the landing gear bays are assembled, the upper wings go on. Pay attention to the version you are building! The differences in the wings are subtle, but very definite.
Fitting the wings to the fuselage is nearly a perfect fit. As with every Spitfire kit I’ve built, there is a bit of a gap at the rear of the lower wing to fuselage join. Because this was a very “busy” area, in terms of both shape and detail, getting rid of the seam can often be difficult if you don’t want to lose the wonderful detail Eduard added to this area.
I’ve found the simplest method is to simply “go with it” for the most part. The small seam across the two small filets is easily dealt with- build up some Mr. Surfacer, mask off the surrounding areas, and smooth it out. For the remaining seam line, I simply add some Mr. Surfacer to minimize it a bit, and treat it as a panel line. While sharp eyed Spitfire nuts would spot it, most folks never realize it’s not actually supposed to be there. And frankly, it doesn’t look out of place at all.
The underwing radiators also consist of a large number of parts. Most kits have three or at most four parts per side, while the Eduard kit has seven per side. In my first build, I built the radiators and then tried to apply them to the wing, which didn’t work out to well. On a later build, I decided to try adding the parts to the wings first- and it worked out great. I started with the radiator faces, then the sidewalls, then the lower cover, and finally the flap cover arm and door. This method allowed the base supporting parts to be positively positioned, and the lower cover could then be adjusted to a near perfect alignment. (I did prepaint the parts of course!)
The final major airframe parts are the horizontal stabs and rudder, and the lower cowl. Pay close attention to the variant you are building- there are two options for the elevators relevant to this Mark. The lower cowl is a bit oddly engineered in my opinion, being split both parallel and perpendicular to the line of flight, but it’s not too difficult to deal with. With all of that in place (oh yes- cannon barrels too!), it was on to the paint stage.
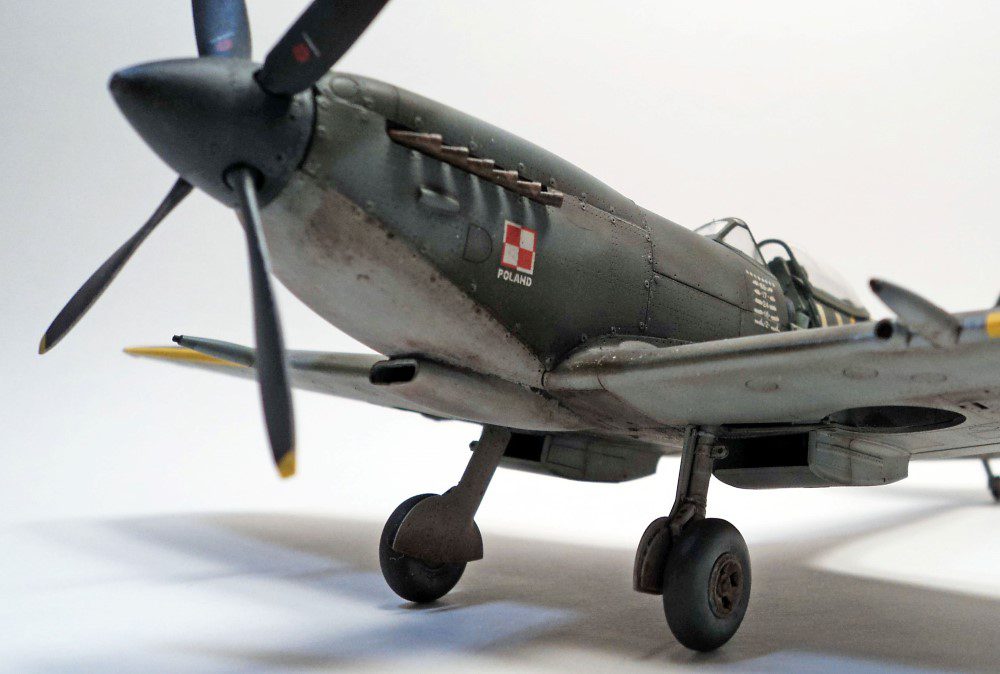
I painted the model with Tamiya’s “trilogy” of RAF colors- XF-81, 82 and 83. They look quite good to my eye. After a gloss coat, the kit decals were applied. They are very, very good- but very thin. Take time and be careful and you will be rewarded with an excellent look. Once those were on, another gloss coat was applied.
Though it’s not likely very accurate, I decided to dirty the model up a bit, and thus applied various weathering effects such as post-shading and fading, oil washes, paint chipping, and chalk powders. While I admit I probably went overboard from a realism standpoint, I love the process and was quite happy with the results. (I am firmly in the “modeling as art” camp, I suppose….)
For the prop, I used an Ultracast spinner. While the kit part is shaped OK, it doesn’t have much detail. Ultracast’s spinner is very, very finely detailed, and looks excellent. It comes with very nicely shaped and thin prop blades. It does make use of the kit spinner backplate. As I’d already glued the kit props (which are still quite nice) to the backplate before remembering I had the Ultracast part, I ended up only using the spinner. But I think it looks great.
To finish up the kit, I added the Ultracast exhausts, landing gear, pitot tube and did a few final weathering adjustments before applying a coat of Vallejo Satin Varnish.
While I love building any Spitfire, I can say without reservation that I simply love building the Eduard kits, especially with the Ultracast additions. While it has a few more parts than other Spitfire kits in this scale, nothing else comes close in terms of shape, detail and surface casting. It’s simply the best line of 1/48 scale Spitfire kits available. (And that’s saying a lot if you know how much affection I have for Airfix’s wonderful Spitfires.)
If you’ve not built an Eduard Spitfire, I highly recommend you pick up any of their boxings, of any version.


Leave a Reply