
I’ve built more than a few of the AMT/AMTech P-40 kits. They’re not bad at all, though they do require some work. And to paraphrase Henry Ford, “you can have a P-40F/L in any brand you want, as long as it’s AMTech.” Like it or not- this is the only game in town.
However, with a little care, it can be made into a nice model.
My route to this particular P-40L was a little odd however. A few months ago, Squadron advertised a Limited Edition P-40E bagged kit for $19.99. It had AMTech plastic, some resin bits and pieces, and a Cartograph decal sheet.
Within a few days, sharp eyed observers noted that the “P-40E” plastic was actually AMTech’s P-40F/L kit- the long tailed version. If you’re not familiar with the P-40, the early models had a shorter fuselage than later versions. The change in length was noticeable, and it also repositioned the horizontal stabilizers.
Basically, they were selling a kit that wasn’t close to reality, even with the few resin “corrections” parts provided. And making all the corrections needed was simply not practical.
I looked at it though and saw a decent cockpit set, and a nice set of Cartograph decals, and a perfectly buildable P-40F/L kit. So I snagged it.
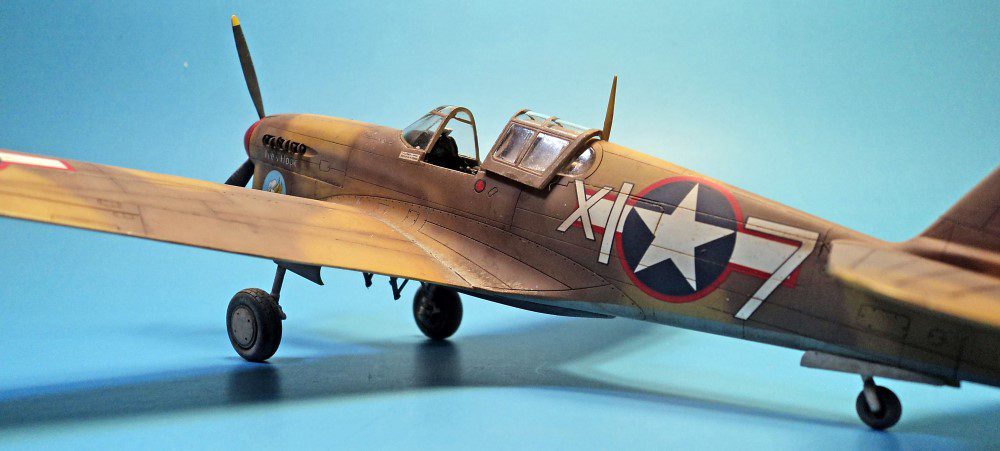
I decided to build the L model of the P-40, and found some decals in an aftermarket set, Eagle Strike’s “Birds of Prey: Warhawks and Kittyhawks Pt. III”. (Sounds like a movie title…)
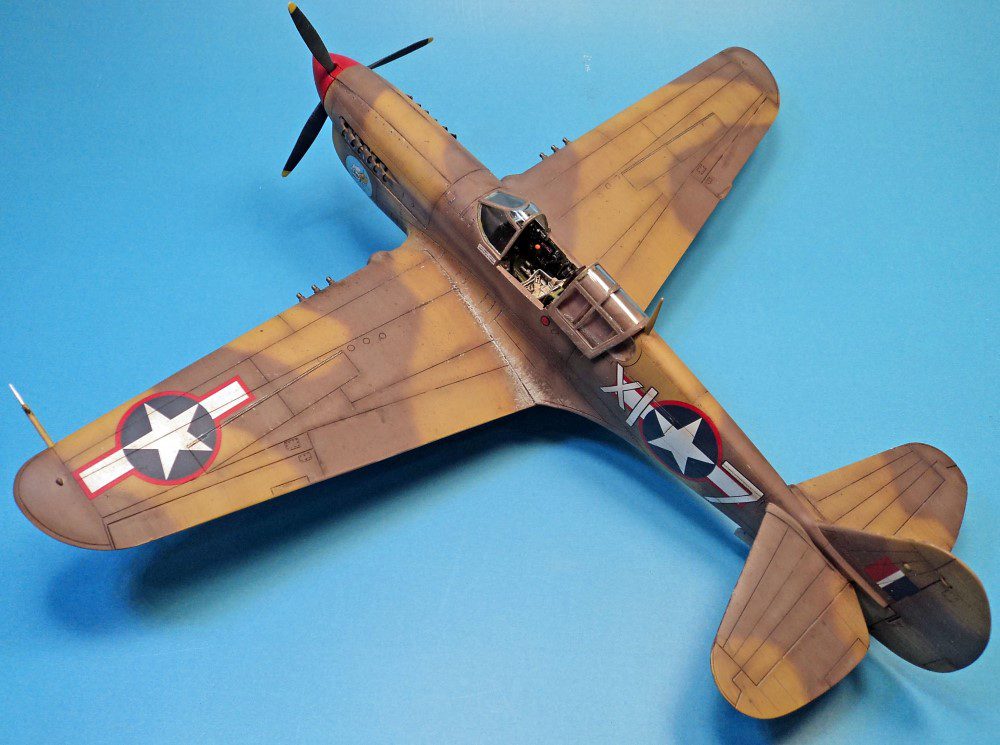
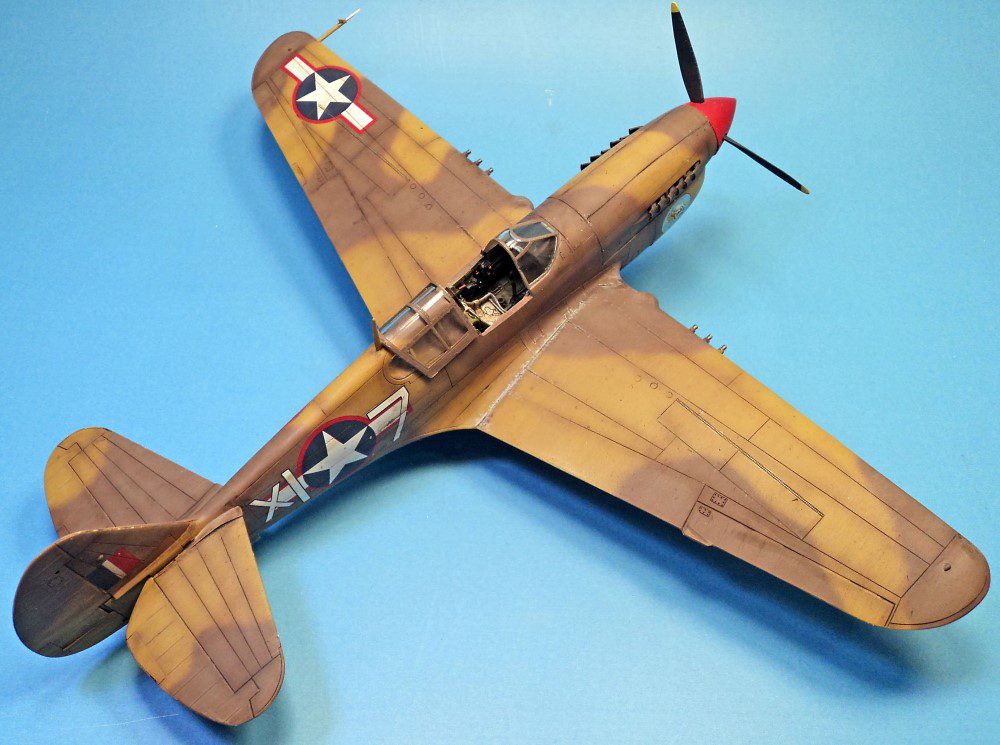
Test fitting showed that the resin cockpit parts- sidewalls, floor, and rear firewall- would work best if the sidewalls were glued in place first. Once those were in place, everything was given a coat of ZC Green, then details picked out in various colors, and finally some drybrushing and an oil wash. The fuselage was closed up, the rear bulkhead slid into place, then the IP and floor, and finally an Ultracast seat was dropped in the cockpit opening.
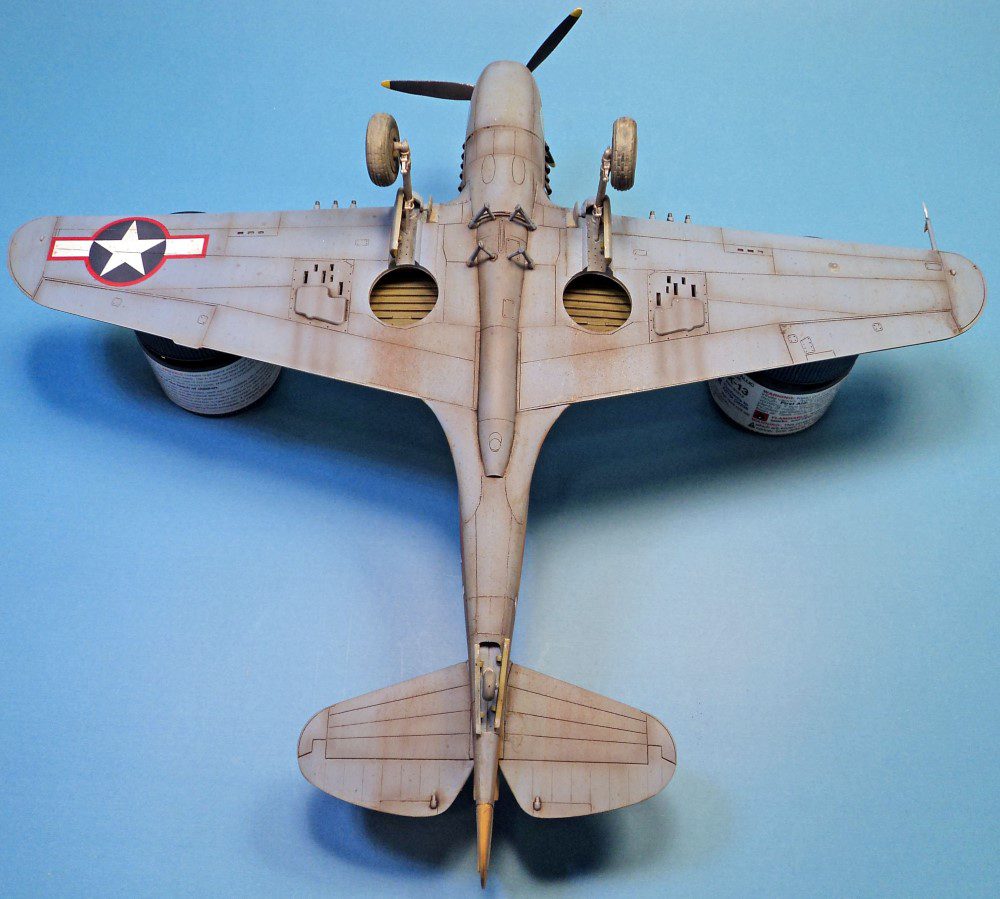
Experience building these kits had shown that unless corrective steps were taken, there was a significant wing to fuselage gap. I had tried gluing the wings to the fuselage and then adding the lower wing, but this still created some alignment issues.
This time I tried a different approach. I added a fuselage spreader, just aft of the where the lower radiator cover joined, and kept test fitting until the fuselage was spread enough to minimize the gap. The remaining space was just about right to draw the wings up with a rubber band, and set the dihedral. It turned out to be a rather easy fix.
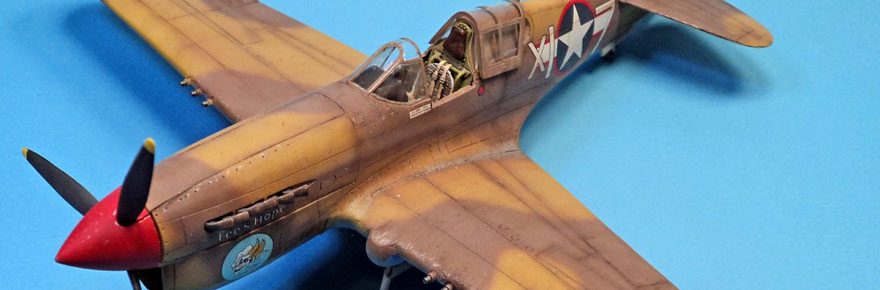
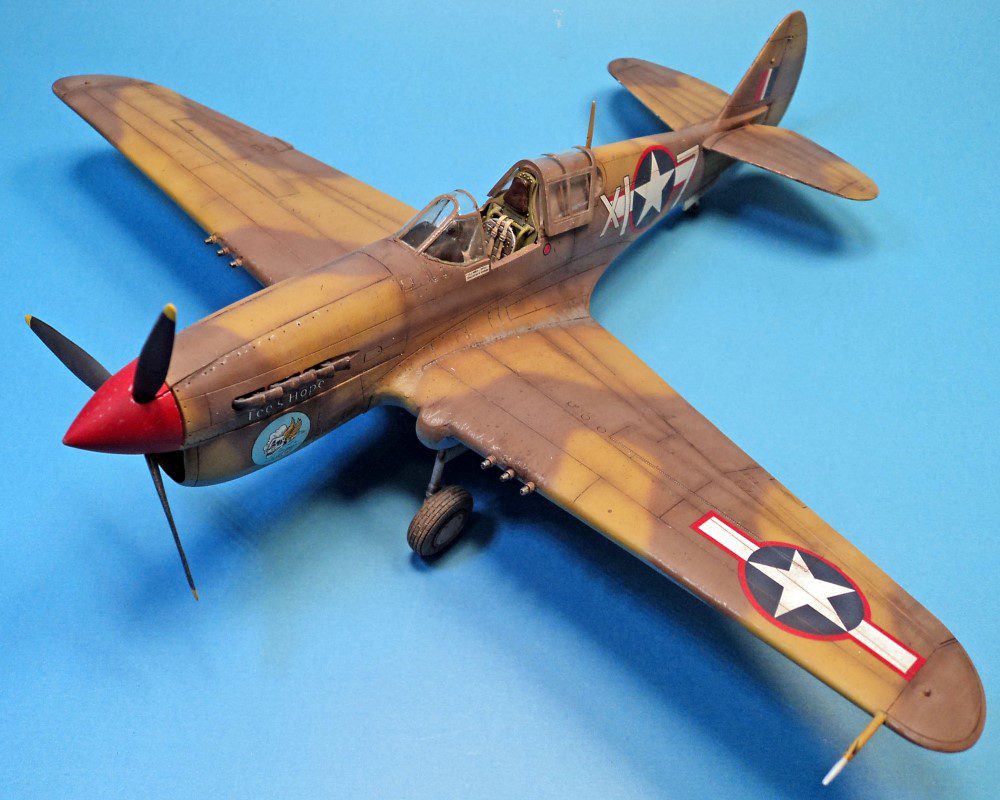
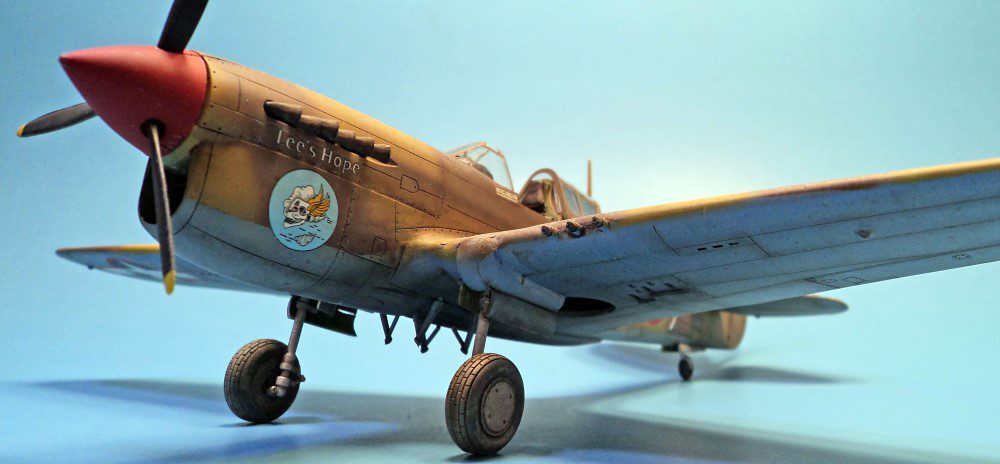
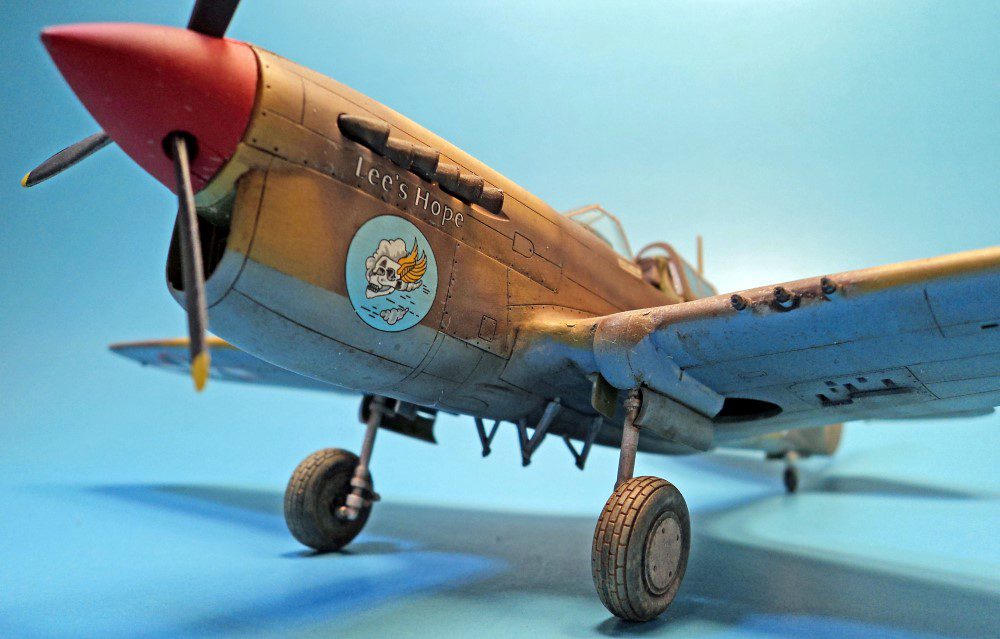
Painting was fun, as it involved my favorite scheme, the MTO desert scheme of middlestone/dark earth over azure blue. Vallejo Model Air provided the azure blue, Gunze acrylics the middlestone, and my new dark earth favorite, Tamiya XF-72, was used a “close enough” color for that portion of the camouflage.
Weathering was a variety of oil paints streaks, washes and splatters, and various fading and shading with an airbrush. Paint chips were added with a Prismacolor silver pencil.
The finishing bits were added, including Ultracast exhausts and Ultracast wheels. I highly recommend the use of these last two items, because the kit versions are poor. (In fact, I highly recommend any Ultracast product for any model…)
While a lot of folks made fun of Squadron for their gaffe, I must say I made good use of all the parts. I used the decals on a Hasegawa P-40E, and now this kit used most of the rest of the parts. So while the bagged kit didn’t work out quite like Squadron intended, I can say it did work out in the end!


Leave a Reply