
I really like how Bandai handles the inner frame on the 1/100 scale Iron Blooded Orphans kits. On previous builds of the Barbatos, Grimgerde, and Schwalbe Graze, the experience left me with the thought “why doesn’t Bandai do them all like this?” The inner frames are nicely detailed, yet not so “part intensive” to induce fidliness. And the best part is painting, detailing, and weathering them is quite fun.
As a testimony to how much I like these kits, I’m not really a big fan of the overall designs. The feet seem way too big on most of them (except for the Grimgerde’s hilariously small feet), the high-heeled look seems to be 70’s throwback, and the proportions just generally seem weird. But the build of these kits is so nice, and provides so much fun, I eventually plan to build them all.
Initial Build Process
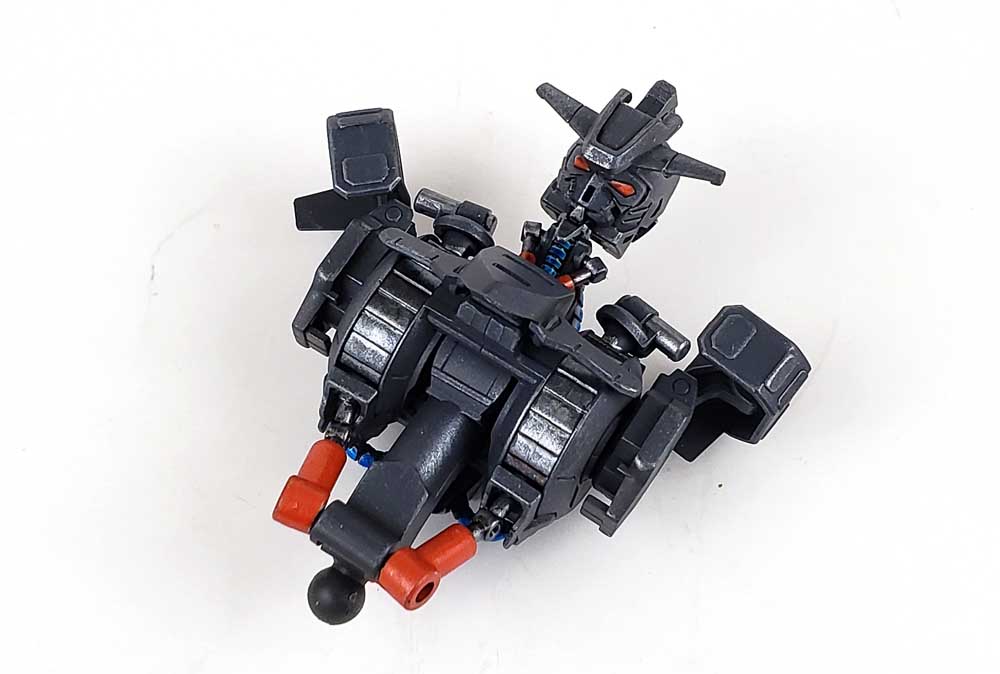
For the most part, the Bael’s inner frame can be fully built prior to painting and weathering. The arms, legs, head, torso and waist go together nicely, and don’t need to be disassembled to later hang the armor on it. I’d seen this when I’d first built the 1/100 Barbatos, which uses essentially the same inner frame.
A few inner frame sections are best left in smaller subassemblies or individual pieces. Parts of the foot, the backpack unit, weapons, and a few parts that hang from the waist fall into this category.
The key to finding the “sweet spot” is to determine what can be built that won’t require disassembly later. A thorough walk through of the instructions – helpfully broken down into the inner frame steps, and armor steps, will help you identify the distinctions.
A Scrape With Primer
On previous builds, I primed Gunpla inner frame parts with Badger’s Stynylrez Primer, and then followed that up with the paint colors chosen for the particular model. However, I have done it a bit different on this one.
Unless you glue them in a fixed pose, Bandai Gunpla kits are articulated – arms, legs, waist, and more all move along multiple points These can be simple things like single direction elbow bends, or more complex ball and socket joints that introduce multiple directions of movement.
In all of this movement, it’s possible for parts to scrape each other. Some areas can be planned for by trimming and sanding to avoid scrapes. But others may not have that flexibility.
And while the combination of Stynylrez and quality acrylics over it is very durable, I’ve always noticed quite a bit of paint scrape during the course of a build. Some can be put off as “weathering” certainly. But because I sell my work, I’m always concerned that the buyer may move it around with some frequency, which scrapes the paint right down to the bare plastic.
Have Your Primer And Paint It Too
On recent builds, I’ve been switching to lacquer based paints almost exclusively for airbrushing, and even some brush painting. As I’d picked up quite a few colors from the Mr. Color Gundam Color Series, I decided to employ them for this build. These paints are matched to many of the canon colors from the anime series. As lacquer paints, they have incredible “grip” – far better than even Badger’s Stynylrez Primer. Additionally, they seem to be very, very durable. While any paint can be scraped off of plastic, the lacquer paints so far have proven to be much more durable than the acrylic options I’d previously employed.
The color I chose was Gundam Color MS Phantom Gray (UG15), a darker gray color. If you’ve ever used Tamiya’s German Gray (XF-63), it’s very similar to that, though perhaps a slight bit darker. The key with the Gundam Color paints is they are pretty much spot-on canon colors. Just recently I painted a Real Grade Z’Gok. The two Gundam Color paints I used for Char’s Z’Gok were so perfectly matched to the Bandai plastic that the only way I could tell what had been painted was by the finish – the plastic was just a bit glossier. So if it’s canon colors you need, or just really good paint that fits the MSG universe, check them out.
I thinned the paint with Mr. Color Leveling Thinner, following my habit of judging it by visual check rather than a strict paint to thinner ratio. The paint was applied with a .3 airbrush. If you do paint the frame in assembled condition, be sure and move articulating parts around a bit to get full coverage.
The Demon Is In The Details
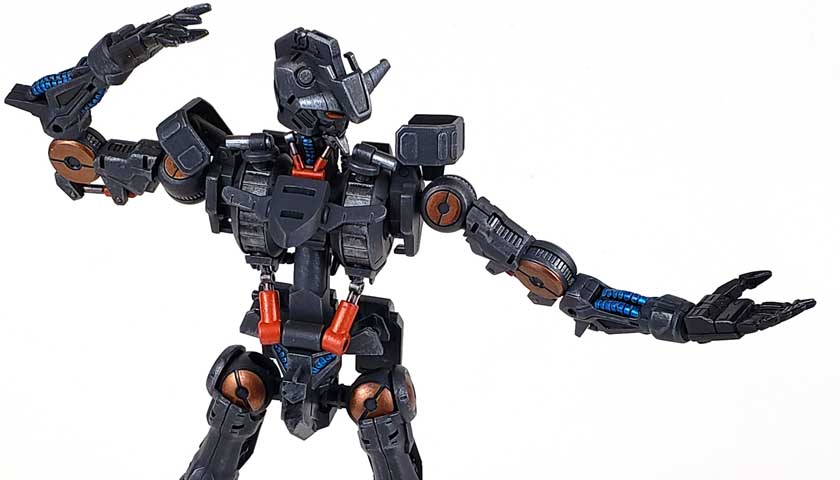
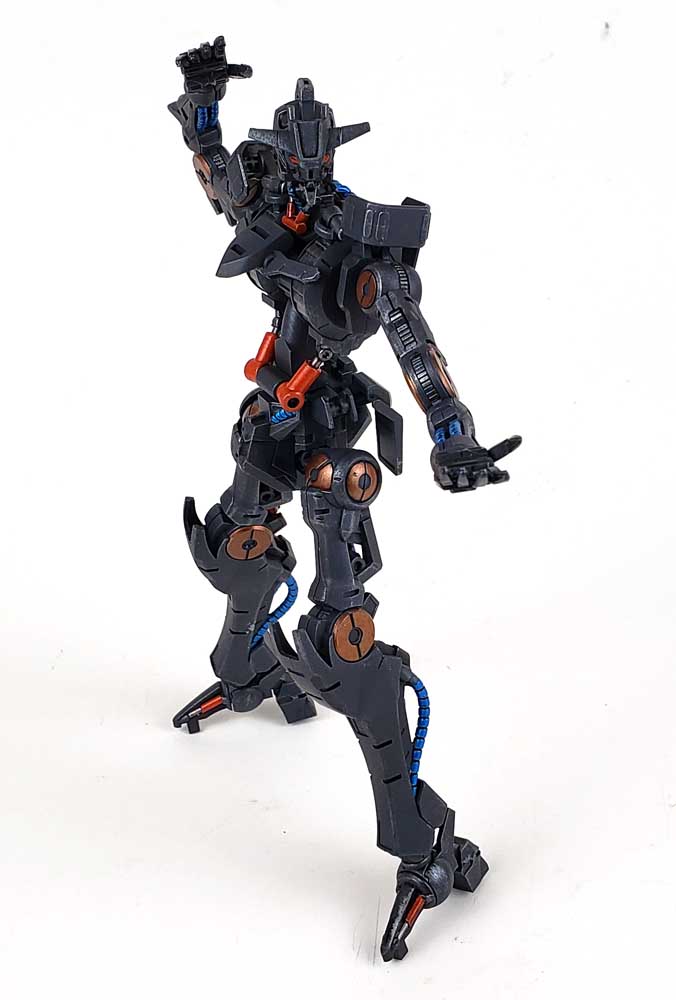
With the base color on the frame, I wanted to add in a few detail colors. The mobile suit’s outer armor will be mostly white, with a few blue touches here and there. I wanted the inner frame color to reinforce that, but to perhaps also add a few splashes of additional color as well.
I started with a drybrush of Vallejo Natural Steel. This not only helped pop out some detail, but also added a touch of weathering to the frame. My main reason for using this color rather than my “normal” Citadel Leadbelcher was simple. The Natural Steel paint has just the slightest hint of blue to it. I thought it would work well with the blue color featured on the rest of the suit.
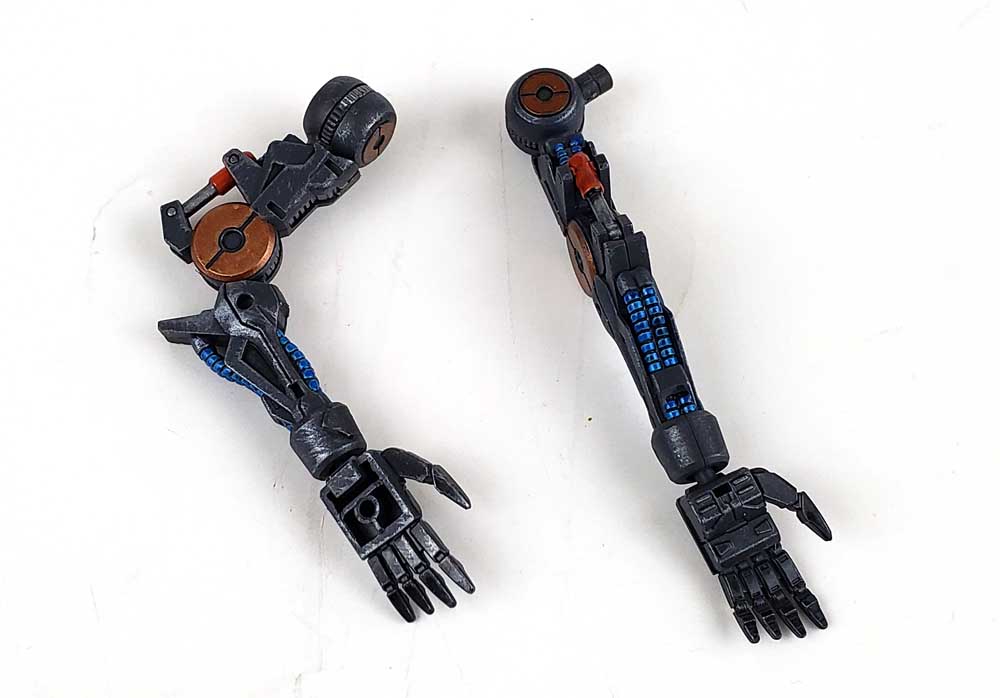
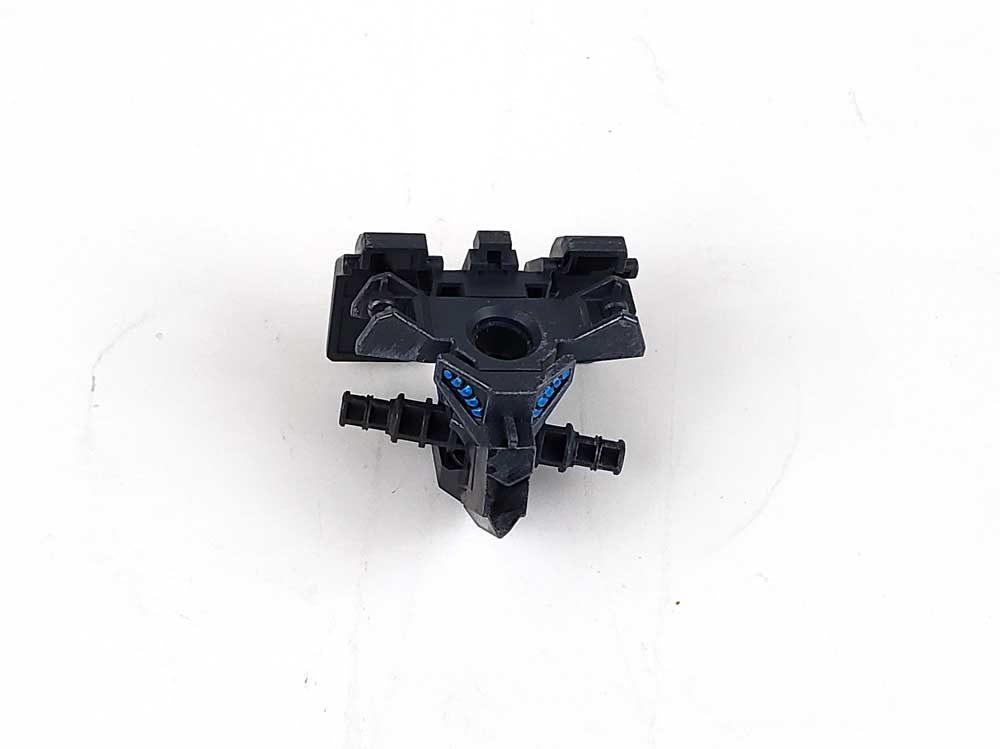
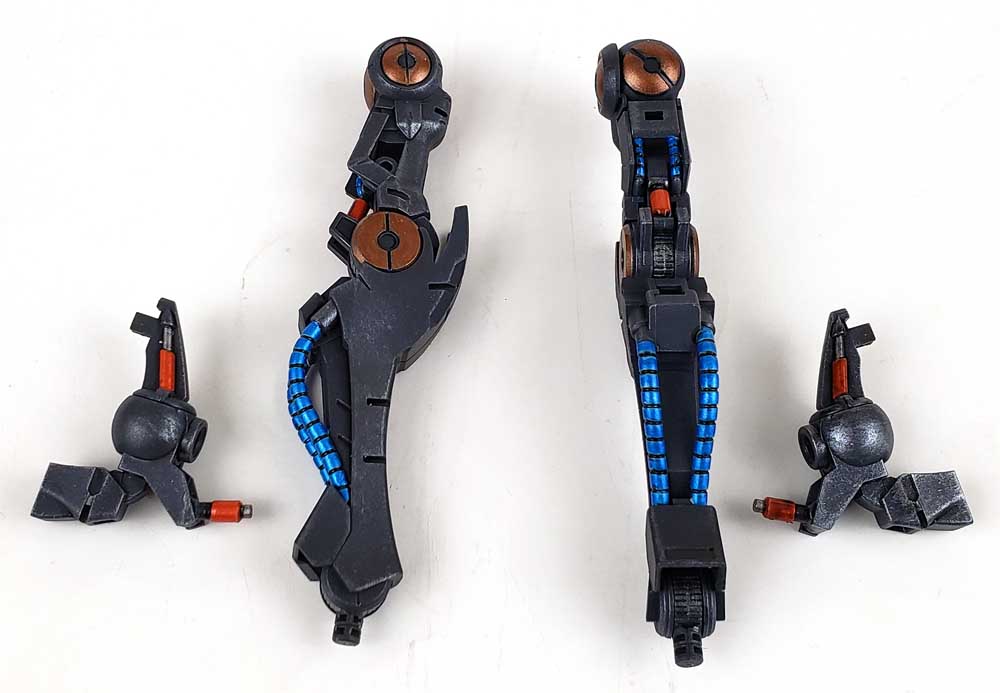
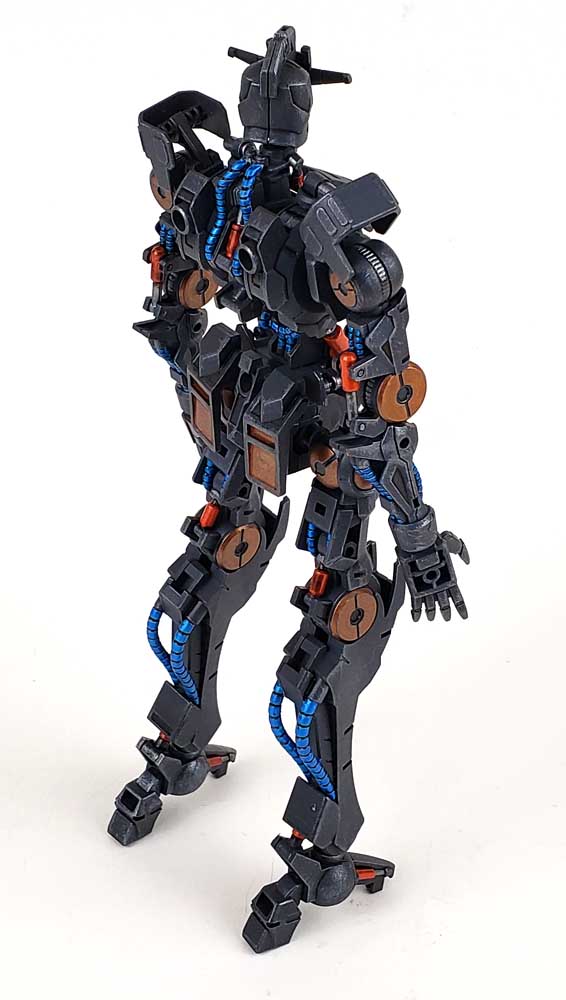
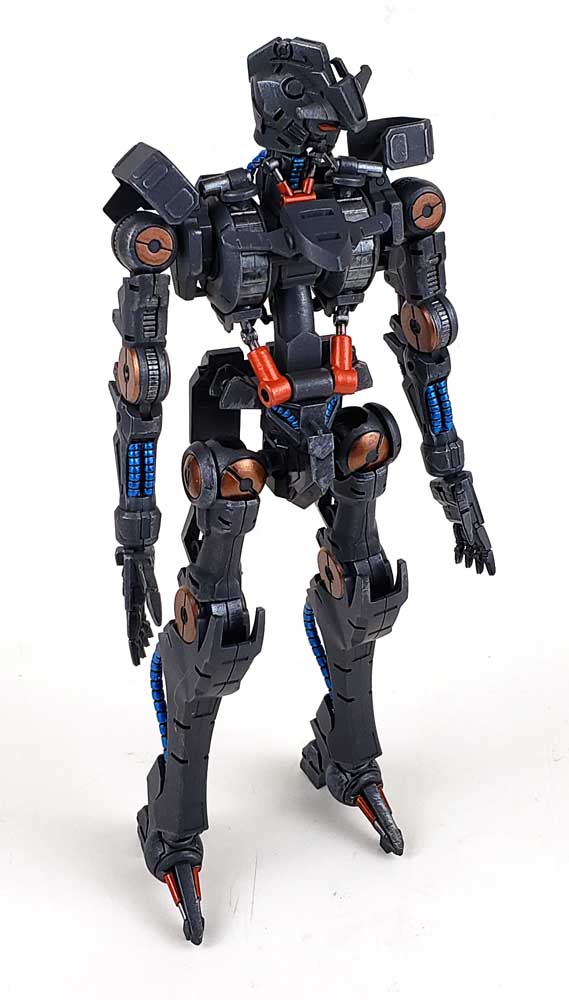
A very prominent detail of the frame are the segmented tubes on the arms, legs, and torso. Additionally, there are some pistons on the frame in various places. Because I plan for the outer armor to be a bit more matte and weathered, I thought it might be interesting to let the inner skeleton be a little shinier and metallic. To prepare the way for later metallic colors, I painted the hoses and piston parts with Vallejo Sky Gray, to give a light undercoat for the metallics to follow.
Not Heavy, But Metal Nonetheless
For the segmented tube sections, I decided to use Ammo of Mig Warhead Metallic Blue. This is a very vivid blue color that really has a load of “punch” to it. For the piston sockets, I opted for Ammo Metallic Orange. I generally paint these red, but I decided on orange because it’s opposite blue on the color wheel. I felt it would fit nicely, and still give some hints of warm color shining amidst all of the cool blues present on most of the suit. The pistons themselves would get a coat of the VMC Natural Steel, and various disc-shaped elements on the joints were slated for Citadel’s Balthasar Gold, a nice bronze color.
I’ve brush painted the two Ammo metallic colors before, and I found that they seemed to work better when applied in a heavier fashion, using a dabbing motion. This allows a slight “thickness” of paint to be applied evenly, without brush strokes or “tearing the skin”. When it dries, the paint levels out nicely. It does take a while to be dry to the touch, and even longer to cure. Be prepared to set it aside for several hours, or even overnight.
The steel and bronze colors were thinned with a few drops of Vallejo Glaze medium, and some Vallejo Airbrush Flow Improver. A similar thick coat was applied like the Ammo products, but using more of a traditional paint stroke. By going heavier here, it allowed a solid wet coat to be applied, and once dry, it tightened down very nicely. I painted the pistons and a few other details on the inner frame with the steel, and the aforementioned discs were treated to the bronze color.
A Gentle Wash
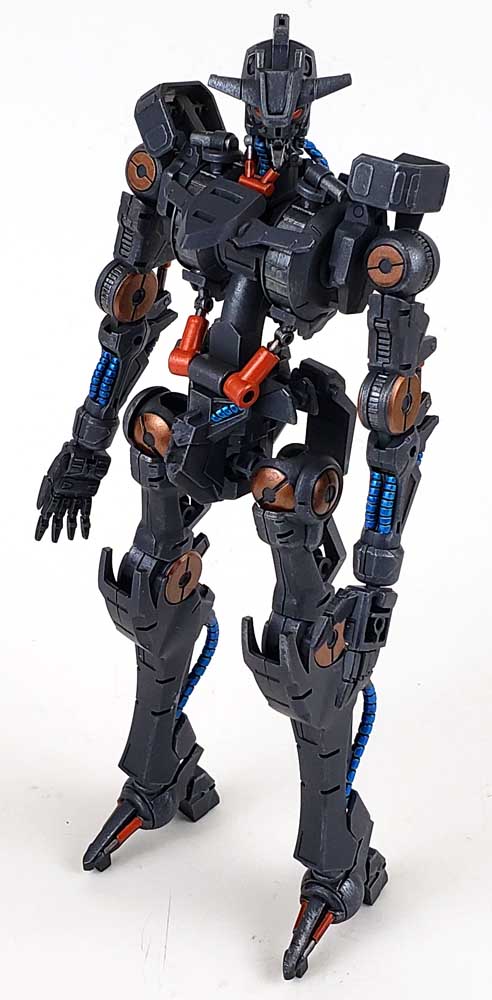
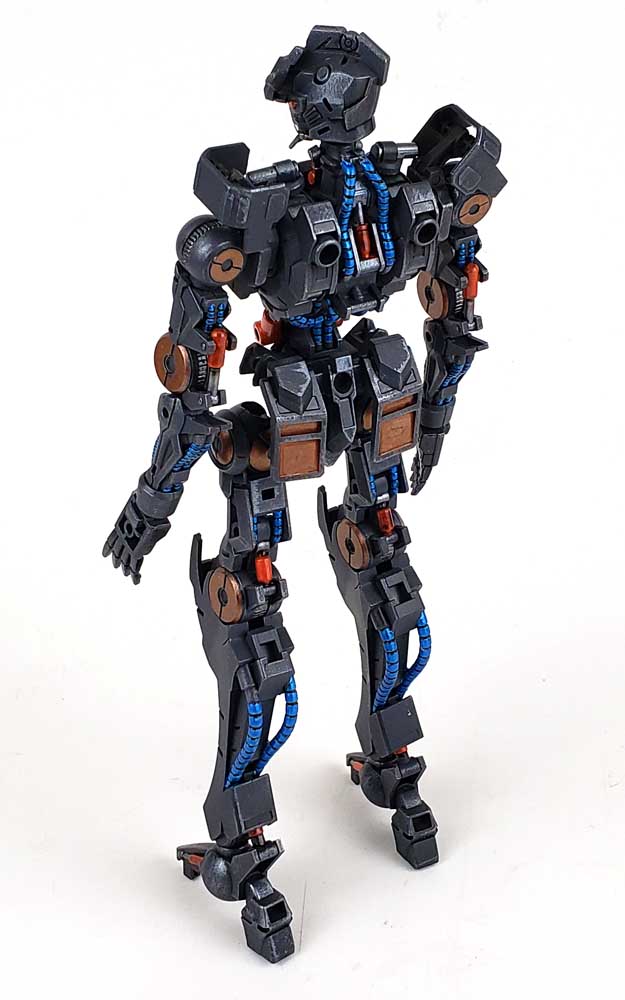
The final step in the weathering for this stage of the build was to add a wash. While the frame’s overall color was still very dark, a wash would help restore shadows in areas that had received lighter paint, and thus help the detail stand out. I chose Citadel’s Nuln Oil Gloss. My thinking for this selection was twofold.
First, as I wanted the inner frame to retain a shinier, metallic look, the Gloss Nuln Oil would work with this goal. If I used standard Nuln Oil, which is matte, I’d need to go back and “shiny up” the areas that had been matted down.
My second reason factored in the effects that enamel thinners can have on Bandai plastic. Used on an open surface, where the thinner can evaporate quickly, doesn’t present a problem. However, if it gets into a joint on the model, or other areas that it might pool, it can shatter the plastic. Priming and painting does help some, but in my mind the risk is too high – especially if you are working fast, and don’t have time to be a bit more delicate.
Citadel’s Nuln Oil (matte and gloss) have worked very well for me, and seem to be very Bandai plastic friendly. While I’ve not pushed the theory by being overly messy, I’ve had no problems in its use.
Application was made with a #0 liner, being careful to generally stay “in the lines”.
A Fun Frame To Finish
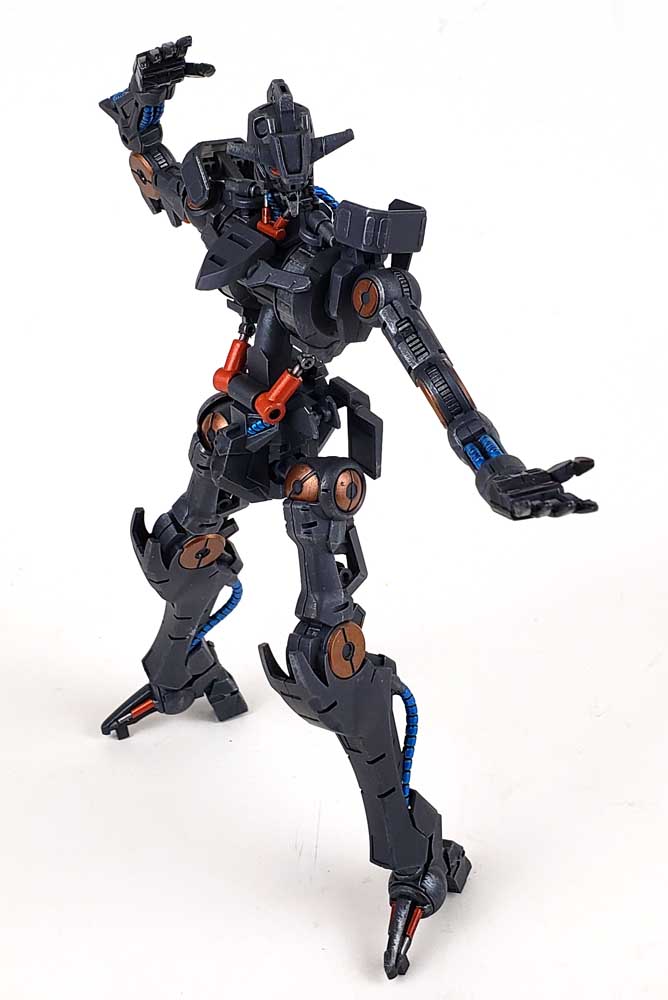
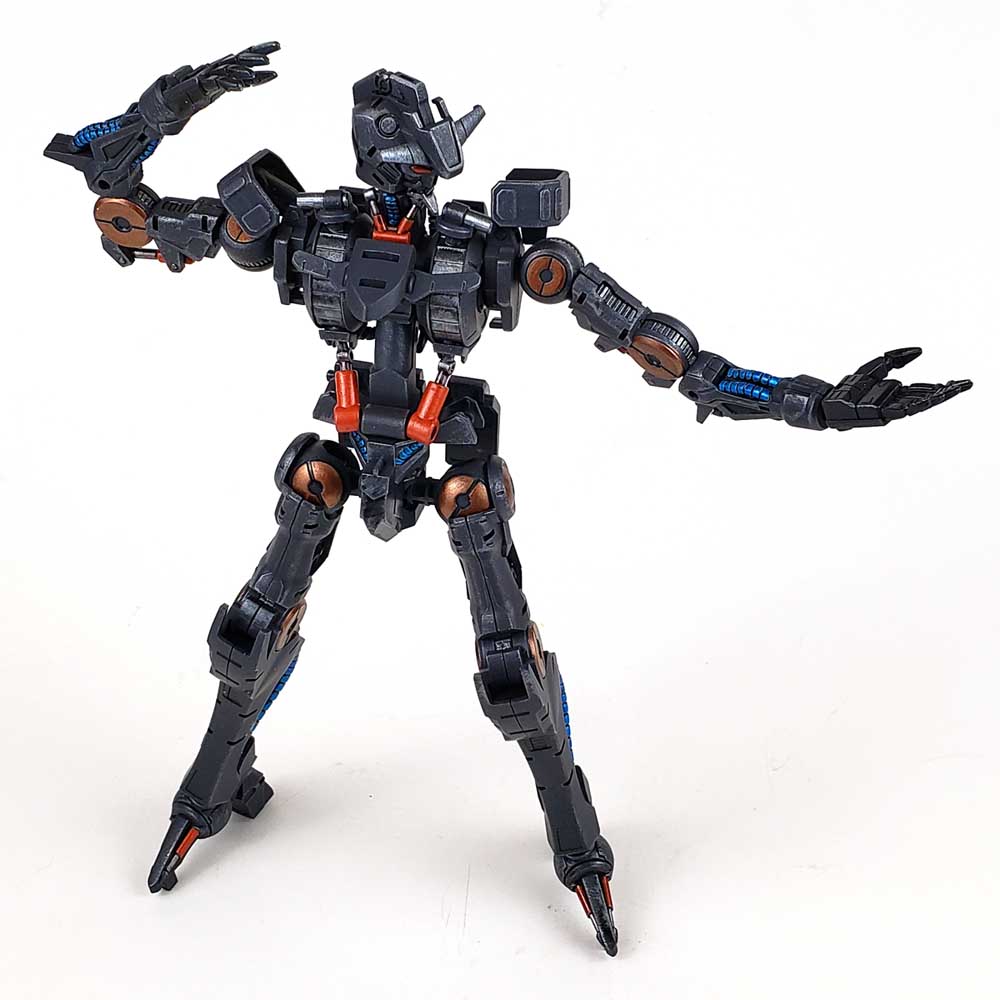
With all the colors and washes applied, I assembled the basic frame parts. Even with only partial foot parts in place, the frame is very stable and can be posed. I really like the way it looks too, as it has a menacing “Terminator” look to it. By being a separate kit, in a sense, the armor is much easier to deal with and then “hang” on the frame later.
To say I’m enjoying a Bandai Gunpla kit is a bit redundant. I’ve enjoyed them all. But these IBO 1/100 scale kits really are something special. They’re not only fun to build, but are engineered it seems to get all the benefits of a master Grade kit, squeeze it into the simplicity of an RE/100, and come out with something very unique.
More like this Bandai, please! 🙂
Leave a Reply