
Imagination is a wonderful thing. As a kid, I could play all day, without a toy in sight, on imagination alone. A crooked stick was a laser blaster. A longer stick was a lightsaber. A cardboard box was a tank turret. It didn’t matter that we didn’t have a lot of money for “real” toys… I could make do with a few sundry objects and my mind.
As I grew older, for some odd reason, I retained my sense of imagination. While so many of my peers seemed to shed that as they left childhood, the ability to mentally wander away stuck with me. I never did figure out if I was the odd one, or if they were. Whatever the case, I felt that they lost out in the long run.
Now that I’ve exceeded the half century mark in this journey on the third stone from the sun, I’ve reached a point of appreciating the imagination that others show. I think there is a distinction, really. It’s one thing to regard the work of the imagination… be it a movie, book, model, or whatever. Yet what is far more fascinating to me is the mind behind the tangible object.
That’s the real mystery I think. That process of imagination – how the brain works. To delve into that creative process is an amazing adventure. The hows and whys with which any particular person goes through to arrive at a creative solution is quite a beautiful process.
B Creative
Of all the vehicles in the Star Wars universe, the B-Wing stands out as truly unique among the already unique. Its shape does not convey “space fighter” at all, yet it has an appealing flow to the design that is oddly endearing. I’d love to have a conversation with the original artist who came up with it. Was there perhaps an object that sparked the look of it? Or maybe it was a “happy accident”, recovered from a scrap of paper in a string of rejected ideas, about to be tossed away for the hundredth time.
Of course, I can also imagine the design emerging at the end of a long day. “We need one more design?” “Really? I wanted to go home for dinner.” “C’mon, George is counting on you.” “Fine.”
A few scribbles later, with a chuckle, the designer thinks “that’ll show him to interrupt my dinner!” The sketch is presented… and suddenly a new craft is added to the stable.
I doubt it happened that way. But it could have. At least as I imagine it… 😉
Building The Cockpit And Engines
If you’ve read any of my other Bandai Star Wars blog posts, you’ll know I really, really like these kits. Bandai produces what must be about the best fitting kits in the world. And in the realm of scifi spaceships, i don’t know that anyone else even comes close. So when I read that the B-Wing fighter was being released, it wasn’t a matter of if I’d buy it, but simply when. Finding a very good price at an online store, clicking “Buy” was an easy decision.
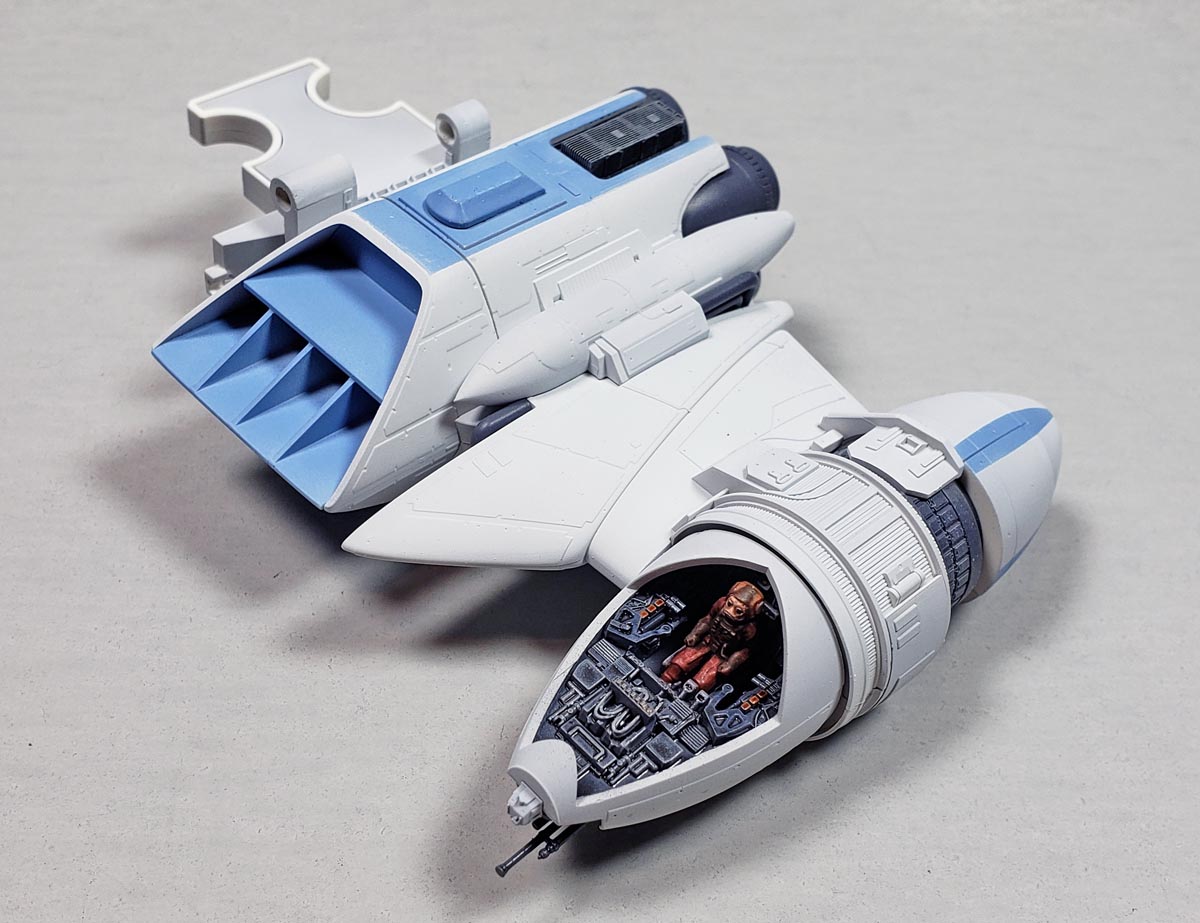
Having come off the amazingly detailed yet somewhat fiddly Y-Wing fighter from Bandai, I was happy to see the B-Wing was a little more conventional in breakdown, even if its shape was anything but. The basic assembly steps were logical – build the bulkier cockpit and engine unit in step one, add the wings in step two, and then step three featured all the other little bits.
When I’d built previous SW kits, I’d been able to paint the parts before assembly, and then just snap things up. The fit was good enough to make this possible. Examining the parts of the kit showed that such a procedure for this build would work well. Aside from a few easily masked areas that needed blue stripes, the color separation perfectly suited the “paint then assemble” method.
Planning For The Paint
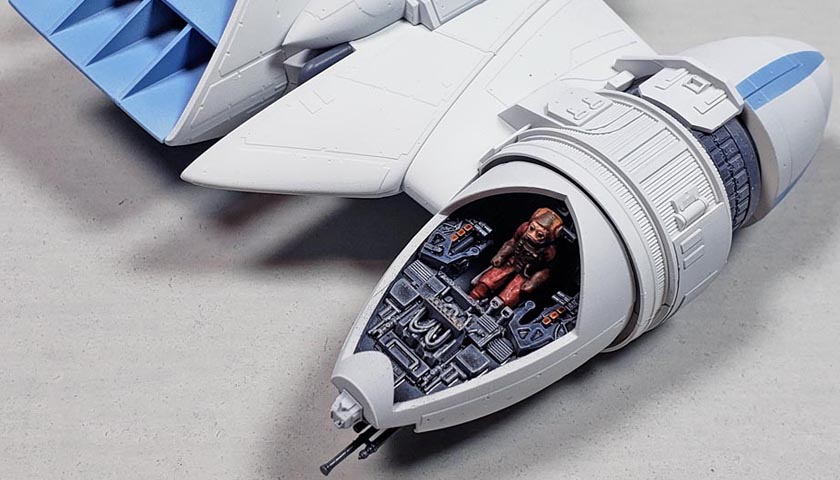
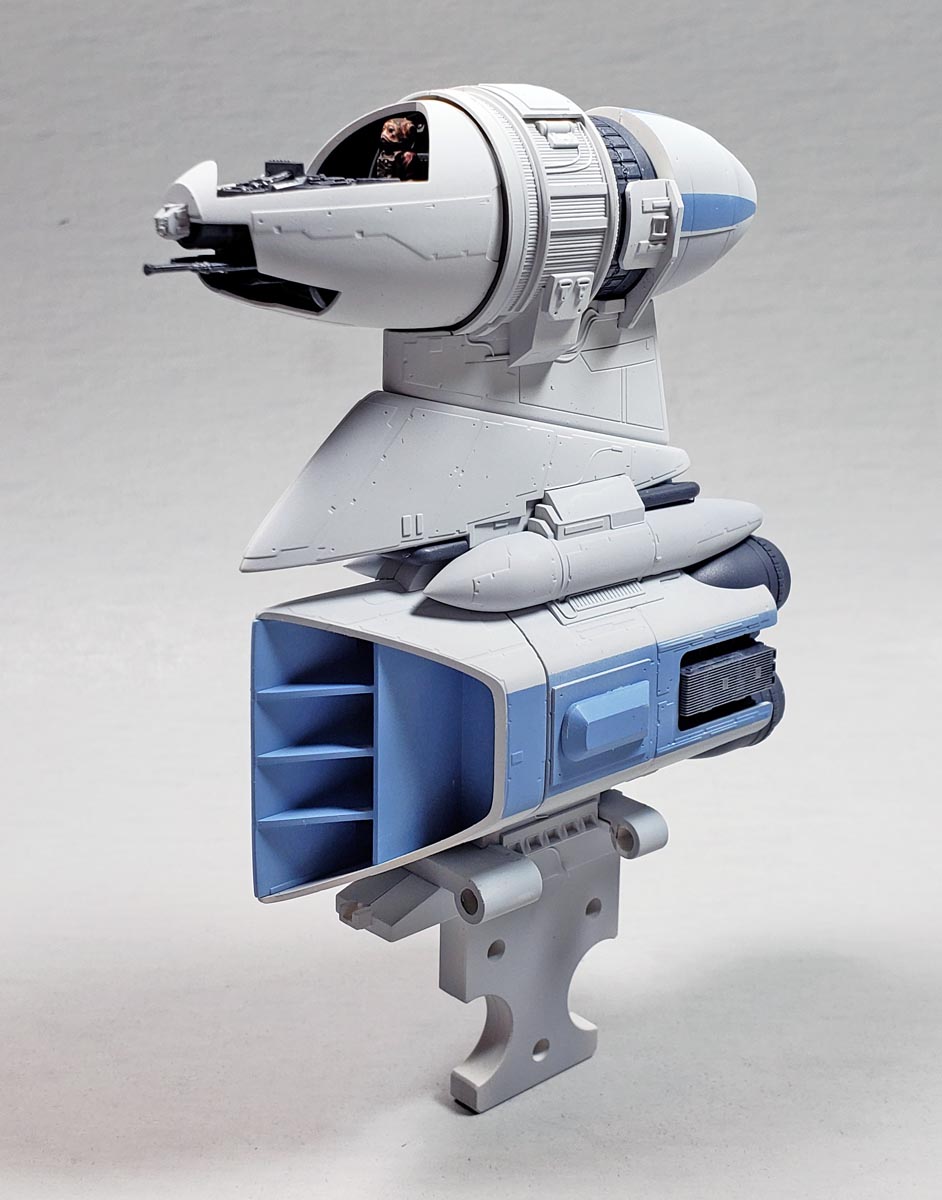
Because the kit is cast in multiple colors, I only needed to paint parts as suggested by the cast in plastic color. For the section that comprised Step 1 of the instructions – essentially the subassembly shown here – I broke things down into colors. In areas that same color joined to same color, and assembly would not hinder later painting, I went ahead and built those parts. I kept the forward and aft halves of the cockpit separate, simply to make painting easier.
For the priming, I opted to use multiple colors. Instead of just blasting one color of primer on everything, I chose colors that would work with the later paint layers.
For the blue colors, white primer would be used. This would give the later blue paint a bright, punchy look, which would help it from being so toned down once weathering was applied. Additionally, because some areas on the white parts would need to be masked for blue stripes, this would allow all blue parts to have a white undercoat, insuring they’d all have equal intensity.
The white areas, received a light gray primer, simply so that I could easily see where the later white paint was applied. And dark gray parts were primed with… dark gray. 🙂
Painting The B-Wing
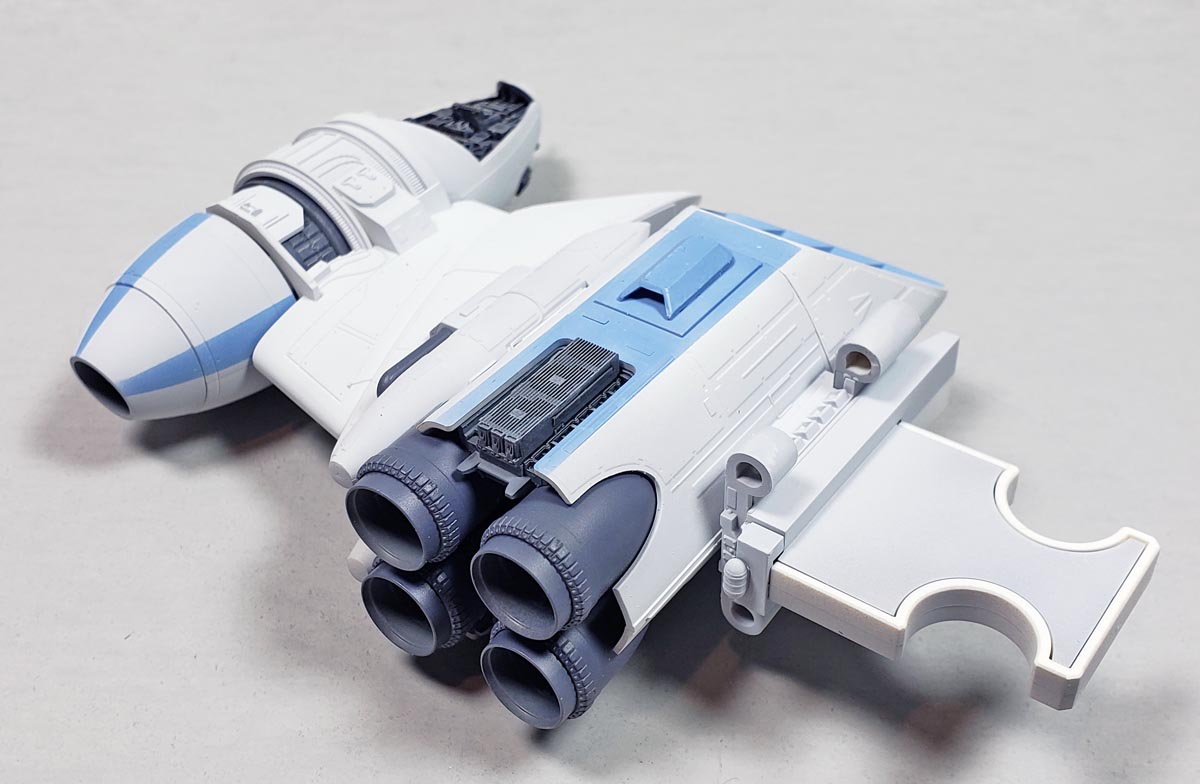
The kit plastic for the blue parts was a somewhat muted light blue, with perhaps just a touch of gray to desaturate it. I opted for Vallejo Model Air Azure Blue. This would provide a similar blue color, but with a bit more saturation to “hold its own” against later weathering. The gray parts were painted in Vallejo Mecha Color Phantom Gray, which is just a bit darker than neutral gray… with maybe just a hint of cool bluish to it. (Or it simply may be my lighting. 😉 )
For the white parts, I opted for a “homebrew” color. Painting anything pure white doesn’t leave any “tonal space” to add highlights. So I like to use a slightly grayish white. I start with a new bottle of Tamiya’s XF-2 Flat White. To that, I add a few drops of XF-55 Deck Tan, and XF-19 Sky Gray. I then do drop tests on a sheet of white paper with a toothpick, until I get to a color that looks white when viewed by itself, but placed next to pure white, shows an obvious difference. I even label the bottle “Spaceship White”. 🙂
All parts were painted in their respective base colors, airbrushed on through my Badger 105 Patriot.
Adding A Bit Of Detail
With the basic colors on, I could do a bit more assembly and painting.
For the cockpit parts, I started with a drybrush of Vallejo Sky Gray, to help the details stand out. This was followed with a heavy, somewhat sloppy coat of Citadel’s Nuln Oil Gloss. This did two things. First, it provided shade and depth for the recesses. Second, it glossed the sections so later shades would settle in nicely. I did a bit of drybrushing once more over this with Sky Gray, but allowed a few areas of shade to stand as-is.
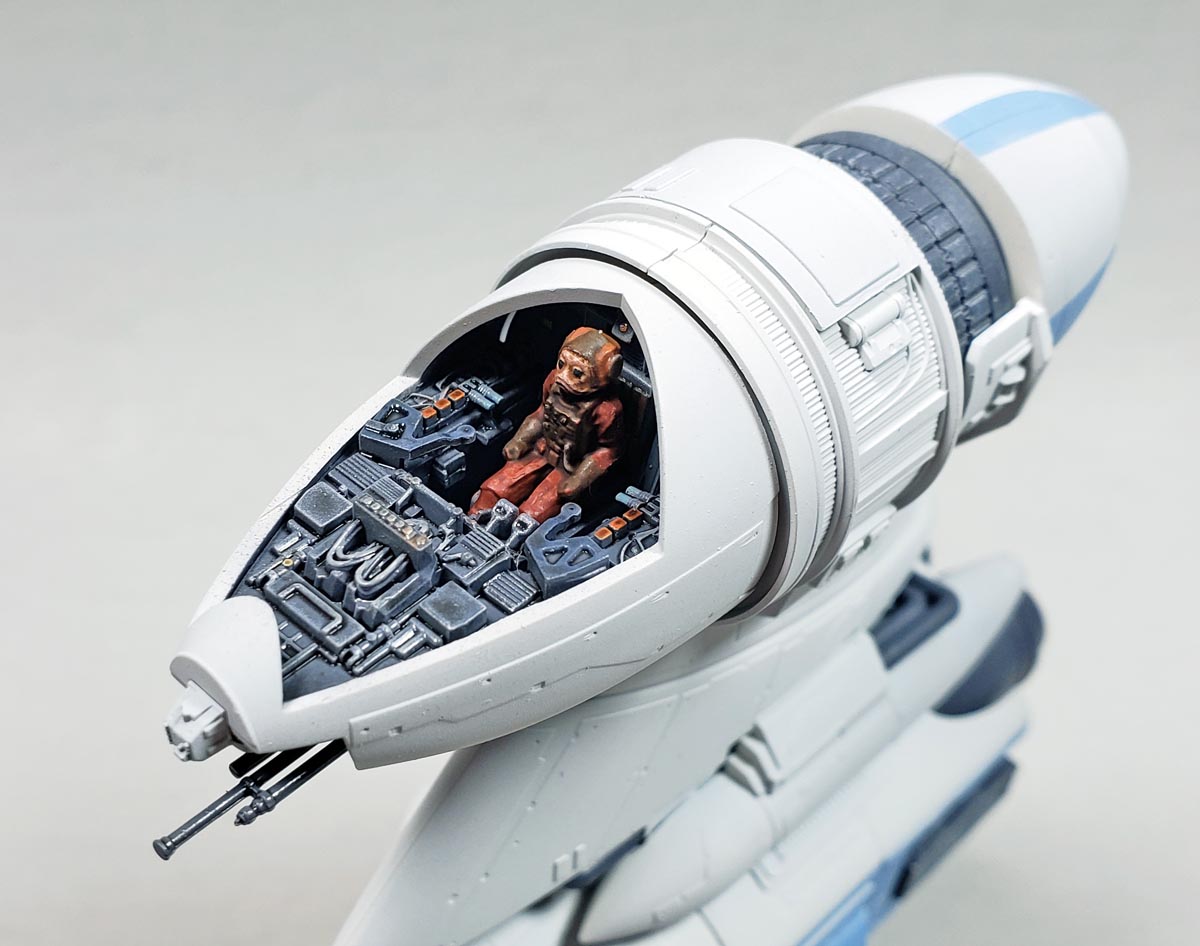
A few bits were then picked out with a #0 liner brush, again using Sky Gray. Other knobs and buttons were painted with various “fall” colors… yellows, oranges, and rust tones. Normally I paint scifi cockpits in bright primary or secondary colors, but for this one, I thought it would be fun to use some more muted tones in a tighter “band” of the color wheel.
A final shade of Nuln Oil Gloss was added to deepen the shadows. This was applied more precisely, targeting the very deepest recesses only. I find a #0 liner brush works very well for this.
Additional parts were assembled for the aft section of the cockpit module. This consisted of a gray inner core – a sort of turbo-looking device – surrounded by white outer body panels. Three blue stripes were needed there. That small section was assembled and masked. Additionally, blue stripes along the sides of the engine housing were masked. Both of these areas received a coat of the Azure Blue.
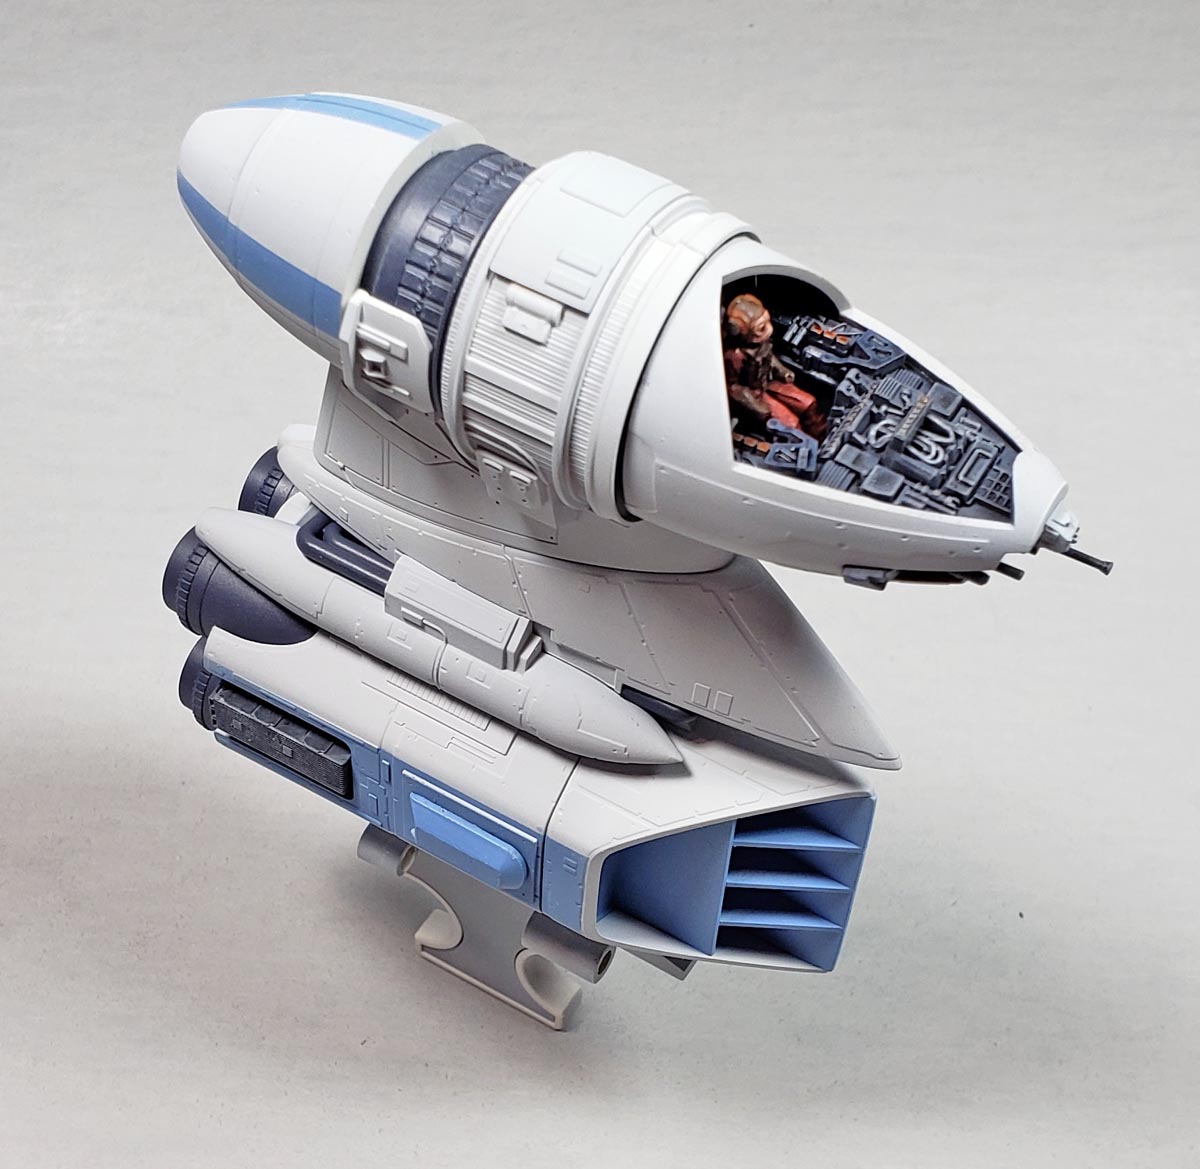
Meet Fast Eddie
The pilot that comes with the kit is one of the Star Wars “creatures”… a sort of odd-looking fish-faced fellow. The part is nicely cast, with a bit more sharpness to the detail than some of the other Bandai SW kits in this scale. After priming, he was base coated with a darker orange rust color. A white/pink mix was used for the face, and additional detail was painted in a red-brown color. A few tiny highlights were touched in, and a shade of Citadel’s Agrax Earthshade was then applied.
I opted for a “two foot” paint job. While photographing/videoing a build shows it right up close, I didn’t think at 1/72 scale I had the eyesight (or patience) to give this little guy the type of paint job that I would for larger scale models. Factoring in that the eventual buyer will likely view it from a foot or two away – and then only through the canopy – I decided on a simple base/shade approach.
In the end, I think he looks the part… whatever he is. 🙂
Snap It Up, I’ll Take It

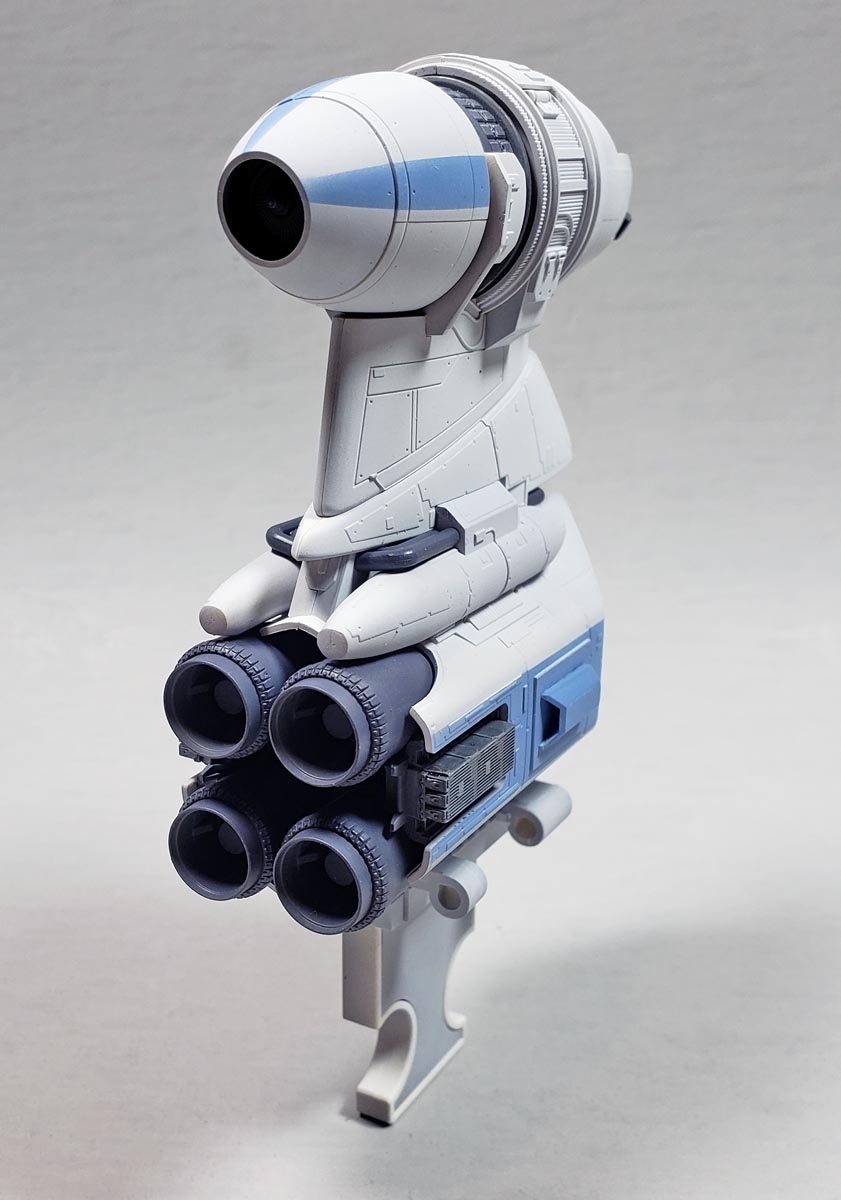
With the base painting for this section completed, all that was left to do was snap it all up. All parts went together nicely, of course. There is a bit of a seam along the top of the cockpit area that I may later go back and sort it out, but the rest can all be passed off easily as panel lines.
The cockpit section rotates within the ret of the sub-assembly, as per the lore from the SW universe. I may glue that down, however, as rotation does cause some paint scratching in a few areas.
I did not add the canopy at this stage. Because I may later decide to deal with the seams lines in that area, not having the canopy there will make that easier. Plus, I deliberately set it aside to make a video about masking canopies. 😉 (Check out my new Youtube channel! Please subscribe. 😉 )
With everything snapped up, I’m ready to move on to the next section, which is building the rest of the “airframe”. So far this kit has been a joy to build, and don’t anticipate a change in that for the next steps. I still think, from an ease of assembly view, that the A-Wing fighter was the best I’ve encountered. But this one certainly would have to rank second. In the “B” slot, so to speak… 😉
Imagine That
I’m looking forward to finishing this B-Wing fighter, but for more than just the modeling side of things. Having watched it on-screen over the years, I’ve never had a real chance to explore its shape and design features. Being able to hold the model in my hands, to really see the flow of it, will fill in those gaps that were simply brief flashes of celluloid previously.
And of course, I will be flying it around my Mancave a bit.
Who would have imagined? 😉
Leave a Reply