Fall had to be my favorite time as a kid. Though I did have to suffer the indignity of returning to school, cooler weather was a bonus. October brought candy, November brought turkey and pie, and December brought… well, all of the aforementioned, plus presents.
A ritual of fall was raking leaves, of course. Huge piles of pine straw and leaves grew in each yard in the neighborhood. Because we had many, many pines and other trees, our piles were especially large. Which meant they were perfect for taking running dives straight into them.
Visiting my grandma’s house, there were even more piles of leaves, and the added bonus of my cousins being there. We’d jump into the leaves, crawl through them, build forts inside the piles, chase each other around trying to stuff them down shirts… it was amazing how much fun could be had with the leaves and straw.
Eventually the sun would set, and an uncle or two would come out to supervise a bonfire. Hot dogs and marshmallows would be roasted on the ends of sticks, and we’d sit long into the evening laughing and joking, warmed by the fire and the family.
Time For A Re-Do
I’d originally built this kit in its Sniper II incarnation back in late 2017. It was my first Master Grade kit, and only my second Gunpla. To say I was blown away by that kit is an understatement.
Still, as I have built more Gunpla over the last year, the urge grew to do that kit again. When I’d done it the first time, happy as I was with it, the whole process was new. Not the model building, of course. Rather, adjusting to the particulars that a Gunpla build requires. It’s just a model, in a sense, yet its form and flow differ from where my past experience was – aircraft.
When this GM Command Colony Type popped up on the nets of the interweb at a reasonable price, I thought it would be a perfect time to do it again. Of course, I did plan to use different colors. As much as I liked that Sniper II scheme, something different was in order.
A Different Frame Approach
On the Sniper II, I’d dutifully placed each and every part on a pterodactyl clip or cocktail stick, whichever worked. Each part was carefully primed, painted fully, then slightly weathered. Only then did I assemble it. Suffice to say, it was a laborious process.
With a few kits now under my belt, I went straight to assembly on this GM Command. Each frame subcomponent was built up as fully as possible, leaving things off only where it required later armor parts. The torso had a few sub-assemblies, as did the arms. The legs were able to be almost fully built up, though the feet had to remain in pieces (mostly). Still, by building the components up ahead of time, I was able to prime things much faster. All was coated with Badger’s Black Stynylrez primer.
As I was planning for the suit to be a lighter color, I wanted the frame to stay somewhat dark. And because this was a grunt suit – and I intended to weather it heavily – I didn’t want a lot of “bling”. My first inclination was to paint it all a German -style gray. However, I thought about it a bit, and opted instead to apply a different approach to how I normally do gray.
In general, I either paint a frame gray, or drybrush it silver. I’m not sure why I’ve done it that way, it’s simply where I’ve arrived. I thought I’d try a slight shift… drybrush the gray on to the black. It’s certainly no radical change – just a color swap – but I hoped it would give it a nice worn yet mass-produced type look.
I opted for Tamiya XF-53 Neutral Gray, primarily because I could not find my bottle of German Gray. 🙂 Using a wide, flat brush, I began by lightly drybrushing the raised edges. I wanted to make the armor look worn, but I also thought it might look nice to give it a bit of a patchy appearance. I’ll leave it to the reader to decide if it’s black worn down to gray, or gray worn down to black.
I gave all the sections a light pass of the neutral gray, and then examined the parts and a few photos on the box of the finished model. In areas where the armor parts would actually be seen, I added a bit more drybrushing.
Normally at this stage I’d begin painting all the little details on the inner frame. Pistons, raised edges, exposed wiring – all of it would get some form of color. Then, I’d go through a process of shading (Citadel Nuln Oil!), adding more detail, and so forth. However… a year on and 15 Gunpla later, I opted for a simpler approach.
I set the inner frame aside and began mounting all of the armor on my clippy sticks.
My reasoning was simple. It takes a lot of time to paint all that detail, shade it, repaint parts that need touch up, and get it all prepared. Especially given that 90% of it will be hidden away behind armor. And with Christmas fast approaching, and having to do “double duty” building and writing so I can get a week off (and still have something on the site! 😉 ), speed was of the essence. So by leaving the frame “semi-finished” at this stage, I could paint the armor, add it on, and later simply paint, shade, and weather the exposed frame parts. Having experimented with this technique on a few HG builds, I knew it would work OK.
Picking A Color
The kit comes in some very, very exciting colors – light tan and dark brown. While I liked the concept of a “desert” scheme (though to be in canon it’s more properly a “floating space colony” scheme…), just those two colors were a bit underwhelming.
I began to play with variations on schemes, using a line image snagged from the net, and Photoshop. Though I tried various incarnations of colors, including a few radical ones, nothing seemed to fit.
As I often do when I get frustrated about some aspect of a build, I walked away from the bench, and just sat and thought about other things. As I was letting my mind wander (scary a concept as that is 😉 ), I looked up on my shelf at an Airfix 1/24th Spitfire Mk. Vb I’d built quite a few years ago. It was in the RAF Desert Air Force scheme – dark earth and middlestone.
I had my colors.
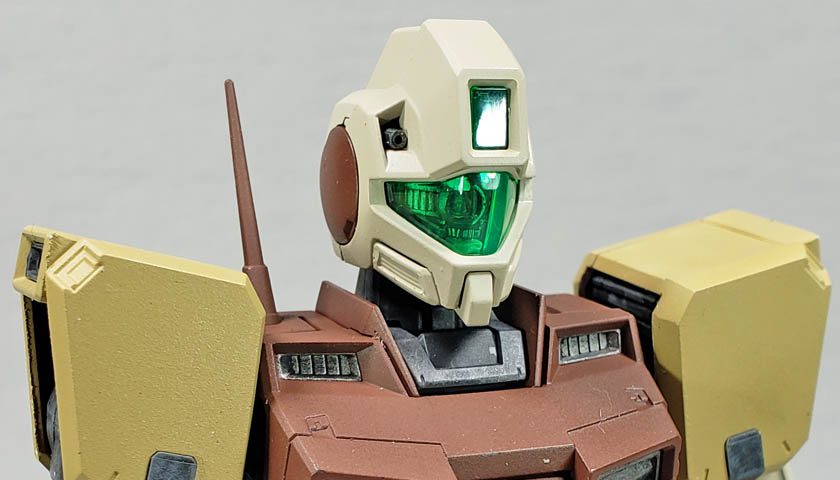
To avoid simply swapping tan/dark brown for the desert scheme, I added in a third color, a very light tan. Using the pattern I’ve tried on a few recent Gunpla, I opted to paint the “calf” and shoulder armor in the mid color of middlestone. Grabbing the color photo of the model in the instructions and a pen, I mapped out what color would go where so I’d remember what to do.
Blasting The Paint On
I used a mix of Tamiya White and Deck Tan for the lighter color, in a ratio of about 2 parts white to one part deck tan. (I think… 😀 ) I’d deliberately primed the armor in a light gray (Badger Stynylrez White and Gray mixed) so that I would not have to fight very dark primer. I could have chosen white, but that would have resulted in a far brighter appearance than I wanted, or extra time covering it over. By priming in a light gray, I could retain the color I liked, but keep it a bit desaturated.
The “middlestone” type color was applied using Tamiya’s XF-60 Flat Dark Yellow. While certainly not a good match for proper middlestone, I wasn’t really trying to duplicate those DAF colors, but rather do as so many movies claim… “inspired by actual events.” 🙂
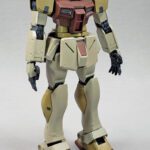
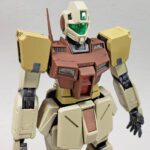
That color was applied to the calf armor, shoulder, some of the waist and torso, and the upper sections of the feet. I considered also painting the skirt armor in this way, but a quick mockup in Photoshop revealed it looked horrible, almost as if the mobile suit had on a tutu. I enjoy the ballet as much as the next fella (meaning I fake it when my wife makes me go), but I was not going for a Gunpla heading to an audition of The Nutcracker. This was going to be a right proper war machine stompy robot thingy!
For the darker color, I’d originally planned on using XF-72 Brown (JGSDF), which is a close approximation of the Dark Earth the RAF used. However, I thought a bit of a reddish-brown might look more appropriate with the other colors. I sat and stared at both XF-9 Hull Red, and XF-64 Red Brown, peering at the bottom of the bottles. I decided to go with the latter, as it was more brown than red, which looked good to my eye.The torso, lower feet, and “earmuffs” were painted this color.
A final splash of red – mandatory in Gunpla – was added in the traditional “shoot here” torso location using Vallejo Mecha Color Dark Red.
Putting It All Together
The good and bad part of doing a color scheme this way is you can’t really see how well it works together until it’s fully assembled. No amount of Photoshop or paper planning can fully replicate how it will all appear as a whole.
Starting with the torso, I began putting together the suit. If you’ve not built Gunpla, you’re missing out on a treat. This part of any assembly takes me back to those days sitting in my room playing with Lego. Snap, snap, snap, click, click, click. The degree of satisfaction I get from something so simple is hard to describe. Simple minds, simple pleasures. 😉
As the various sections came together, I began to smile. I really, really, really liked not only these color choices, but also the way they “mapped” out on the suit. Picking colors is one thing, but getting them distributed in a pleasing and appropriate manner is another. I’ve had more than a few stops and starts in that regard. This one though hit the target I had in my mind.
With everything assembled, it looked “all the part”, to quote a dear friend in the UK.
Missing The Leaves
As I sat holding the mobile suit, looking over the assembled GM Command, now waiting on its decals and weathering, it occurred to me that the colors were not just reminiscent of the Desert Air Force. They spoke of the fall, leaves, warm plaid shirts, and toasty marshmallows on sticks. As it is apt to do, my mind wandered through the memories, each recollection seemingly opening the door on another one.
I actually began to feel a bit melancholy. My grandparents are long passed away, with new owners in the home. The trees were cut down, and I suppose the piles of leaves are no more. The cousins have their own families, and are scattered all over. And I doubt the kids these days would appreciate the simple joys of brown and red and yellow leaves. (Or perhaps they would… maybe there’s hope…)
However, I have my memories, foggy as they may be some time. And though I can’t get a redo on my childhood leaf adventures, I can have another go at a Gunpla. And the simple act of choosing a color scheme opened up a flood of pleasantry, locked away for decades.
Fun gained. The simple joys of the hobby.
As my mind meandered, my wife called to me. A chocolate chip pecan pie was ready, and coffee. With whipped cream on top. Looking outside, I had leaves of my own that needed raking. And we had a nice fire in the fireplace.
I set the Gundam aside. He could wait on the start of the weathering.
Family called.


Leave a Reply