
For better or for worse, I am a high volume builder. I can’t say that I ever consciously set out to focus on building a lot of models. It just seemed to happen. I’d build a model, set it aside, and build another. Before long there would be two going at a time, and then three. It’s not uncommon now for me to have as many as ten projects in some state of completion.
Of course, having multiple models in the works at all times does help me write content for this blog. And as I realize more and more that my hobby is not so much modeling as it is writing about the hobby of modeling, that’s not a bad thing.
Still, I try to make sure that the work I do has some acceptable level of quality to it. Thus balancing speed with reasonable results is critical. Over the years, as I learn how pro modelers work, I’ve tried to steal replicate their methods, but refine them in a way to make them easily repeatable, and very quick.
Here’s a method I often employ with aircraft exhausts, based on methods I’ve seen in books, blogs, and videos over the years. It’s not particularly ground-breaking, or innovative, really. But it is fast… from start to finish this process took 18 minutes, most of which was drying time.
Now, you may be looking at the final result and thinking “yeah, and it looks like it took 18 minutes.” Though I would ask for some allowances for poor photography, I will admit there are better ways of doing this to achieve a better result. But quite often they take longer.
And because I have a tendency to forget exhausts until the very end – when I usually have a final build slotted for publishing, a fast and easy method is called for. So for what it’s worth, here are seven quick steps to reasonably decent looking exhausts.
(The products shown are what I use… you of course can choose your favorites!)
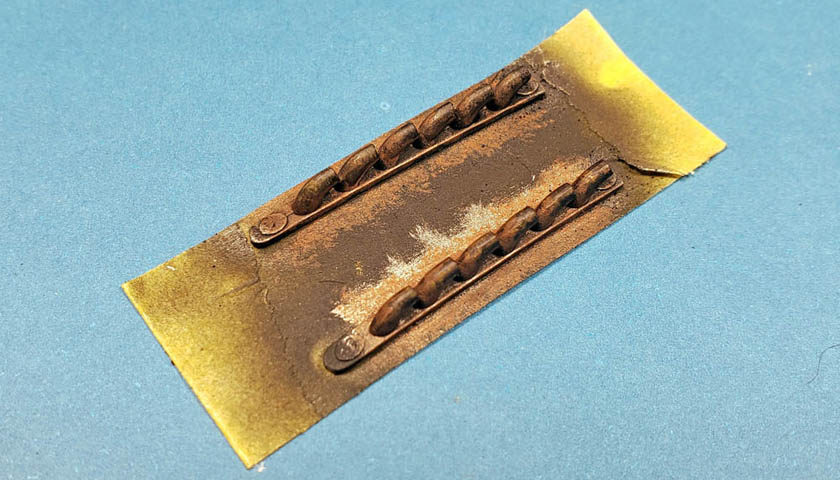
Step 1: Prime
I primed the exhausts with black primer. You can use primer, or paint. The key is to start with a very dark color to help add some shadows. (These had been primed early on with the rest of the kit parts.)
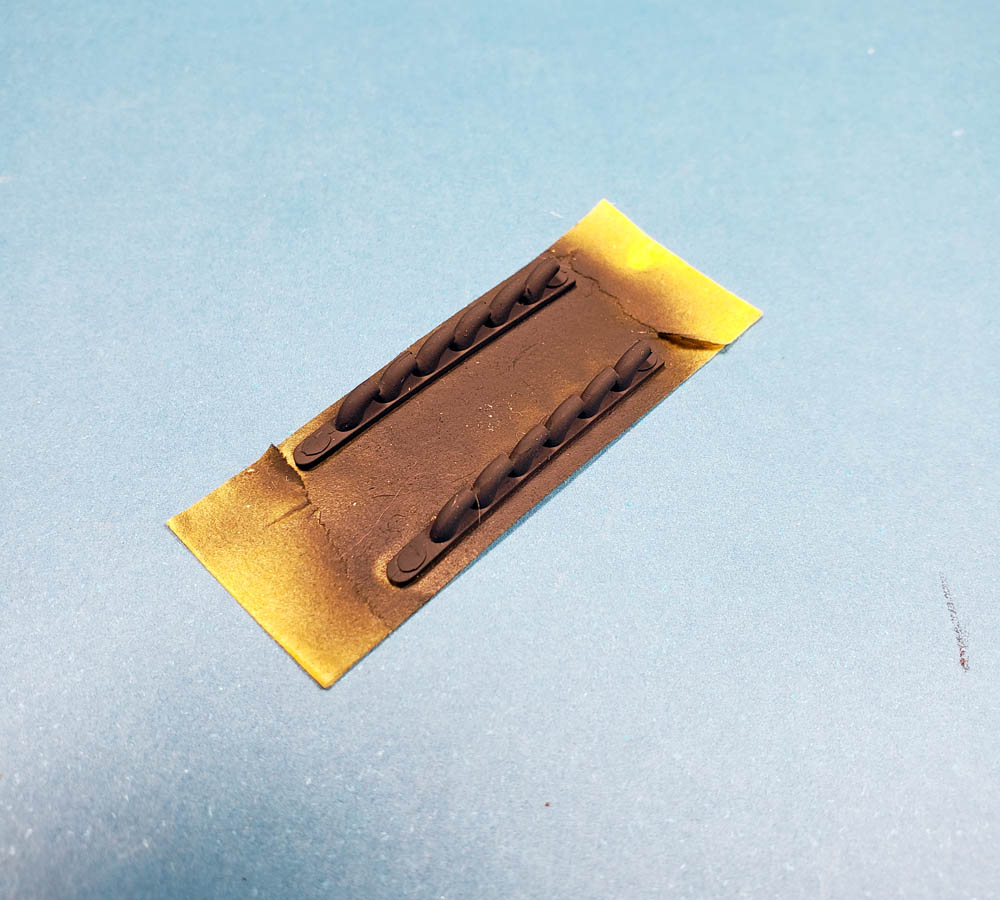
Step 2: Add Metal
A heavy drybrush of a darker silver was applied. Normally when I drybrush, the brush is wiped almost clean before application. I wanted a bit more color applied, so I left it just a bit “wetter” than typical for drybrushing. If you aren’t sure how much to do, opt for traditional drybrushing, and just build the color up to a suitable level. Focus on the tops of the parts – let the dark color underneath create shadows. Drying time before next step: ~ 1 minute
Step 3: Rust Wars
Using a medium rust color – not too dark, not too light – I lightly drybrushed rust color over the exhausts. Here I tried to keep it a bit lighter, making sure to allow the previous layers to still show. As with the silver, if you’re not sure how much to add, build it up slowly. Drying time before next step: ~ 2 minutes
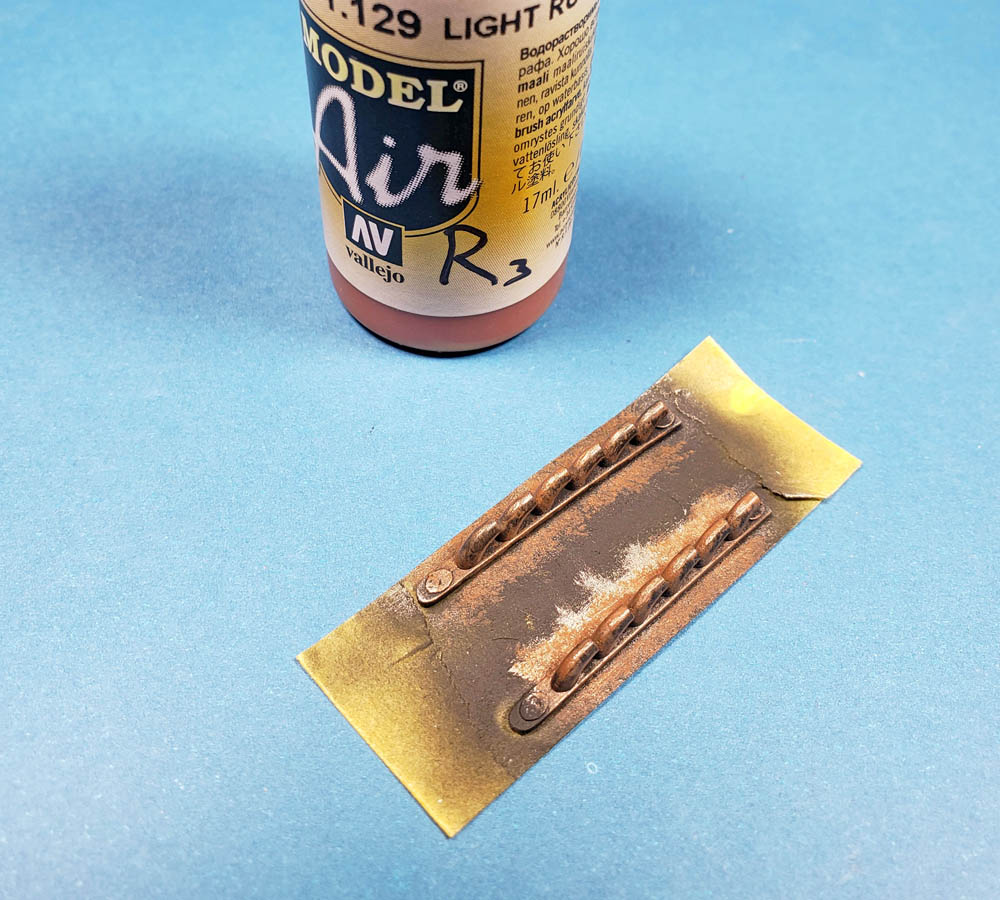
Step 4: The Rust Strikes Back
I followed up the medium rust color with a lighter rust color. For this step, I allowed the brush to be slightly wetter than for a typical drybrush, but only by a whisker. And I applied it in a gentle stippling motion, basically bouncing the brush up and down rather than wiping side to side. Again – build it up to your tastes. The idea is to get some lighter rust contrasts and streaks. Drying time before next step: ~ 2 minutes

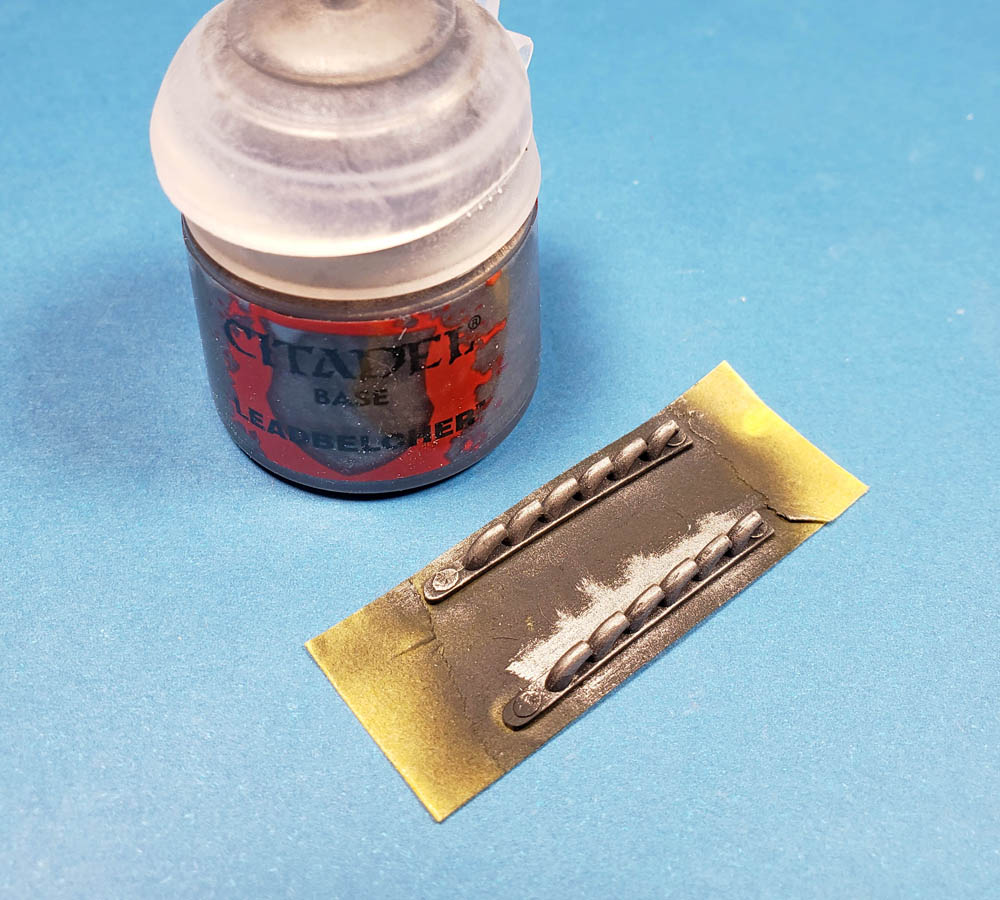
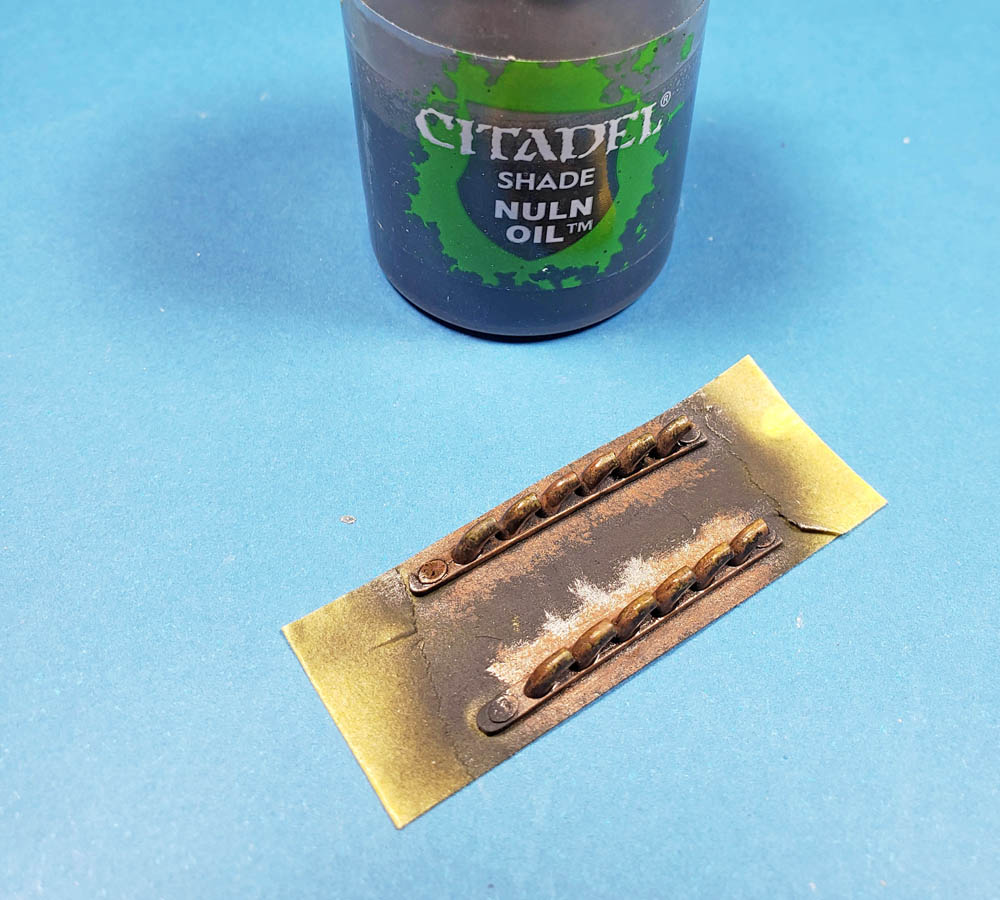
Step 5: Dirty It Up A Bit
A fairly heavy wash/shade was applied next. I used Citadel’s Nuln Oil, but any dark acrylic wash, or even thinned paint, will work. I literally slopped it on – just a big brush full slathered on. Drying time before next step: ~ 5 minutes
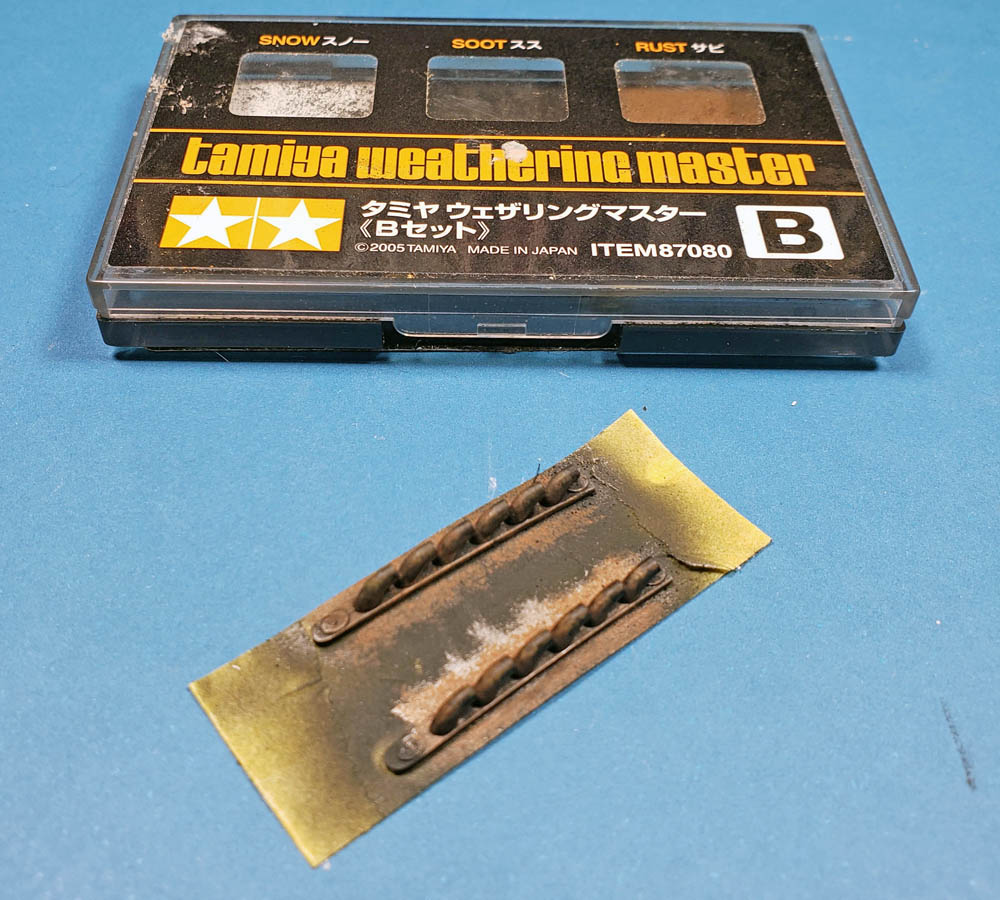
Step 6: Smoke ‘Em If Ya Got ‘Em
As a final step, I added some exhaust staining to the ends of each exhaust using weathering powders. I could have also used a dark brown or black acrylic paint drybrushed on, but I just chose to go with powders. If you use powders, blow off any excess. If too much gets on areas you don’t want, stipple on some of the previous colors (you pick which one – experiment!) to mute it.
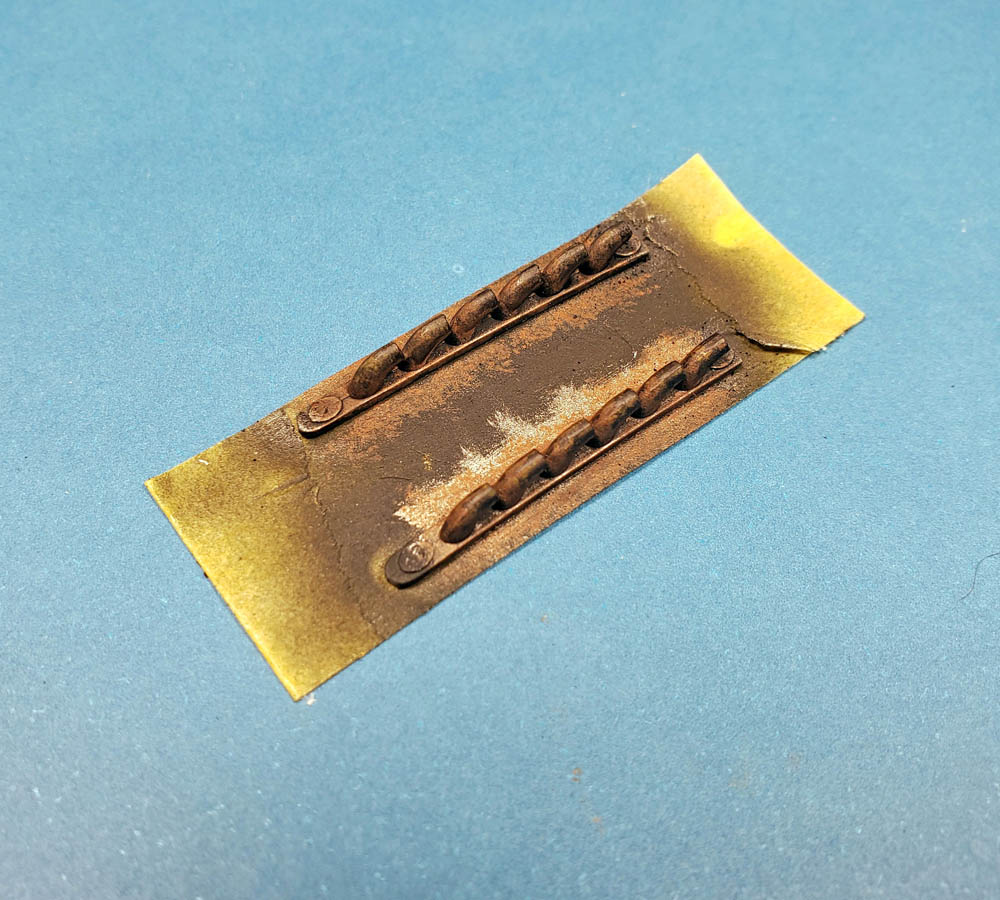
Step 7: There Is No Step 7
That’s it! You are done. Well… I am done! You are just reading about me being done. 🙂
As I’d mentioned in the intro, there are better ways to exhaust yourself painting exhausts. Careful brush application, use of more refined products, and simply taking more time are all great ways to approach the matter for stand-out results. But the focus of this method is (hopefully) a balance of quick speed with good results.
And this does not need to be confined to aircraft exhausts. Any metallic surface that goes through repeated extreme heat cycles can benefit from this technique. (Even gun barrels, with a few color changes.) Certainly add your own variations, and experiment with it.
As always, the key is to have fun with what you do – enjoy the hobby!
Leave a Reply