
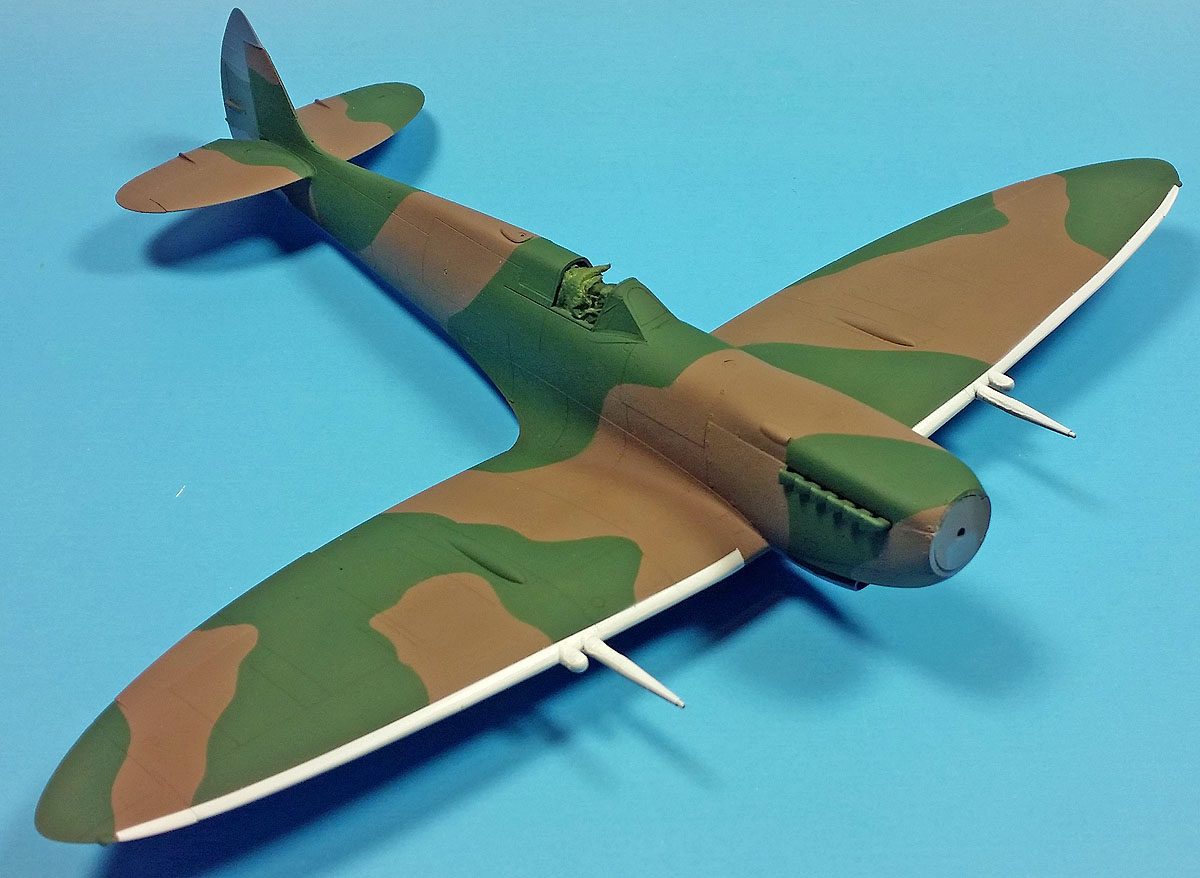
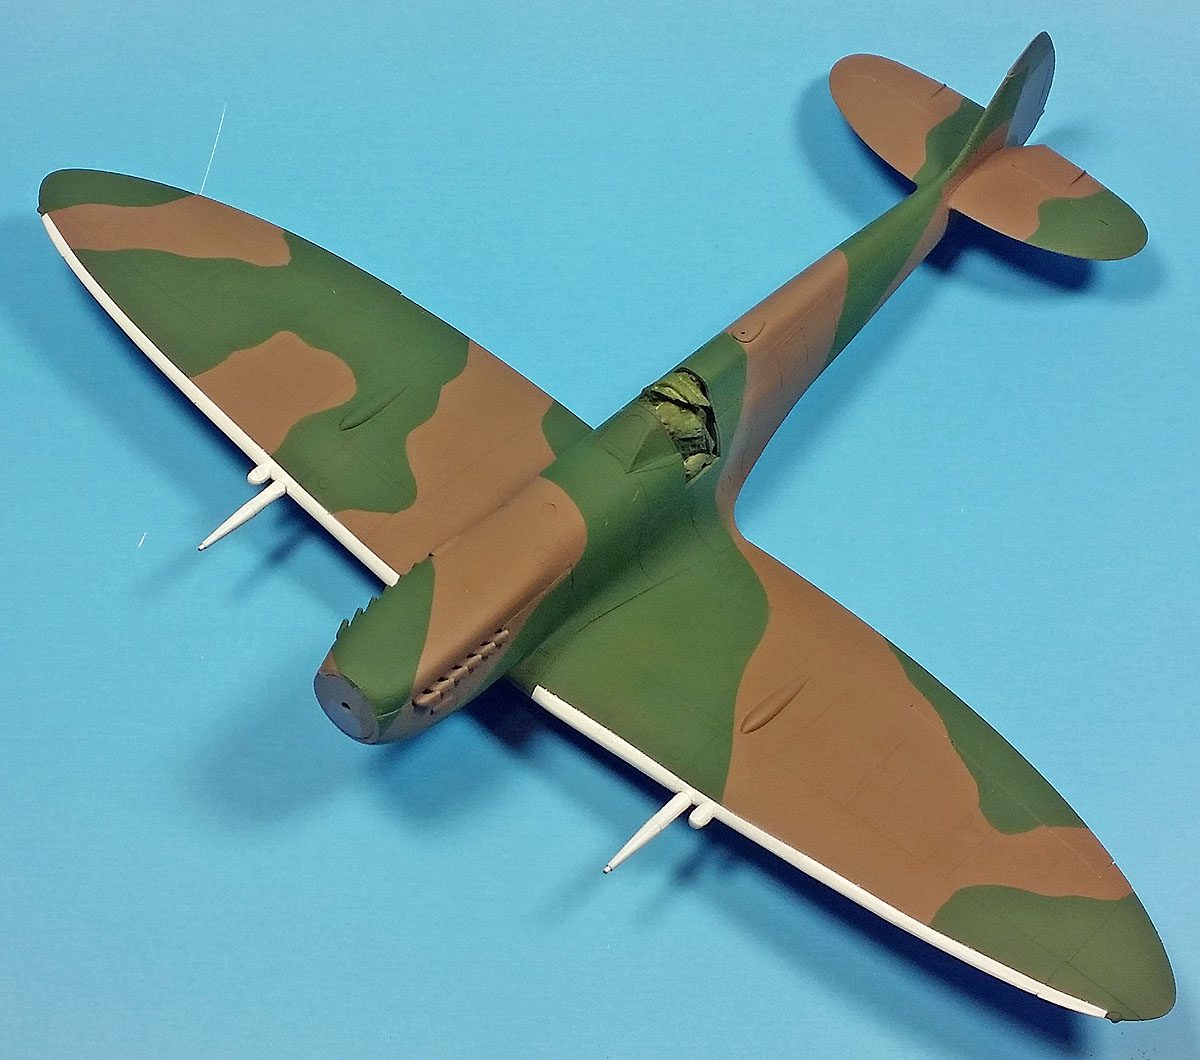
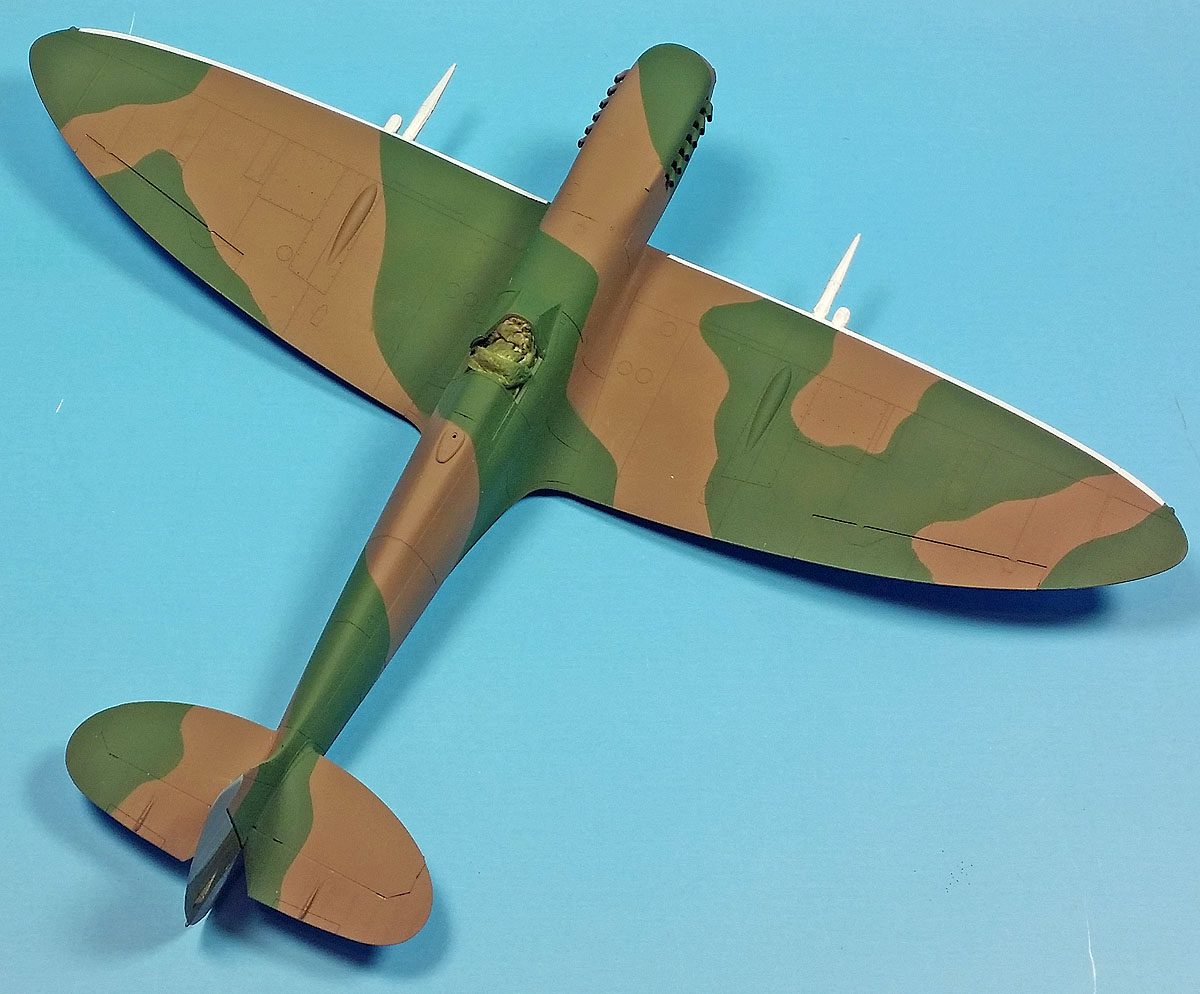
I’ve added the base paint layers to the Eduard 1/48 Spitfire Mk. VIII. If you’ve not built an Eduard 1/48 Spitfire, I’d highly recommend picking one up. While this particular kit is part of the dual combo “Aussie Eight” boxing, any of Eduard’s releases of this plastic will work. It is, in my estimation, one of the finest kits in the scale ever produced. (Despite my initial concerns when it was first released… I’ve grown to love it!)
The markings for this aircraft will be Clive Caldwell’s A58-484 Spitfire Mk. VIII. when he was CO of No. 80 Wing, depicted in March, 1945. The aircraft had originally been painted in MTO colors- azure blue undersides, and an upper camo scheme of middlestone (a yellowish light brown), and dark earth. For use in the Southwest Pacific, the middlestone was painted over with a local color, foliage green.
The instructions call for Gunze’s Foliage Green H302 (Aqueous)/C302 (Mr. Color), and Dark Earth H72/C369.
Full disclosure… I was not alive in March 1945 to supervise the color application to this particular Spitfire. (Sorry…) I know some will swear the color brands called for are spot on, others will say they’re not. The only one who truly knows, I suppose, is that guy in the nacho line at the IPMS-US Nationals with the stained t-shirt. Apart from him, or perhaps an actual, real paint chip or artifact that is well preserved, or an actual eyewitness, we’ll never really know. Ever. (Except Marty and the Doc…)
Yet many will pull their hair out trying to find the exact color match. I’d like to submit that such an endeavor may not really be beneficial, either to your model, your mental health, and certainly to the rest of us around you who have to listen to long diatribes about FS color.
Instead, I plan to go on a long diatribe about… err…. not FS color. Or something like that. 🙂
Great- How About The Paint You DID use?
Glad you asked.
I eyeballed the instructions, and a few photos, and then looked at my paint shelf. Spotting Vallejo Model Air Azure Blue (71.108), Dark Earth (71.029), and Tamiya Deep Green (XF-26), I decided that those colors met TLAR standard. “That Looks About Right”.
First, the model was primed with Badger’s Stynylrez Primer (gray), and then the azure blue was applied to the undersides, and those surfaces were masked off. As this particular aircraft had what appears to be a replacement rudder in ETO colors, that was painted in Tamiya XF-81 and XF-82, and then masked off.
Vallejo’s Dark Earth was then applied to the upper surfaces, out of the bottle, and after sufficient time drying, a long and tedious masking process began.
I really never try to get the pattern exactly right, again going for TLAR standard. A few years ago I was actually able to freehand the camo nicely, but my eyesight is not quite so good, and my hand no quite so steady. So I use a combination of Tamiya yellow tape, and the white curve tape. I have used blue tack to get a more “feathered” appearance, but I stopped doing that when I realized that later weathering steps tended to blur lines sufficiently in scale that I thought worrying about it earlier was not needed. So an hour and a half later… the upper surfaces were masked off.
Next, the Deep Green was applied, thinned 50/50 with Mr. Color Leveling Thinner. I find this has been the best performing thinner for my work using Tamiya acrylics. With that on the model, all the gobs of tape were removed.
One final step was to add the white leading edges to the wings, so more masking tape came out. Vallejo Mecha Color Off White (69.003) was applied to that area. And more masking tape went into the trash can.
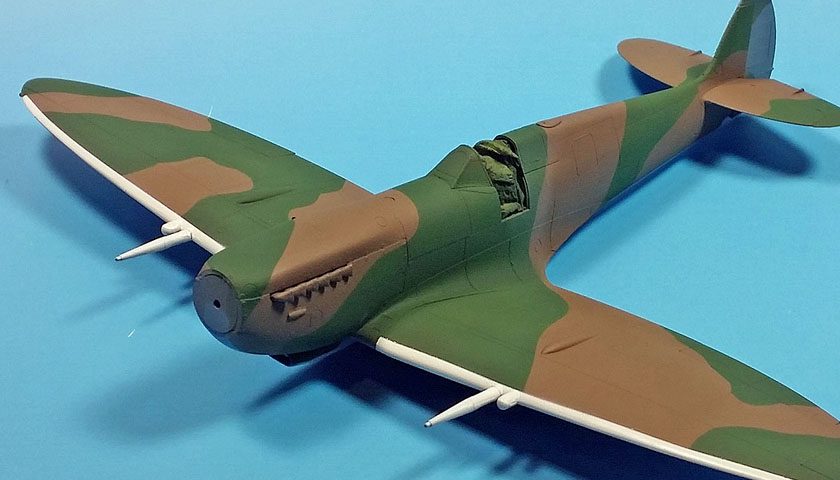
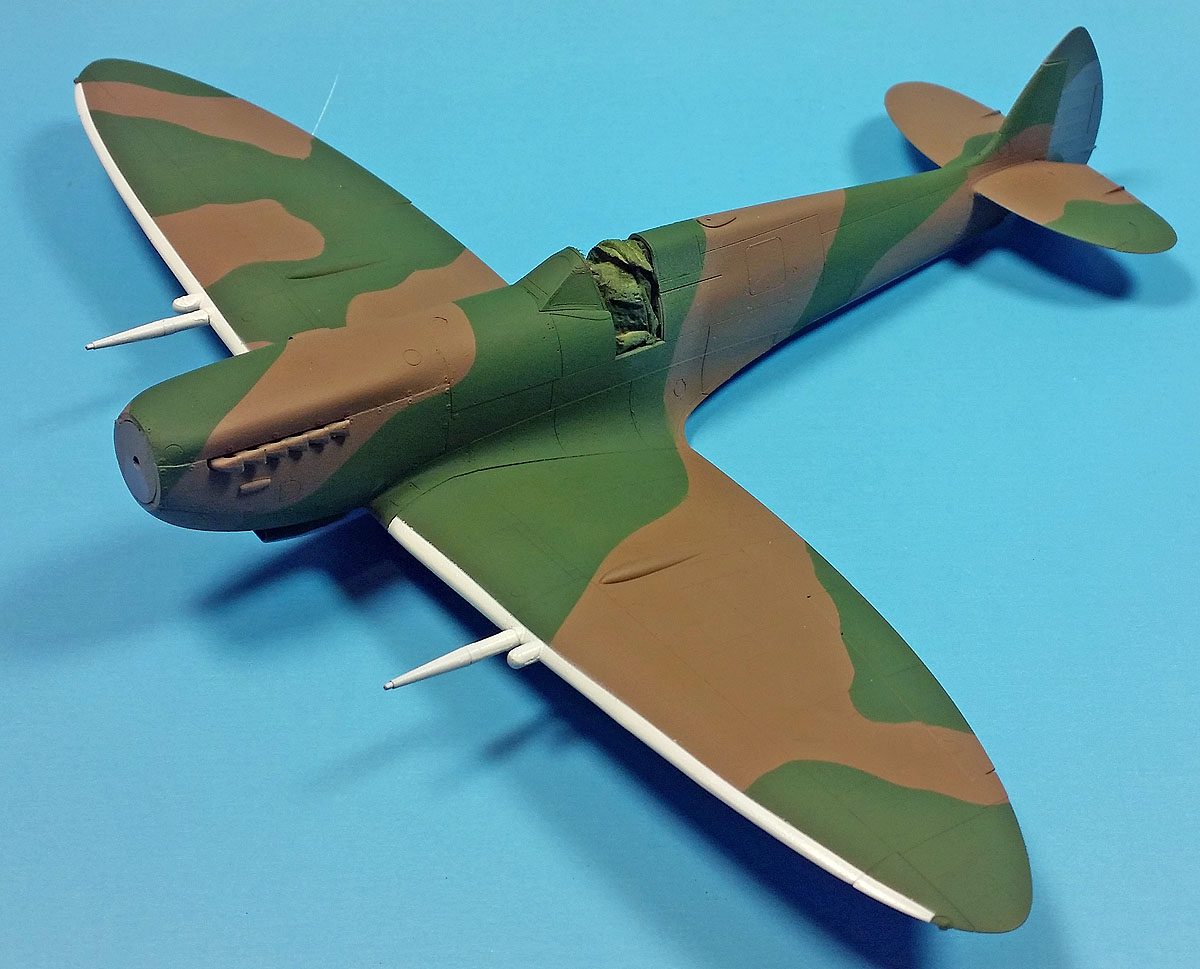
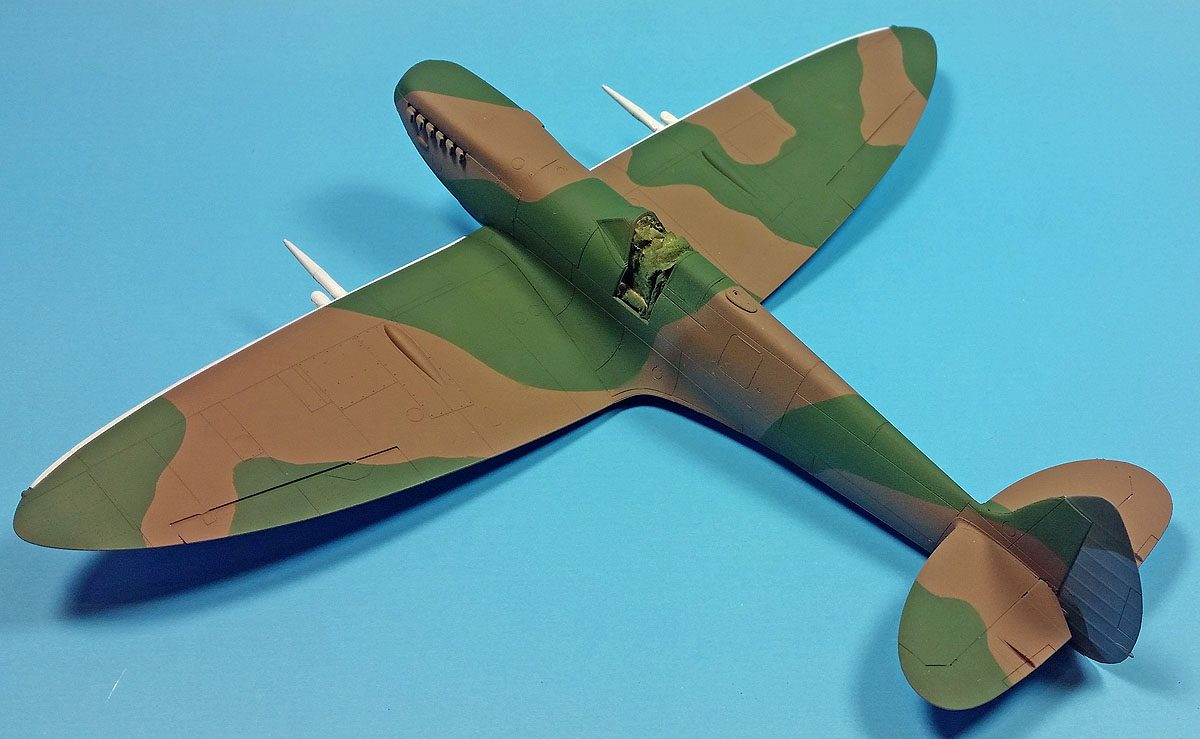
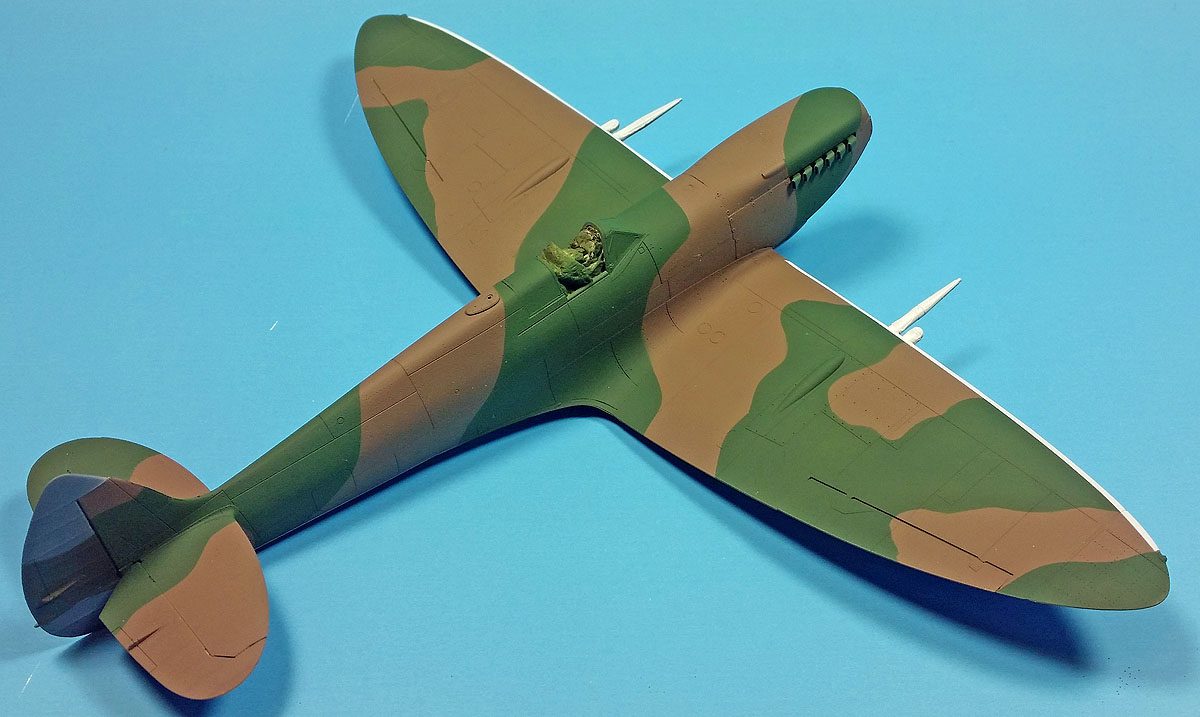
And thus you have the result shown in the photos.
So What About This Non-FS Color Rant
Again, glad you asked. 😉
Here’s the method behind my madness for why I don’t sweat being so absolutely orthodox in my color choices.
First, look at a real aircraft. Or a car, or tractor, or house, or anything painted, that sits outside and gets wet and bakes in the sun, and is exposed to the elements. That nice, perfect, factory specific color doesn’t last very long. Sure, your two year old Lexus may still be the shiny color as when you first purchased it. But come look at my 2001 Honda. If you open the door and look at the paint inside the door sill, there’s not a spot on the outer surface that matches it. Sun and rain, wind and bird poop, gravel and road grime- all have faded it, tinted it, discolored it, and generally abused it.
The same can be said for any wartime aircraft. While the paints were made to be durable, the focus was not on precision color matching or super durable paint, but rather on getting the airframe out the door and into the hands of the warrior who flew them. All the time knowing that the airframe’s life may be measured in weeks, at best months, before it was either destroyed, damaged beyond repair, or simply worn out and replaced.
So all the hand wringing about an absolute precise color match is, in an odd way, not accurate.
And aside from the real world evidence, let me outline my next steps in finishing and weathering this model:
- Apply various colors to the base to fade and introduce a more random, less monotone look. These colors will be lighter than the base, but related to the base. (Greens and browns)
- Hit it with the “dot filter” method of oil application
- Some paint chipping
- Gloss coat the whole thing, and apply decals
- Add further layers of fading and shading using not only lighter tones of the base colors, but also some post-shading, and some final fading with a dusty color to unite it all.
- Add various streaks of grime, oil, fuel, dirt, and mud.
- More paint chipping too, as the previous steps will have dulled much of the previous chipping down, so some areas will need to be brightened up to simulate more recent wear
- Any other nonsense I think will help
- A finally matt coat
Now- in all those steps, do you really think that the colors I started with will shine through? No more than they would on my old Honda.
Those very weathering steps seek to replicate (NOT duplicate- there is a difference) what happens to the real aircraft. And as I adhere to the Mick Foley Theory of Suspended Disbelief, in many cases I try to exaggerate reality to “fit” what the brain wants to see.
So if I’d have obsessed over the “true” FS colors (that I was not alive or there to actually see), it would matter little in the end. Because as long as you are reasonably close, the final result will look the part.
Yeah, But…
Certainly you can’t start with a color that is way off and expect to get a decent result. Yet I’d submit that most modelers would be surprised how far off you can be to make it look right.
A case in point… one of the Spitfire Mk. Is I’ve built was painted in Dark Earth and Dark Green. I used Tamiya XF-72, JGSDF Earth, for the Dark Earth. It’s close, but not exact. I built it, painted it, and weathered it. A friend, who is notorious for being a “color Nazi” complimented me on the “accuracy of the Dark Earth”, mentioning that few people take the time to really get the shade so precise.
I then dropped the bomb… it was the “wrong” color, straight out of the bottle. The sound of the gears grinding in his head as the clutch plate of cognitive dissonance took hold was monumental.
And quite fun.
Of course, if you like doing exhaustive color matching, do it. If you are building a cleaner, factory fresh model, then absolutely look for the right color. It’s your hobby- do it as you please.
But if you are like me, and simply get tired of hearing folks moan and groan over color accuracy, please know this…
It’s not that important.
For one, it’s a hobby. Second, if you weather your model with an eye towards how the process actually occurs in real life, you’ll quickly realize that “TLAR” at the start works just fine.
And finally, you’ll get to watch the guy in the IPMS-US Nationals nacho line spill his cheese dip and corn chips all down the front of his “FS or Die” shirt when you explain how you used the wrong color.
That in and of itself is worth it all. 🙂
Stay tuned for later installments of this build, as I plan to show a sort of “step-by-step” photo sequence of how it will come together.
(I just hope it all works out! 😀 )
Leave a Reply