
Every now and again, I pick up a kit for reasons that really elude me, and I fully expect to end up regretting the decision. Yet, quite often in those cases, I don’t regret it at all, and actually end up enjoying the kit. (Though sometimes not… Special Hobby and your Boomerang…)
I’d spotted this kit on the shelves of my local Hobby Lobby, and despite the fact that it clearly had a warning label on the box (see sidebar), I kept going back, week after week, to take a look at it. It just looked cool. Really cool. And I’ve never even played Halo. Finally, in a fit of insanity, I bought it.
Once the kit was home, I started opening the box, just waiting for the regret to come flooding in.
But the regret never happened.
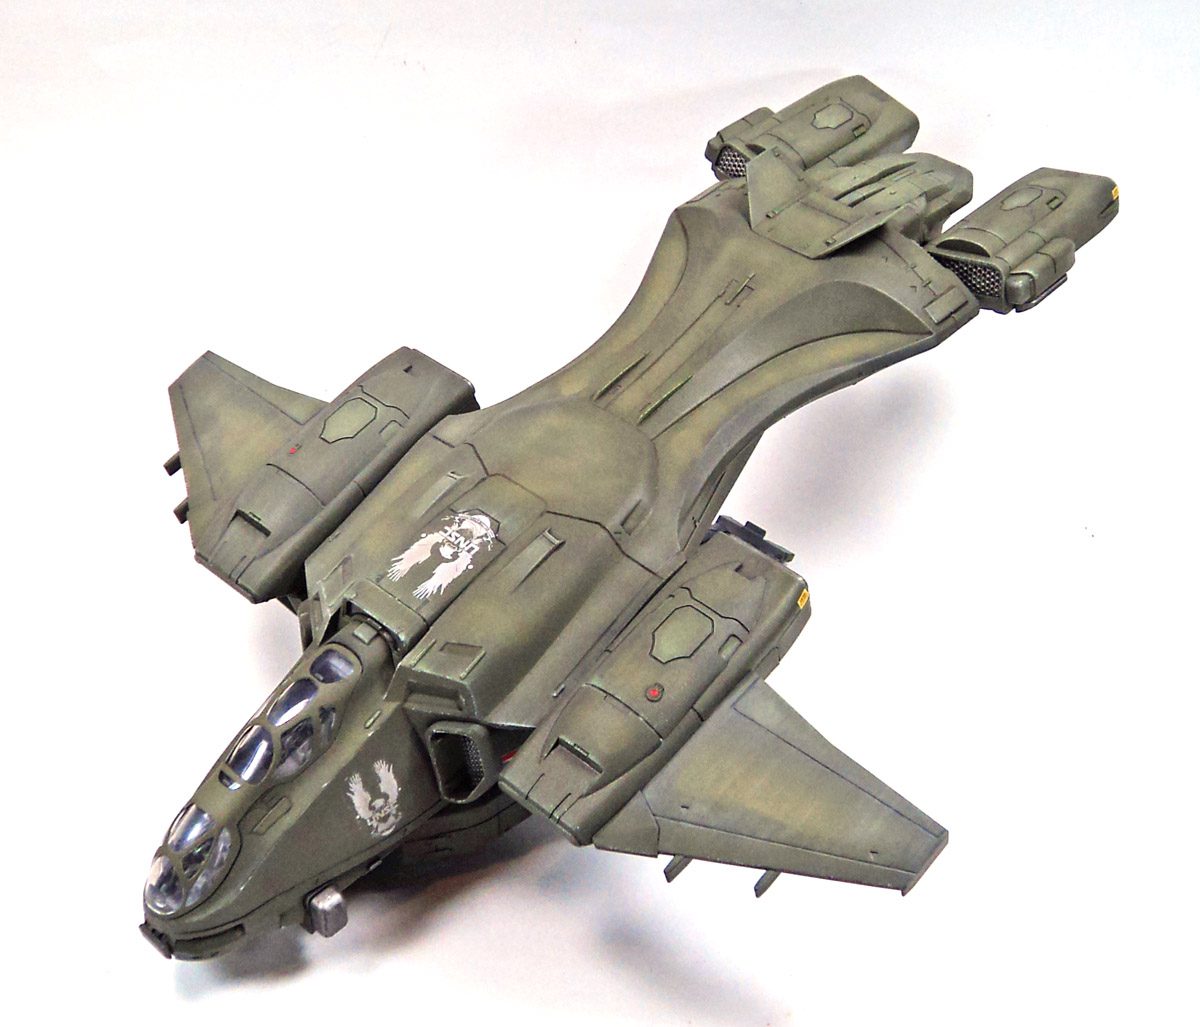
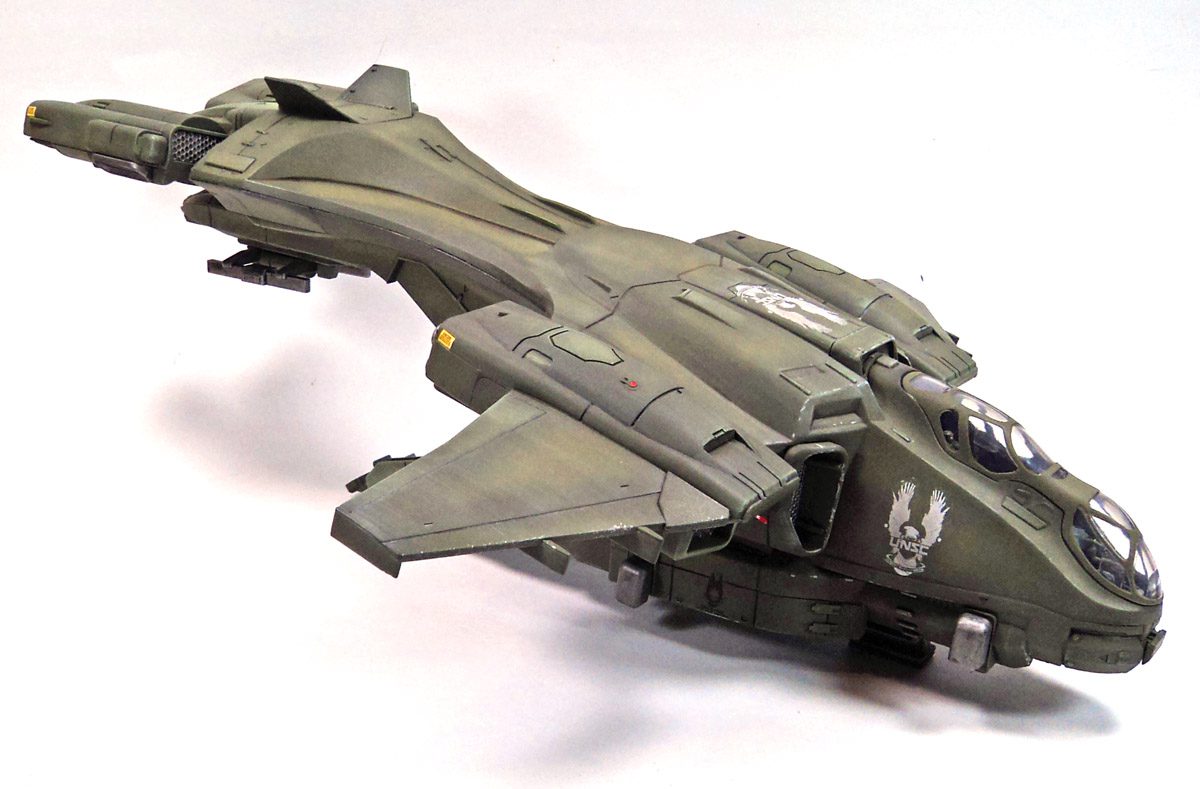
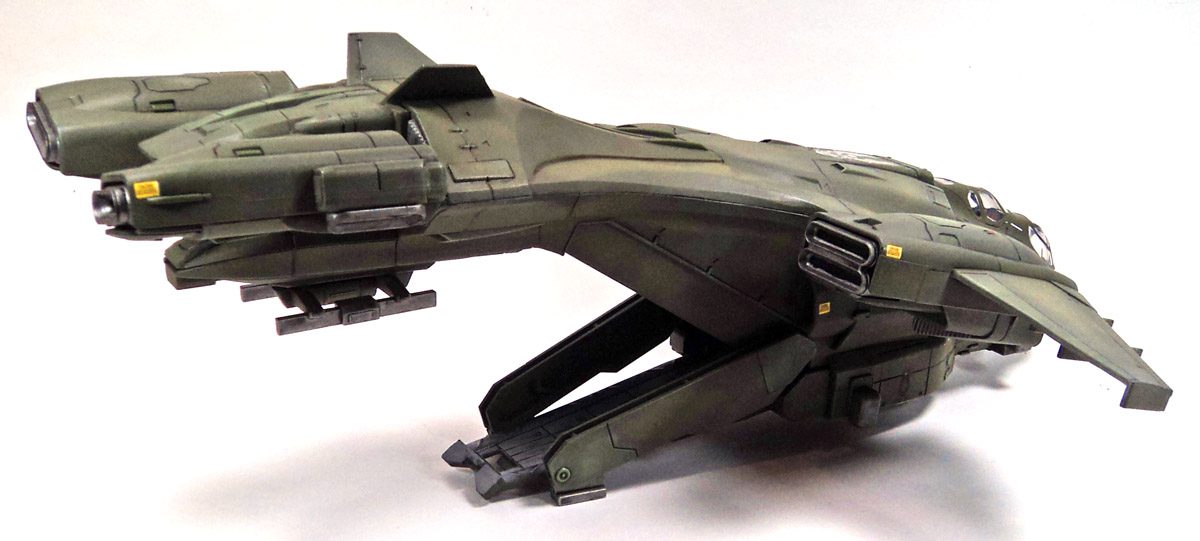
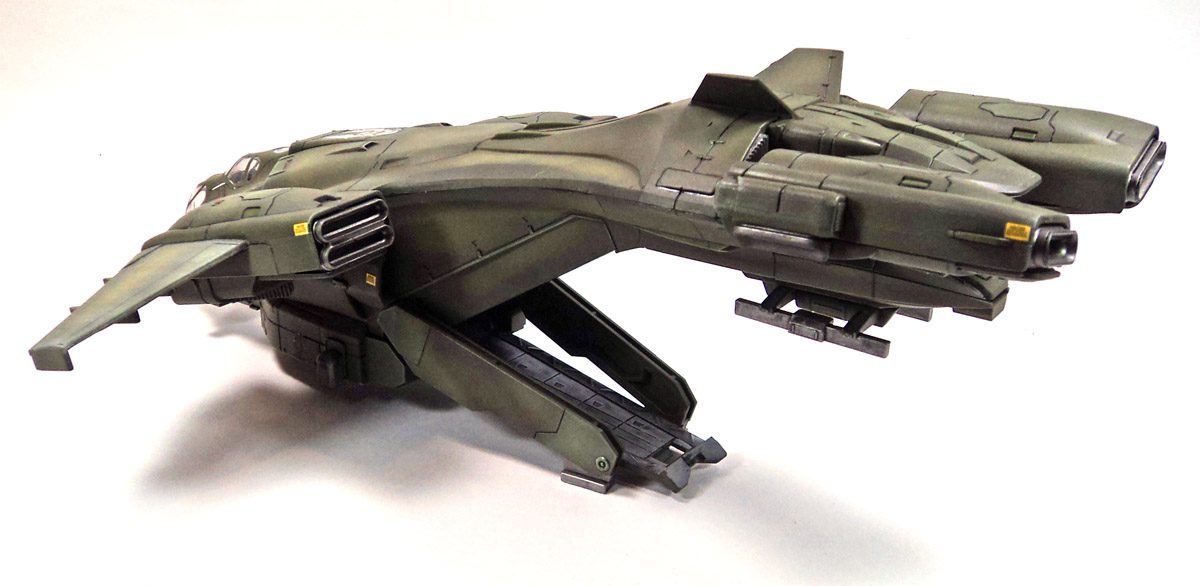
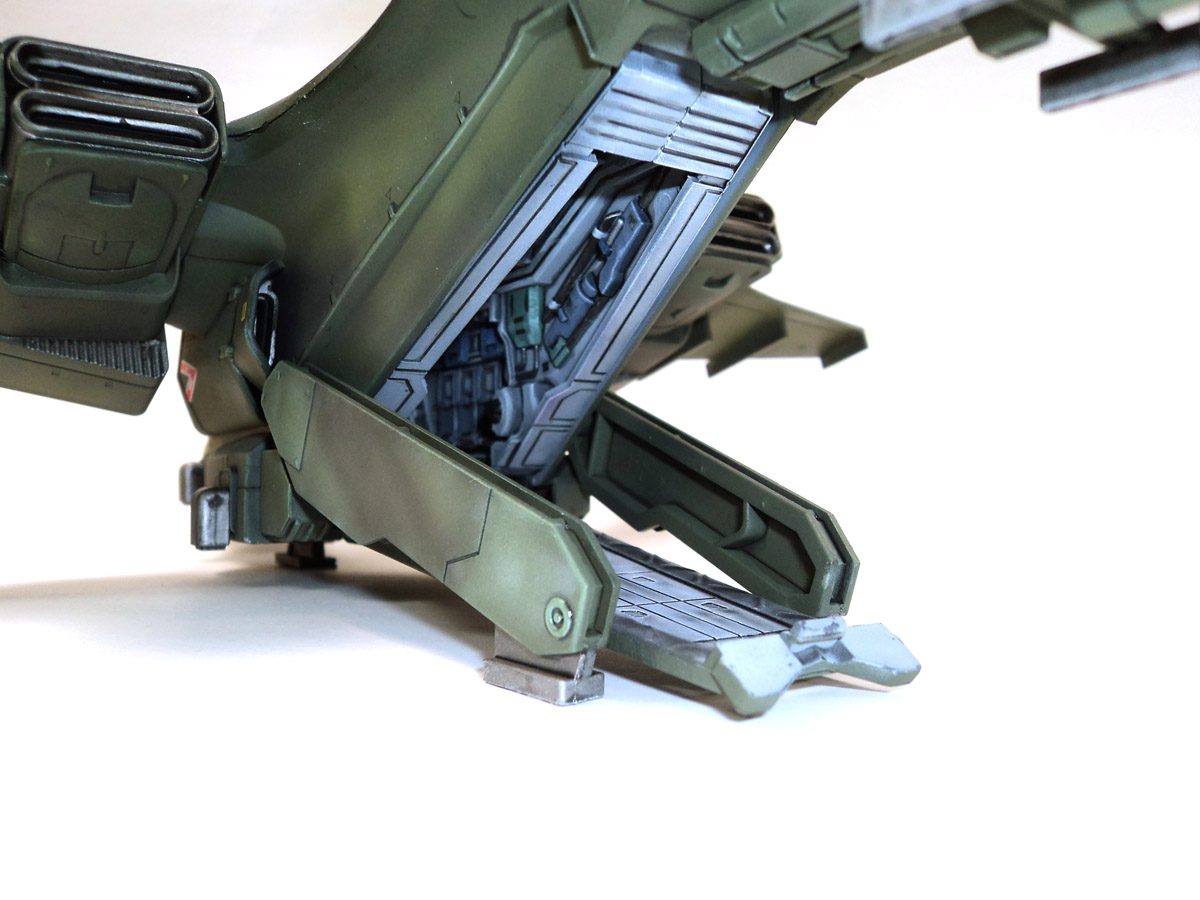
The kit is designed to be a snaptite “build and play” assembly. The cockpit section houses a light and noise gizmo, so when you push the button on the end of the nose, it lights up and makes jet sounds. The wings and rear engines tilt forward and back, the rear loading deck opens up, and even the little forward landing skid can be popped open and closed.
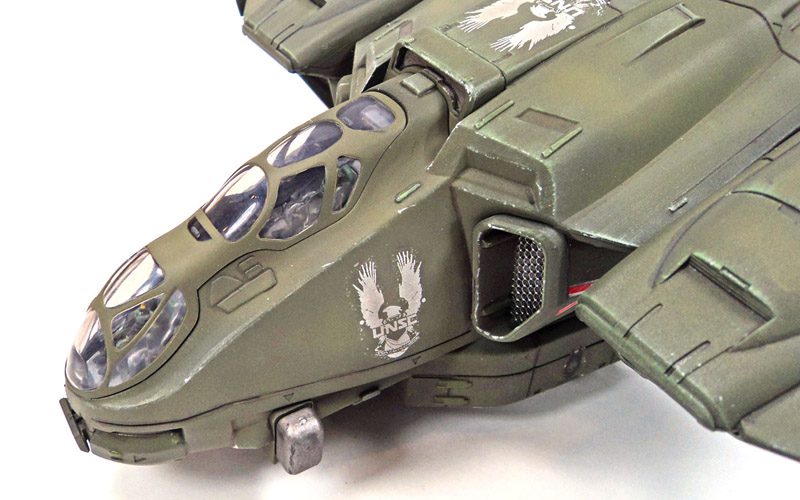
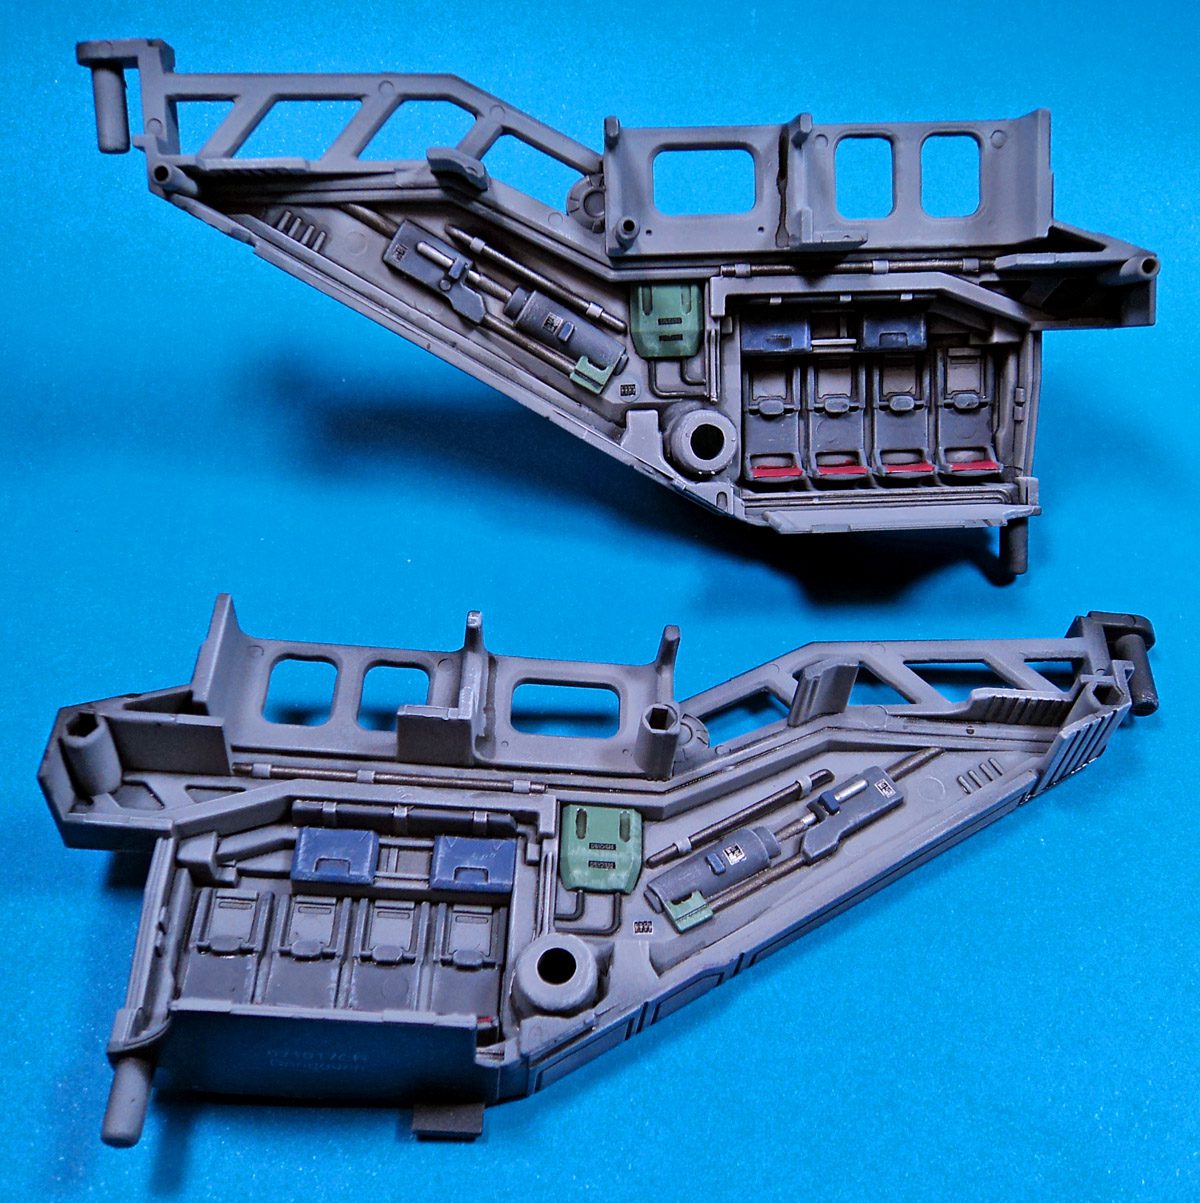
Surprisingly, there was a decent amount of detail. The cockpit itself, while a bit softly engineered, has plenty of bumps and textures to make it seem busy enough under the greenhouse canopy. The rear cargo area, despite a plethora of ejector pin marks, is actually quite nicely done. Panel lines, for the traditional modeler, will seem like trenches. But… they hold a wash nicely, and in the overall scheme of things, I think they work. (Besides… it’s all made up nonsense! It isn’t real!)
I started by priming everything with Badger Stynylrez primer, the black variety specifically. For the interior, I airbrushed a base of Tamiya XF-19 Sky Gray. Various colors were added here and there, with no real purpose in their choice, other than to add a bit of variety. I knew the cargo area would not be readily visible, so I was not too worried about it. Everything was given a wash (shade!) of Citadel’s Nuln Oil.
With the cockpit, cargo area and hatch finished, I assembled the fuselage. The procedure is pretty simply- snap the halves of the cargo area together, stick that and the cargo door in the lower half of the fuselage, add the cockpit in, and close it up with the upper half of the fuselage.
I DO NOT recommend test fitting this. It fits, and is extremely tight. I’d almost found this out the hard way, but fortunately in a rare “common sense” mode, I didn’t push things together all the way and was able to extract myself from a near disaster..
Once the upper and lower fuselage hull halves are assembled, there is very little in the way of cleanup. There is a small seam line around the fuselage, but instead of trying to sand it all away, I simply filled it in with Mr. Surfacer 500, let it dry a few minutes, wiped off the excess with cotton buds damped in rubbing alcohol, and pronounced it a panel line.
The fuselage engines were added, then the wing and tail assembles assembled in assembly like fashion, and their seams were handled as the fuselage was. I do recommend painting the engine area on the fuselage side before assembly- trust me, it is really difficult to get to afterwards.
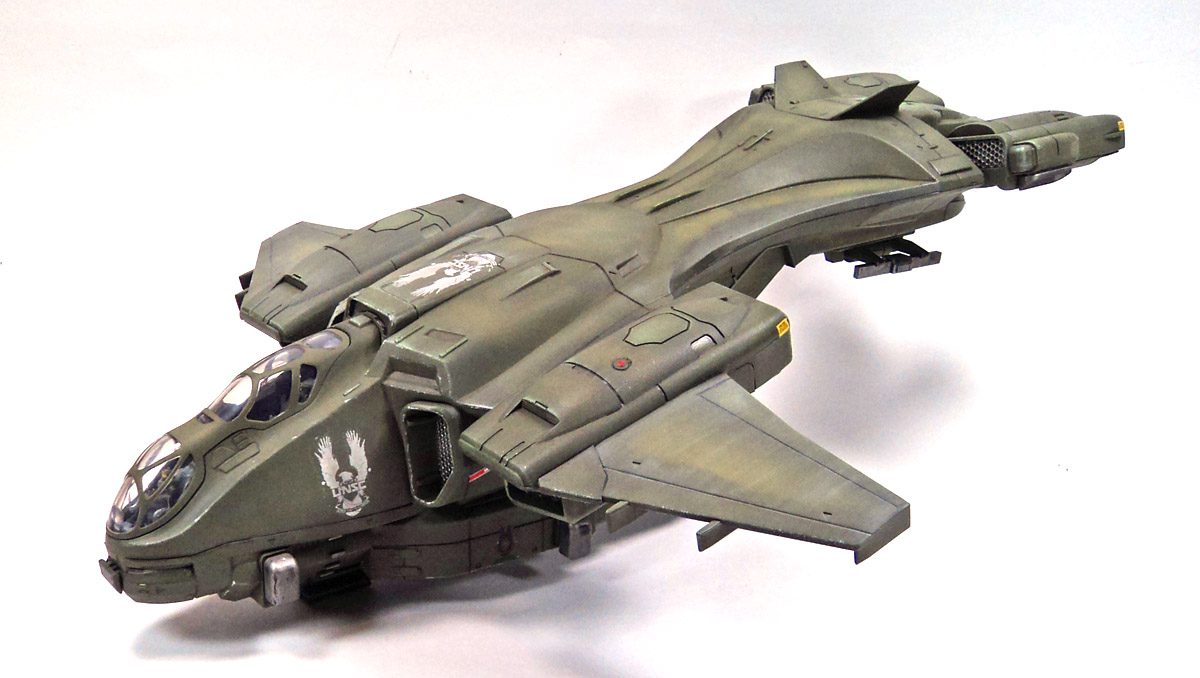
The canopy was pre-painted in gray, but it was a gloss gray, and I wanted the overall color to be some form of green. I decided the simplest course of action was to mask the canopy as I normally would, and if any gray shown through…. oh well. 🙂
I painted the two small figures- tiny in 1/100th scale. One was called “No Name Crewman Who Will Probably Die”, and the other was some fellow named “Master Chef”, who I suppose is the cook for the Halo organization. (Although I may be wrong on that name…. who knows. I never played Halo. After Quake II I gave up gaming.)
I wasn’t sure what color of green to use, as screenshots from the game showed various greens, and grays, and I even saw one that looked blue. I decided to use a somewhat scientific method for color selection- I looked on my paint shelf for the first green paint bottle I saw, which happened to be Tamiya XF-81 RAF Dark Green 2, subtitled “The Spitfire Strikes Back”. (I think….)
As always with Tamiya paints, it airbrushed on in lovely fashion. I then began a process of oil streaks, airbrush fading and shading, and applications of Nuln Oil.
I’ve found, in my experience building over 250 aircraft models in the last 10 years, that there is an easy way to know when you have enough weathering.
I got bored applying it.
So moving on to the gloss coat of Future, I made everything nice and shiny.
The kit does not come with waterslide decals, so I’m wondering if Revell partnered with Bandai in the planning of the project. A quick trip to Ebay found some Halo decals, actually designed for figures in 1/6th and 1/18th scale, but I thought “those look about right”, and ordered them. I put a few of those on, and also a few decals from some jets.
I’ve found, in my experience building over 250 aircraft models in the last 10 years, that there is an easy way to know when you have enough decals.
I got bored applying them.
(Detecting a theme here? 🙂 )
The final step was to apply a matte coat, and everything was flattened down.
My conclusion on this kit is simple- go buy it. It is good fun. You can assemble it in 10 minutes with your 4 year old and let the playtime begin, or you can use it as a palette for crazy scratch building and detailing. Or anything in between. It really opened my eyes up to the fact that, despite the fact that I’m 50 years old, in not so great health, loads of debt, a fairly bad odor most of the time, and a grumpy demeanor (’cause those kids won’t get off my lawn!), there is still a lot of fun to be had with made up nonsense. Make believe. Especially when you can push the button on the nose and it lights up and makes jet sounds. And you zoom it around your Mancave® shouting “Take that you rivet counting sods!” as you laugh maniacally…
Sorry… too much coffee.
And the fact that no self respecting Idiot Preventing Modeling Sanity member would ever get near this thing made it all the more fun.
Revell…. more stuff like this. Please. And I’ll just pretend that 72nd scale Gripen never happened.
And now that this one is finished, there is that Warthog…..
Leave a Reply