
If you mention the F-16, Eurofighter, MiG-21, or J-10 to most modern jet fans, they’ll know exactly what you’re talking about. But bring up the JL-9, and you will likely get a raised eyebrow and the question “What is a JL-9?”
The JL-9 airplane is a MiG-21 derivative developed by the Chinese People’s Liberation Army Air Force (PLAAF) as an advanced jet trainer. If you’re familiar with their JJ-7, the JL-9 essentially moves the air intakes to the fuselage sides, slaps on a pointy nose, and ends up looking like a pretty sleek jet. There’s even a naval variant with a tailhook.
What’s really important for modeler’s though, is the JL-9 model. While many of Trumpeter’s kits receives criticism for accuracy, shape, and other (legitimate) complaints, they must have had their first string varsity lineup handling this one.
While I didn’t do any comparisons with scale drawings, the model lined up in detail and shape with every photo I examined in preparing for the build. It just looks right.
And it is a fun kit to build. I tend to rank kits on a build scale that is anchored at one end by Tamiya (virtual perfection) and the other end by Special Hobby. (Which I find to generally be, at best, awful.) I’d have to say Trumpeter is just a few marks off of Tamiya level with this kit. Just the slightest bit more precision in fit, and it would have been the equal of anything Tamiya has produced. I’d rank it slightly better than Airfix’s most recent work- which is very good itself.
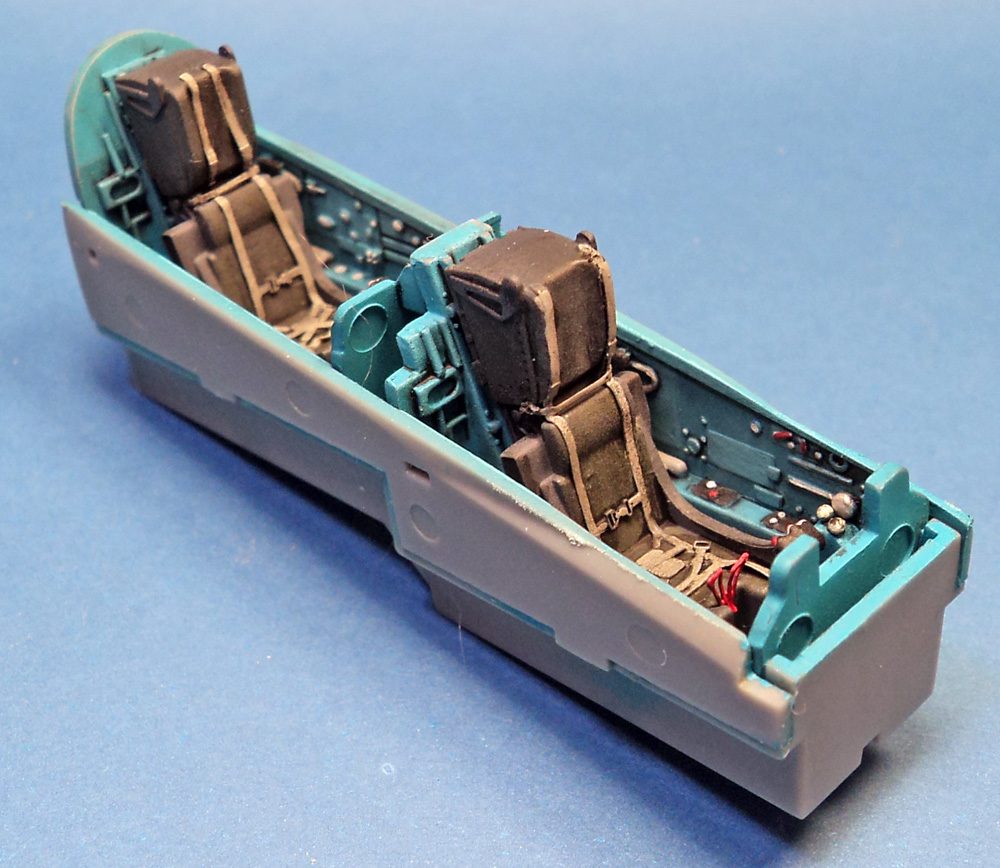
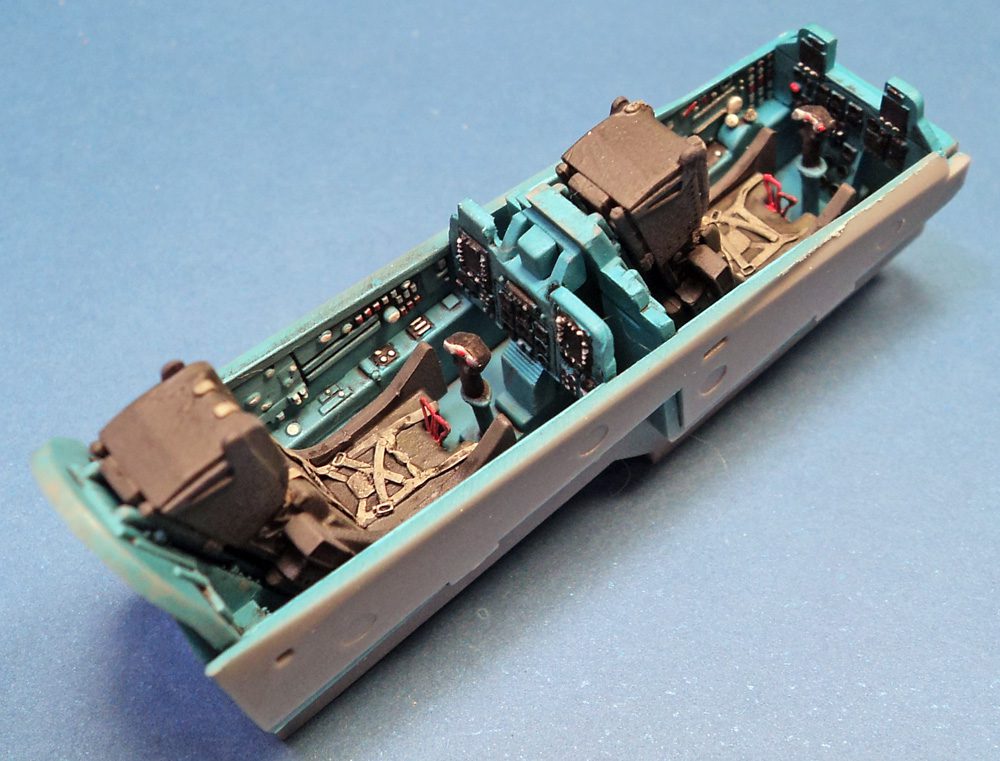
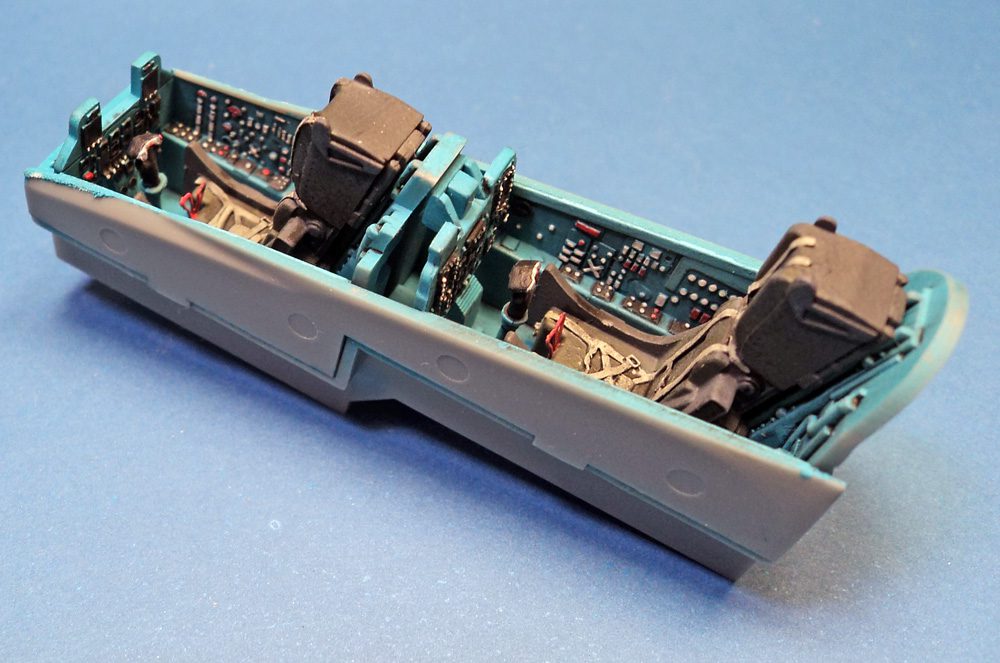
The cockpit is a nice little sub-assembly, featuring separate sidewalls, a cockpit tub, nicely detailed instrument panels and consoles, and two very good ejection seats with photoetch belts. Decals are provided for the IP and consoles, though I decided to paint everything instead.
The cockpit is painted in the unusual turquoise color associated with many Russian aircraft. I used Vallejo Model Color Blue Green (70.808) for the interior color. It’s a bit more blue than the real thing, but for simplicity sake I went with it. The consoles were painted black, and various colors picked out. The entire sub-assembly looked the part when painted, and test fitting showed it to be a perfect fit.
The main and nose wheel wells are very nicely detailed, and look really good painted with some highlighting and wash applied. They too fit nicely inside the fuselage. The instructions call for them to be light blue, but thorough examination of photos showed that a medium gray with just a touch of blue was more likely a closer match, so I used a homemade mix of Tamiya paints. With those in place, as well as the cockpit and jet nozzle assembly nestled in one fuselage half, the whole thing closes up nicely with no gaps.
You will need to work out a few seams, but except for a few places on the underside with a lot of tight detail, some Mr. Surfacer and a fine sanding stick will take care of things.
I wasn’t sure how the wings were going to be. Each wing consisted of an upper and lower half, which fit together perfectly. The join to the fuselage was a simple butt-join with a small alignment tab, but the fit was just about perfect, both wings aligning nicely. I did run a line of Mr. Surfacer to seal off the join for paint, but other than that it was perfect. The horizontal stabilizers fit equally well.
At this stage I began adding weight to the nose. Waiting until this point allowed me to test the center of gravity. I used a combination of Liquid Gravity and small lead foil sheets, until the CoG was about an inch forward of the leading opening of the main wheel well. I knew that point would be far enough forward that it was in no danger of being a tail sitter.
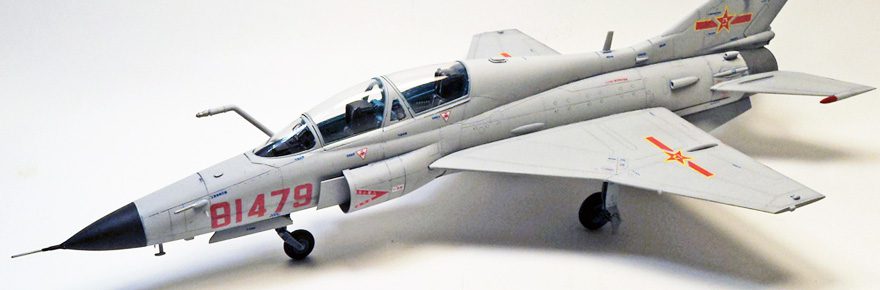
While the kit comes with a variety of drop tanks and missiles, I decided to build it like I saw in many photos- completely clean with no pylons.
Paint was simple enough- except for the black nose cone, the green antenna cover on the tail, and some red splashes on the horizontal stab tips, the whole thing was a very light shade of gray. I used Tamiya XF-66 Light Gray, mixed with white, until I got a mix that looked about right when compared with photos.
After painting, I began unmasking the wheel well. As I began to pull out the masking from the left main gear well, I heard a gut-wrenching click, and then a rattle. The interior wall of the main gear bay had snapped loose and fallen inside the model. I shook it for half an hour trying to get the part out, but no luck there. As the JL-9 has its main gear doors open on the ground, a large opening would be obvious.
I considered cutting the kit open to try and retrieve it, but doing so would have introduced more problems in closing that up and getting the part refitted. A friend suggested a very simple fix- just close the gear door. While this is not correct for the JL-9, many jets do have their main doors closed on the ground, so it wouldn’t look out of place. And it resolved my problem- covering up the gaping hole left by the absent part.
With that minor disaster avoided, I could begin to apply decals. The scheme for the JL-9 is pretty simple- national insignia in six locations, and a large aircraft number on the nose. You get the choice of red or yellow. I decided on red.
Then, of course, there are the stencils. One thing I have had to come to grips with since starting to build jets is the huge number of stencils all over the exterior. The JL-9 is no exception. The fun part is they are all in Chinese. (Go figure.) So in more than a few cases I would get things swapped around, and I’m not sure how many of the stencils are actually right side up. But they look the part. The decals were superb in performance. I thought the national markings could have been a bit sharper in detail, but everything else was great.
I decided to keep this build relatively clean, so aside from a panel line wash, no additional weathering was applied. This actually fits, as the photos of the actual aircraft show them to be very, very clean.
With all the final bits applied- landing gear struts and doors, and various antenna projections, the whole kit was treated to a flat coat of Vallejo Satin Varnish, and I called it finished.
To say I thoroughly enjoyed this build is an understatement. It’s a straight forward, simple kit of a very unusual subject that can be enjoyed by any modeler of any skill level. I highly recommend it.


Leave a Reply