
I’ve always thought DeHavilland’s Hornet was a cool looking airplane, and I’ve always wanted to build one. However, the only kit I knew of for this sleek looking fighter was from Classic Airframes. And I’ve never really enjoyed building their models, quite frankly. Life’s too short to have to sand that much plastic. 🙂
So it was with great happiness that I greeted the announcement of Trumpeter’s release of the Hornet.
Of course, knowing that it was Trumpeter, it meant two things could be counted on. One, the kit would go together very nicely. And two, there would likely be some accuracy issues.
Now that I’ve built the kit, I can say that both assumptions were correct. However, unless you are a Hornet fan with a sharp eye, you most likely can’t even pick out the biggest accuracy issue. And no matter who you are, you will appreciate the pleasant construction experience.
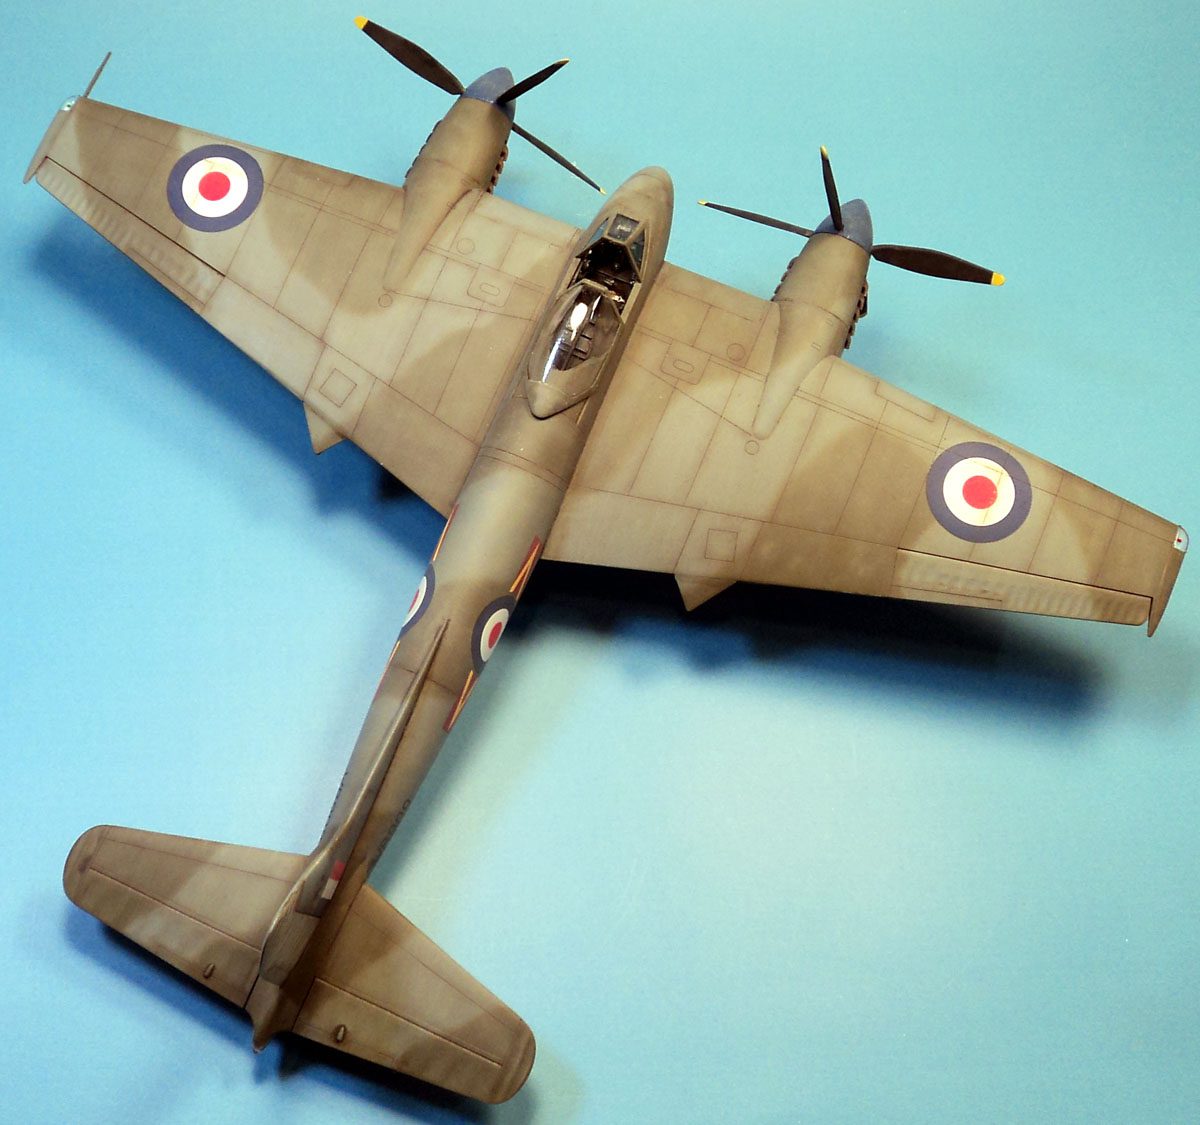
The kit is actually very simple, with no over engineering in sight. The kit is for an F.1, but the basic parts for an F.3- basically the longer vertical stabilizer, are in the kit. (And a few parts are obviously going to be used for an Sea Hornet NF.21 night fighter too!)
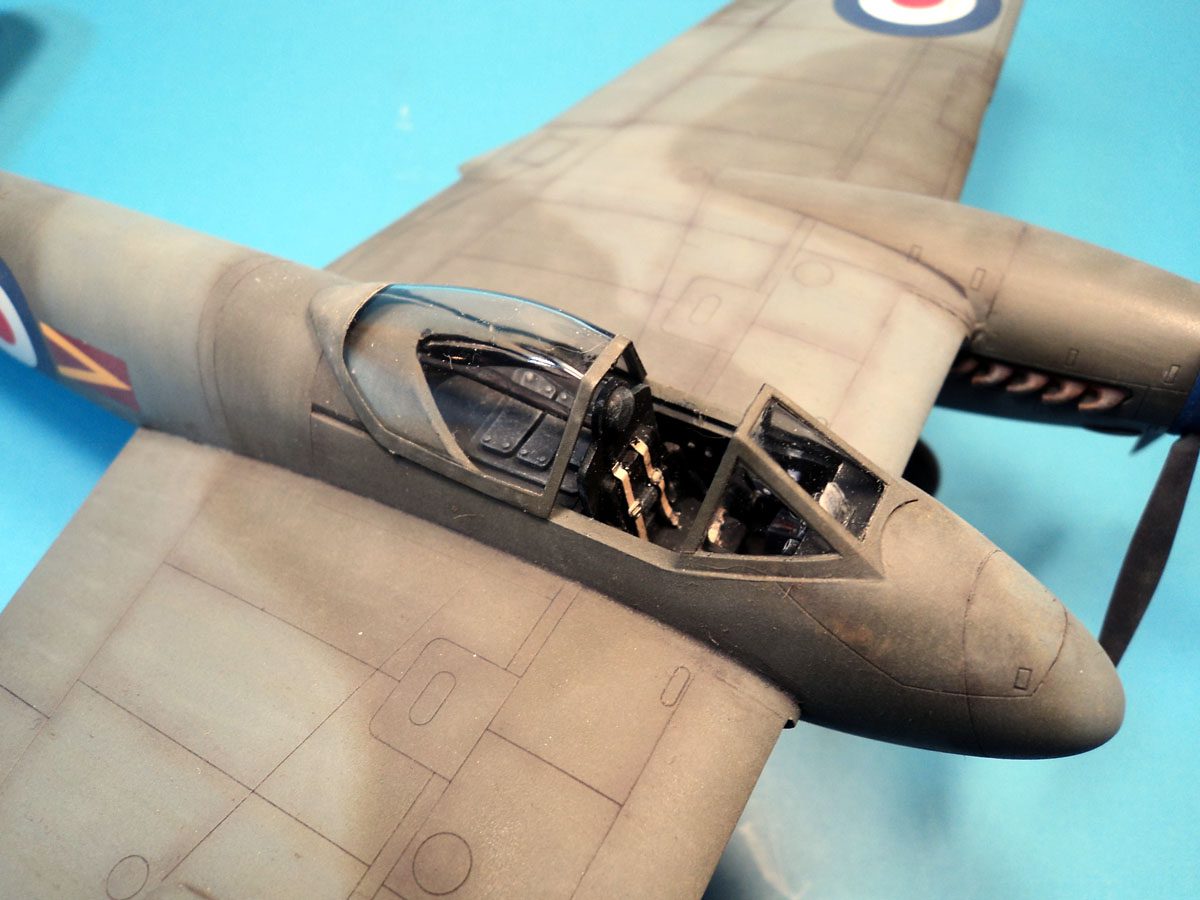
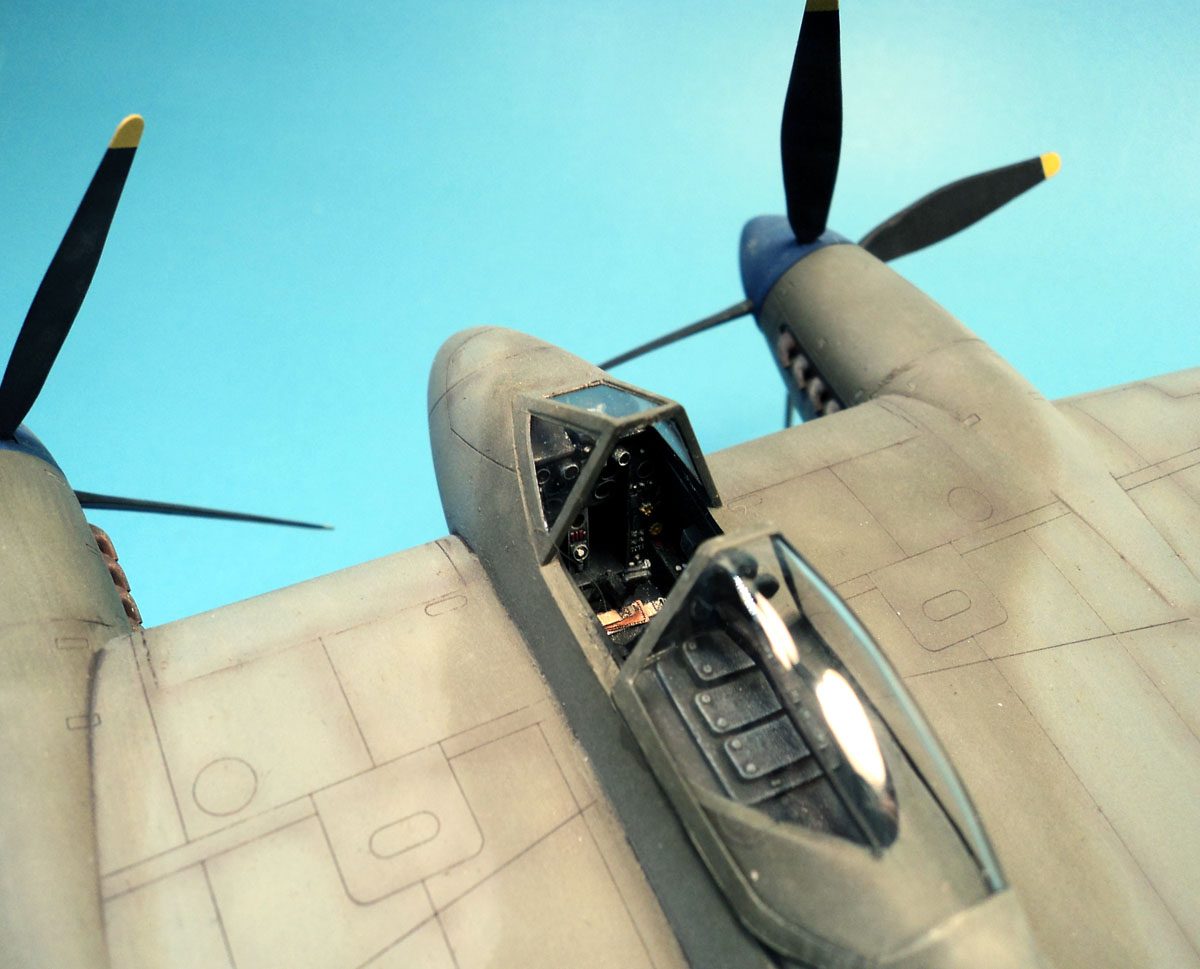
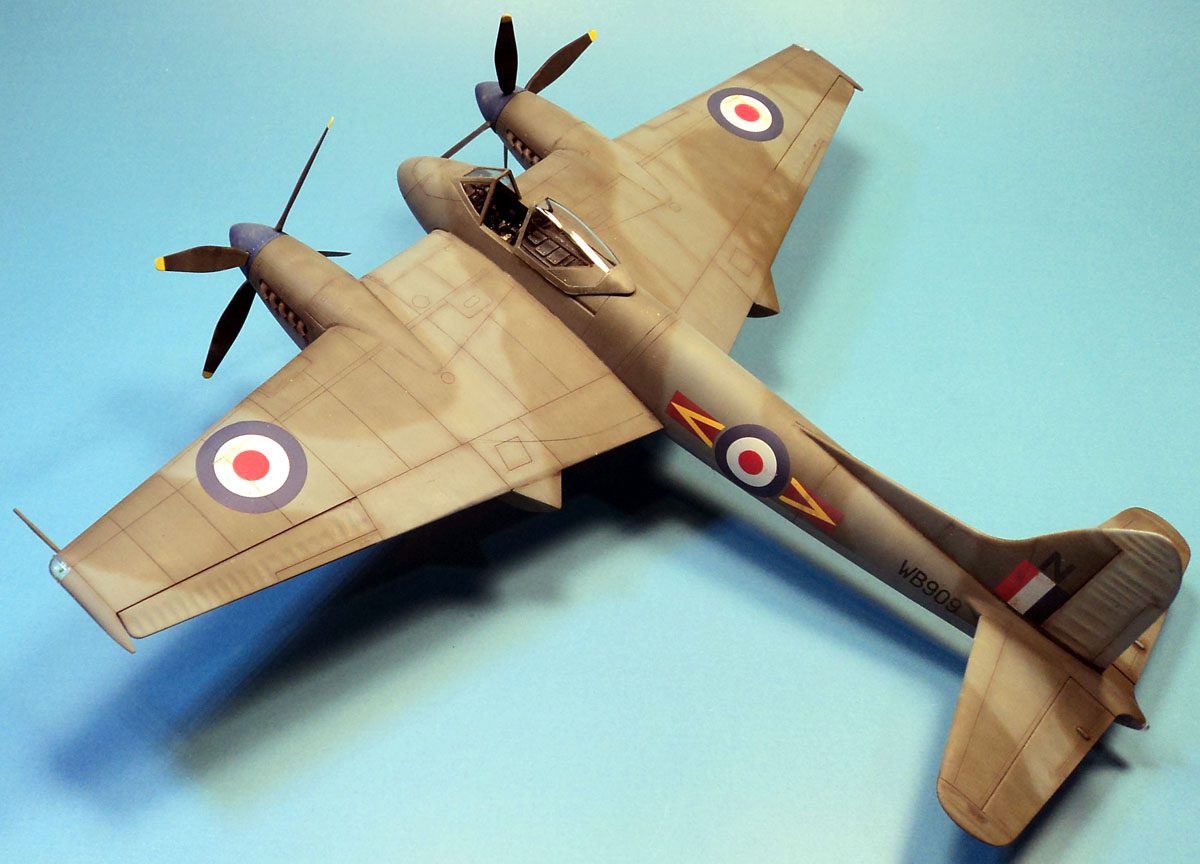
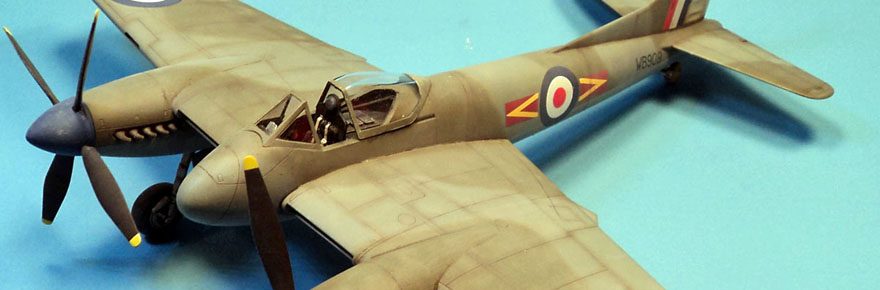
The cockpit is fairly basic, but decent looking. It’s busy enough, and that’s good- it is quite visible, whether the canopy is opened or closed. The seat is a bit odd looking, and could probably use a replacement. As far as I know, none are made yet. I don’t know that there are any aftermarket parts for the kit yet. If anyone releases a nice resin cockpit, it certainly wouldn’t hurt. Still, built out of the box with some decent painting, drybrushing and an oil wash, the cockpit looks nice enough. Just add some belts of your choice and move along with the build.
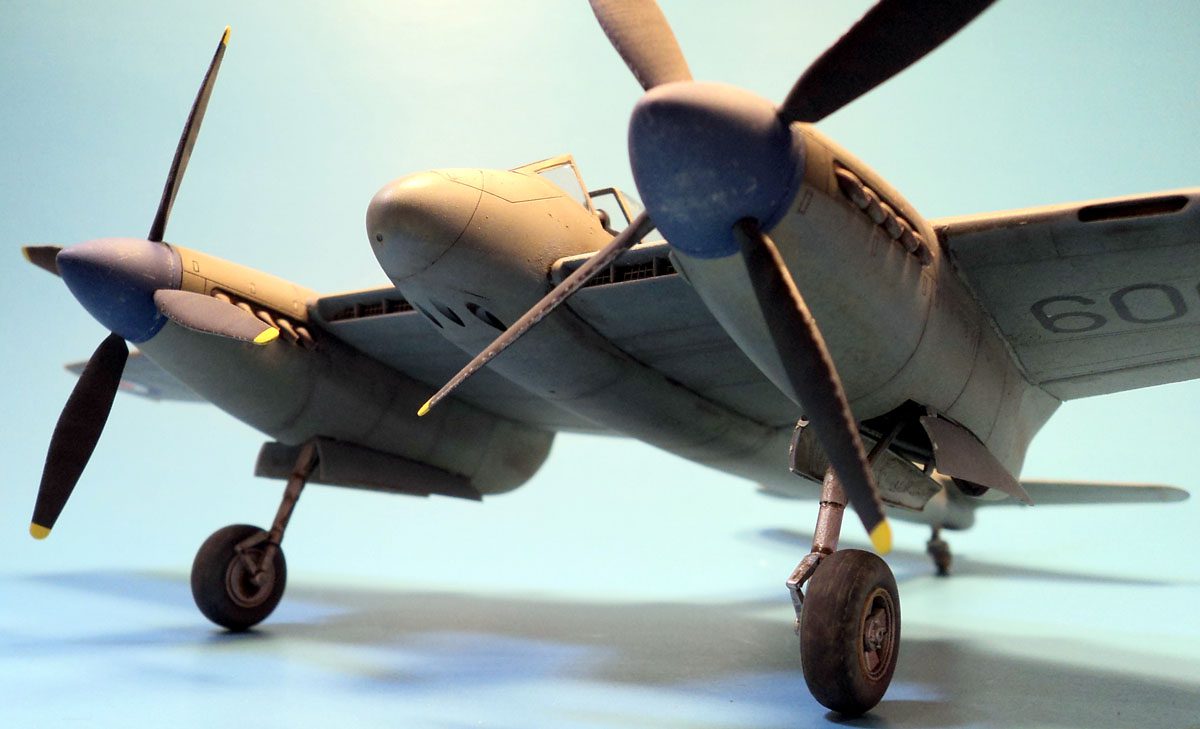
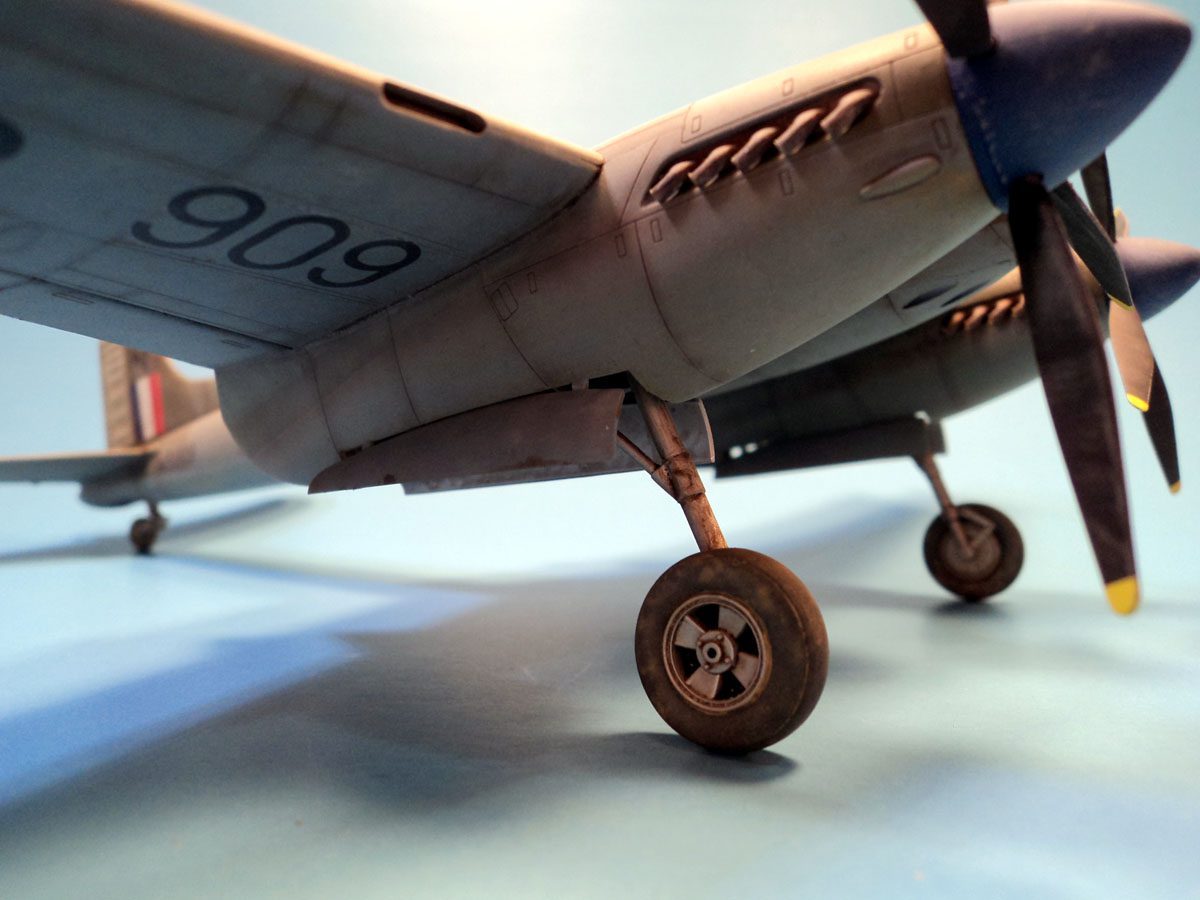
The fit of the fuselage, wings etc., is excellent. On one nacelle I needed to use a bit of filler on the join to the wing, but I’m not entirely sure it wasn’t an alignment issue on my part. Aside from sanding away the seam lines, there was no drama in that area.
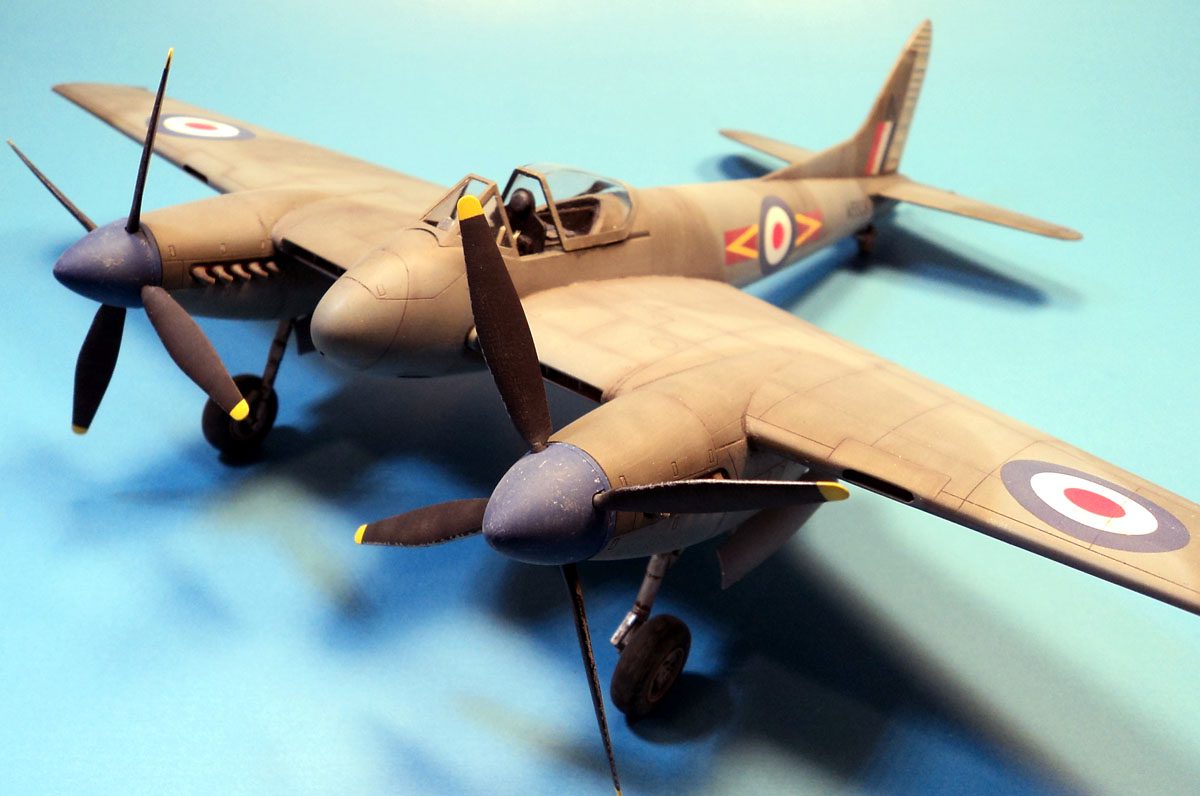
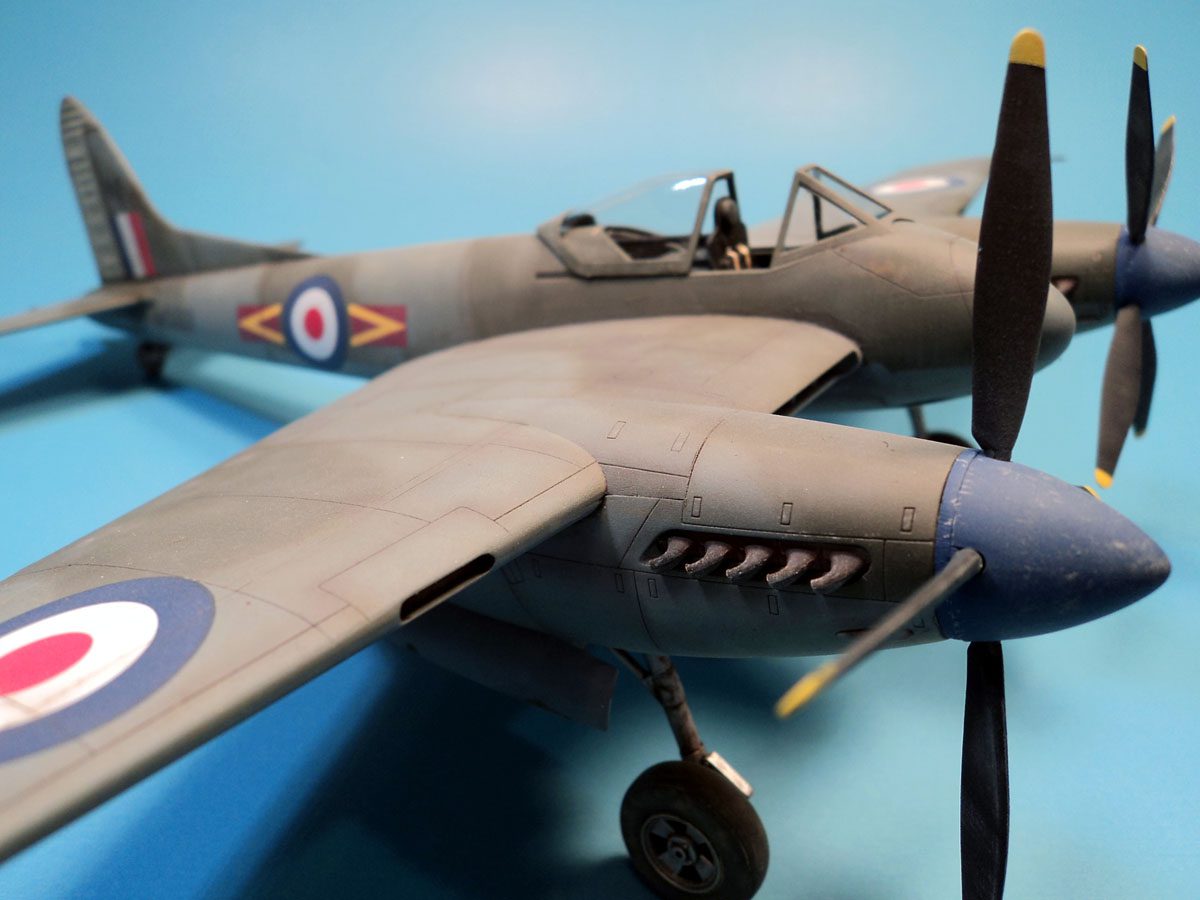
The biggest accuracy issue you’ll notice is the windscreen. On the real aircraft, the bottom edge was essentially parallel to the line of flight. On the Trumpy kit, it’s angled up pretty significantly. (C’mon… how many of you would have actually known about that, and actually noticed it…?) However, the canopy parts are very clear, and fit perfectly.
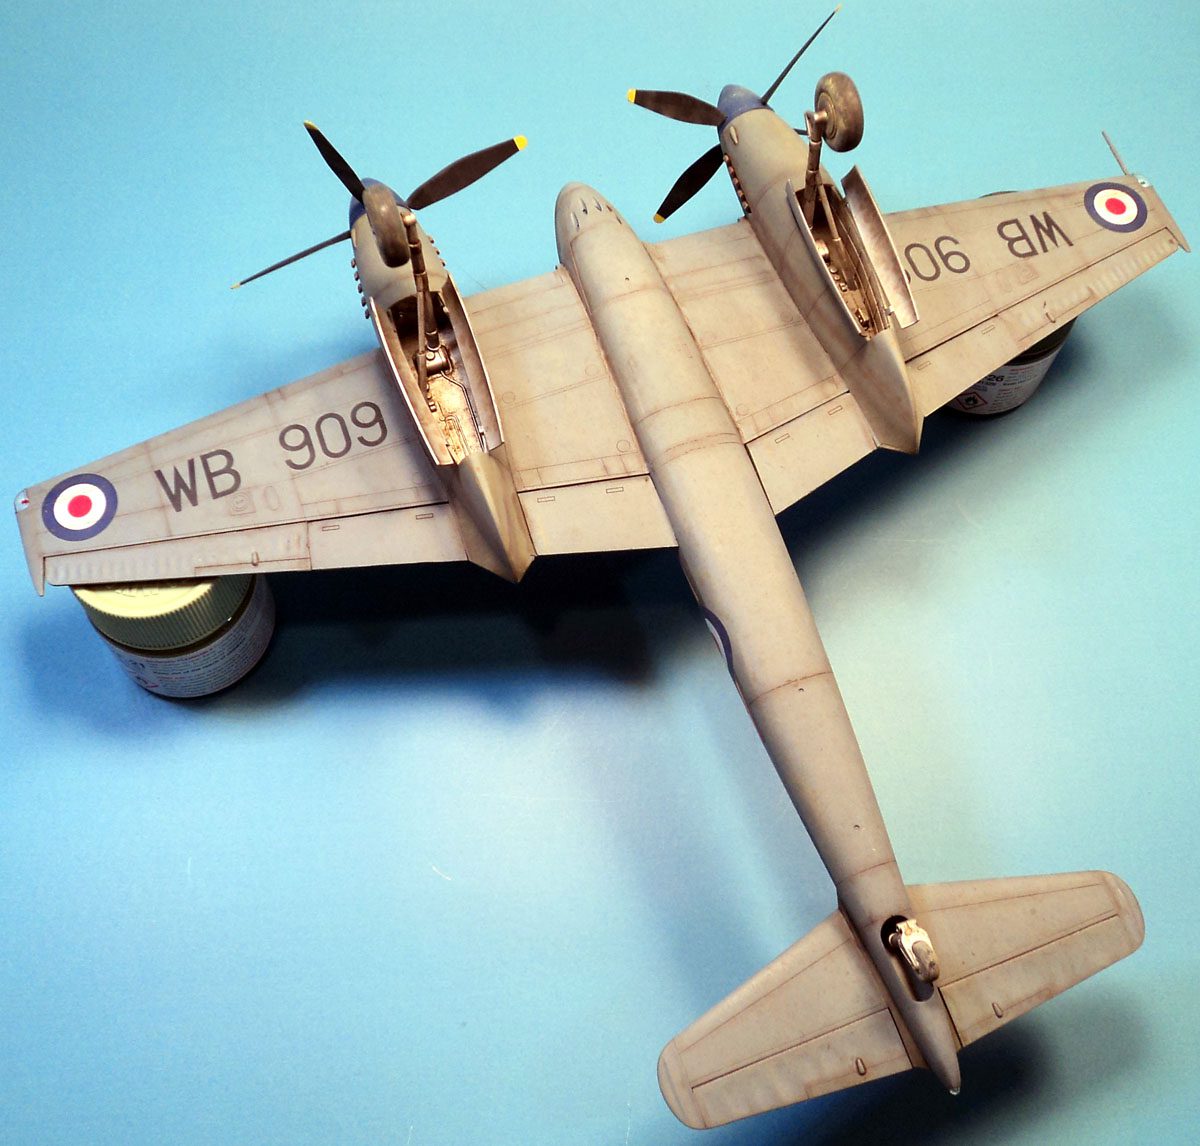
Pay close attention when assembling the props. As many manufacturers do, Trumpeter makes use of “duplicate” sprues for some parts. This duplicate set, among other parts, has a prop spinner and four blades on each set of sprues. However, the Hornet’s props turned opposite directions from each other- the top of blade turned toward the fuselage on either side. So to account for this, Trumpy cast each sprue with two blades for one prop, two blades for another. Pay close attention to this- you’ll need to follow the instructions for the correct numbers for each side.
I do find it odd that Trumpeter did such a nice job on this detail, which is a bit obscure, and yet missed the angle of the canopy line.
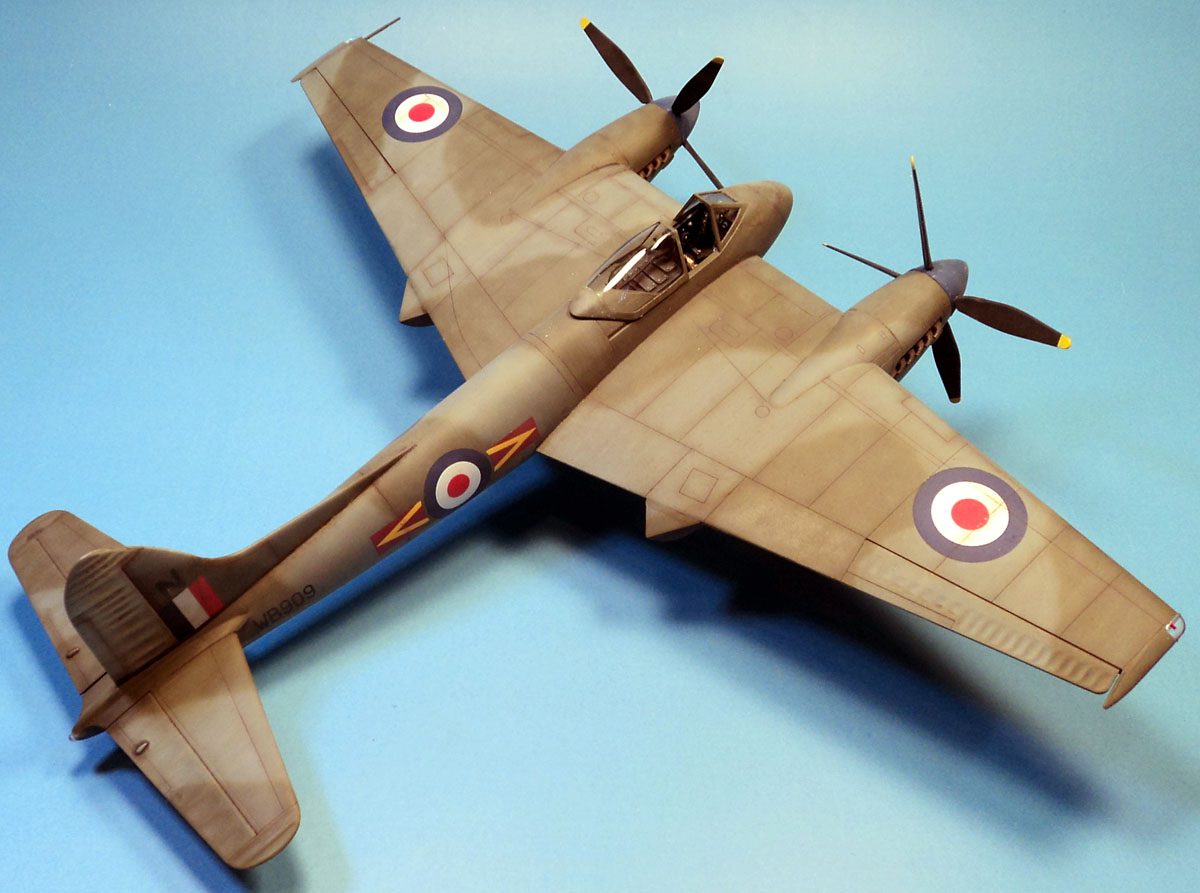
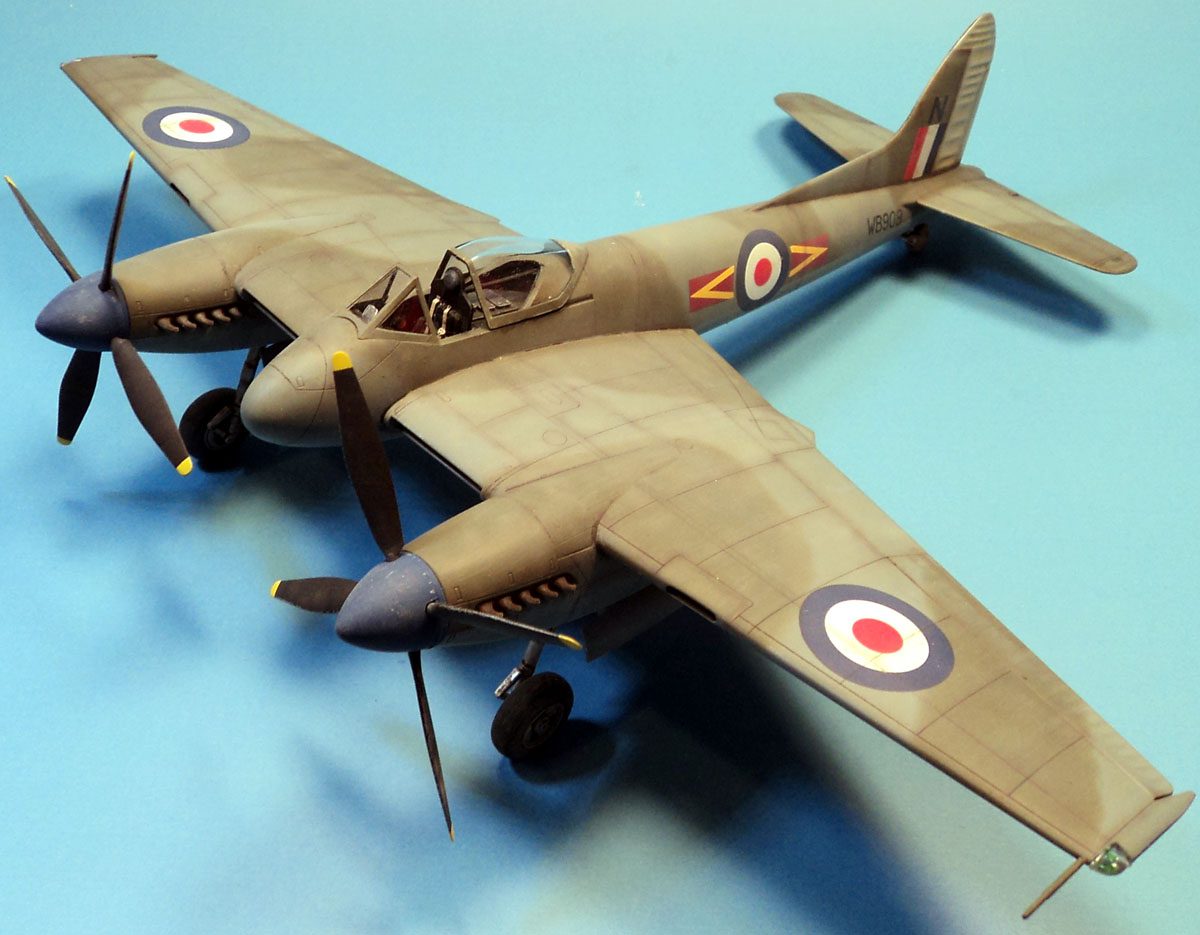
The kit comes with markings for two silver schemes. The Hornet was made of wood for the most part, as was it’s “big brother” the Mosquito, so it wasn’t so much a natural metal finish as it was silver paint. I thought this scheme looked a bit plain though, and decided to make use of the kit’s F.3 rudder to build a camouflaged version used in the Malayan uprising in the early ’50s. I saw a particularly interesting shot of a Hornet with a silver rudder, blue prop spinners, and some colorful fuselage markings. And it turns out that Classic Airframes actually kitted that exact aircraft.
I made a quick query on Hyperscale, and within no time, a spare set of Hornet decals was winging its way to me from a fellow modeler who graciously sent them to me at no charge!
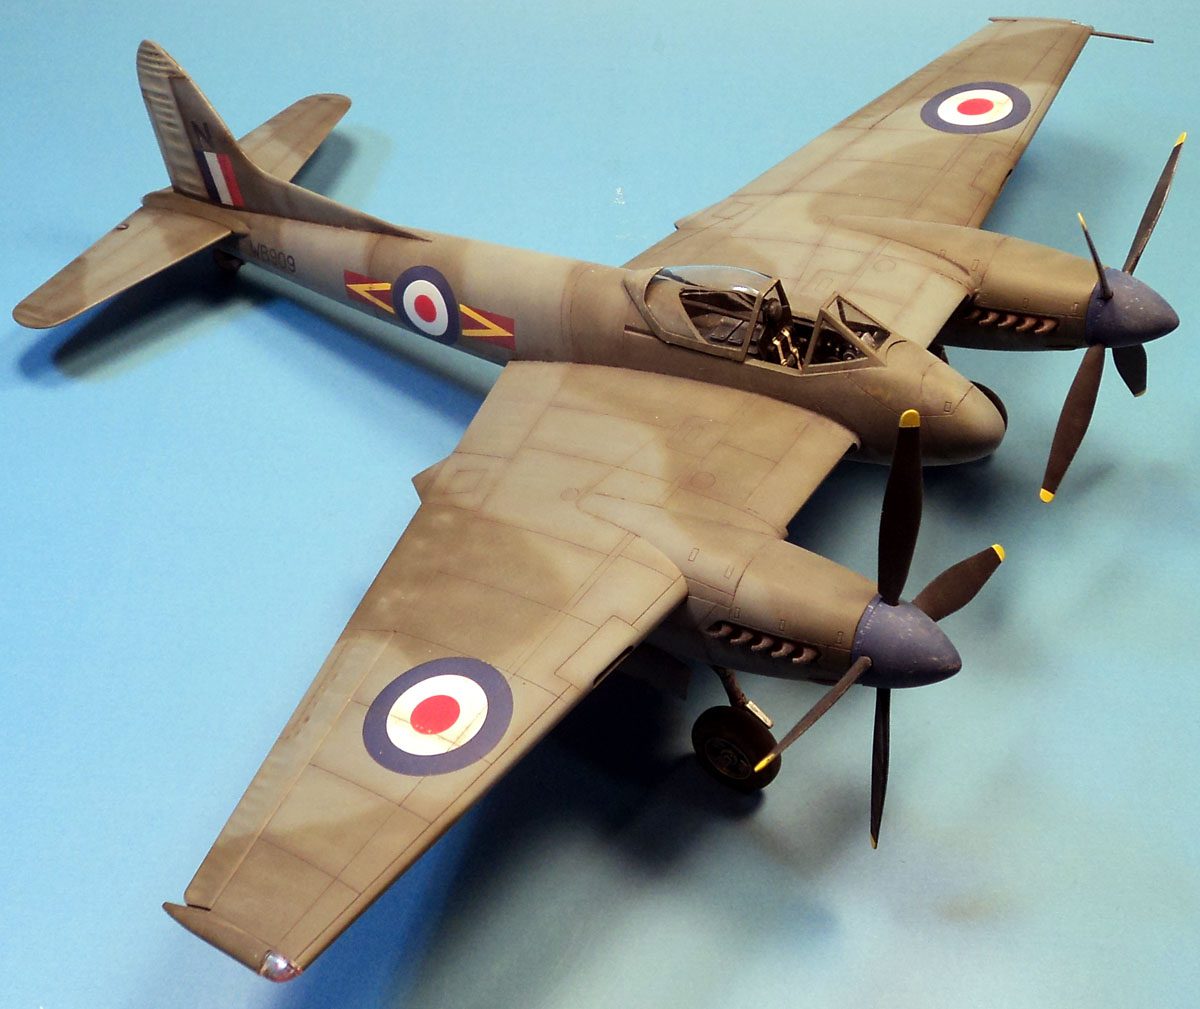
The undersides of the aircraft was painted Pollyscale PRU Blue. This was masked, and then Tamiya paints were used for the Ocean Gray and Dark Green. Vallejo Silver was used for the rudder. Since it was a fabric rudder, I didn’t want to use Alclad, and I thought the Vallejo looked really good. Various oils were used to give the paint a worn look, and then various fading and shading was airbrushed on, followed by an oil wash. (Oh yes, the decals went on somewhere in the process. 🙂 ) Everything was sealed with Vallejo Satin Varnish, the final fiddly bits glued on, and the props were added, making sure to get them on the correct side.
All in all this was a very easy, satisfying and fun build. Accuracy of the canopy line aside, this is a great kit. As with Trumpeter’s Whirlwind- which suffers from its own accuracy issues- no one will mistake this model for what it represents. In fact, most folks won’t even notice the errors. And I won’t tell them if you don’t!
Trumpeter does some nice work, and if they would pay a bit more attention to accuracy, they’d really be vying for top of the heap. I do recommend this kit to any builder of any skill level.
Leave a Reply