
Rating kits can be very subjective. One person’s “awesome” kit may be described by another as “decent”. Differences in manufacturers and genres can be quite distinct. In the brief time I’ve built scifi models, I’ve noted that it’s either feast or famine… on one side you have Bandai type quality, and on the other there are makers like Moebius. Both can certainly be built… but the journey is very different.
Of course, when you want to have a particular subject displayed on your shelf, any warts and bumps are often overlooked for the sake of the quest. While it would be nice to have Bandai quality on everything, reality rears its head and says “get to sanding”.
I’d Never Seen That One
While attending a model show in South Carolina earlier this year, I scoured the stacks of plastic for sale. A few years ago the hundreds of aircraft offered would have overwhelmed me, but this time was different. My brain mentally filtered out aircraft, looking for some cool scifi kits.
There were a few here and there, most of them being older subjects, or kits produced by folks I knew would require a lot of work. One table did catch my eye.
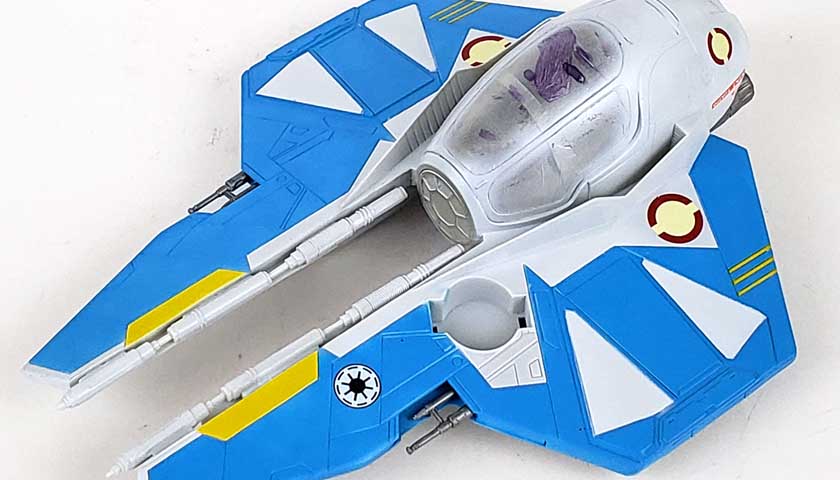
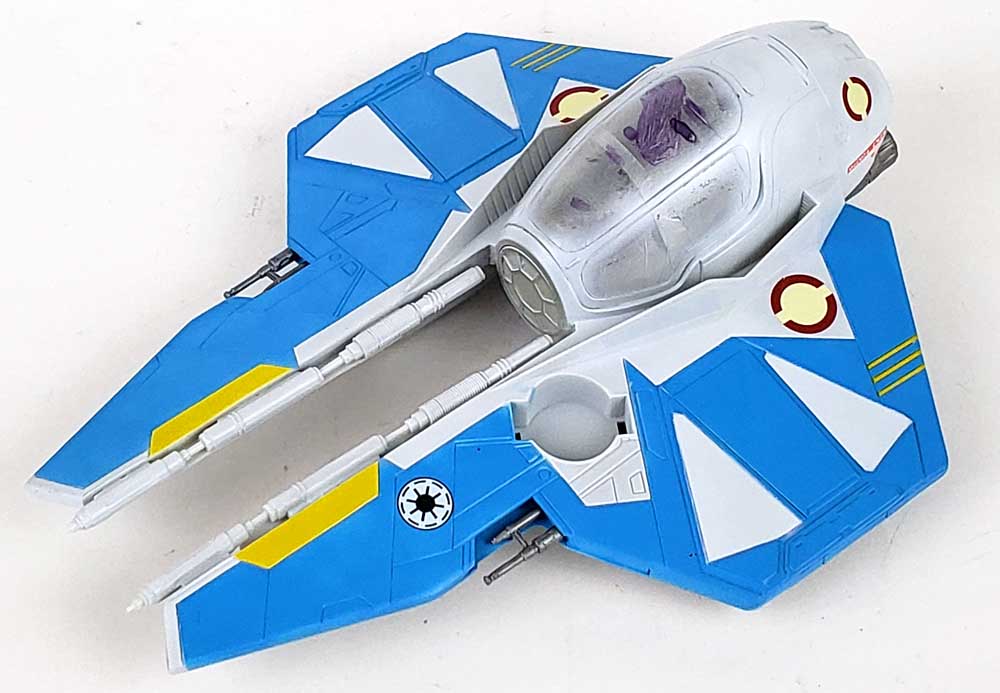
I’d never seen the kit of AMT’s Jedi Starfighter before. It didn’t surprise me really, as my new arrival to the genre has meant I’m learning how much I’d missed over the years in my focus on winged things with spinny front ends. While the design is not a favorite, it did have a certain cool factor to it. My only hesitation was the fact that it was an AMT kit. I’ve built a few of those over the years. While they’re not bad, quality isn’t their middle name. (Maybe “Mediocre”? 😉 )
The price was not too bad – $10 if I recall correctly. So gambling that I could at least fall back on Tamiya Putty and sanding sticks, I jumped in.
It’s Episode I – III In A Nutshell
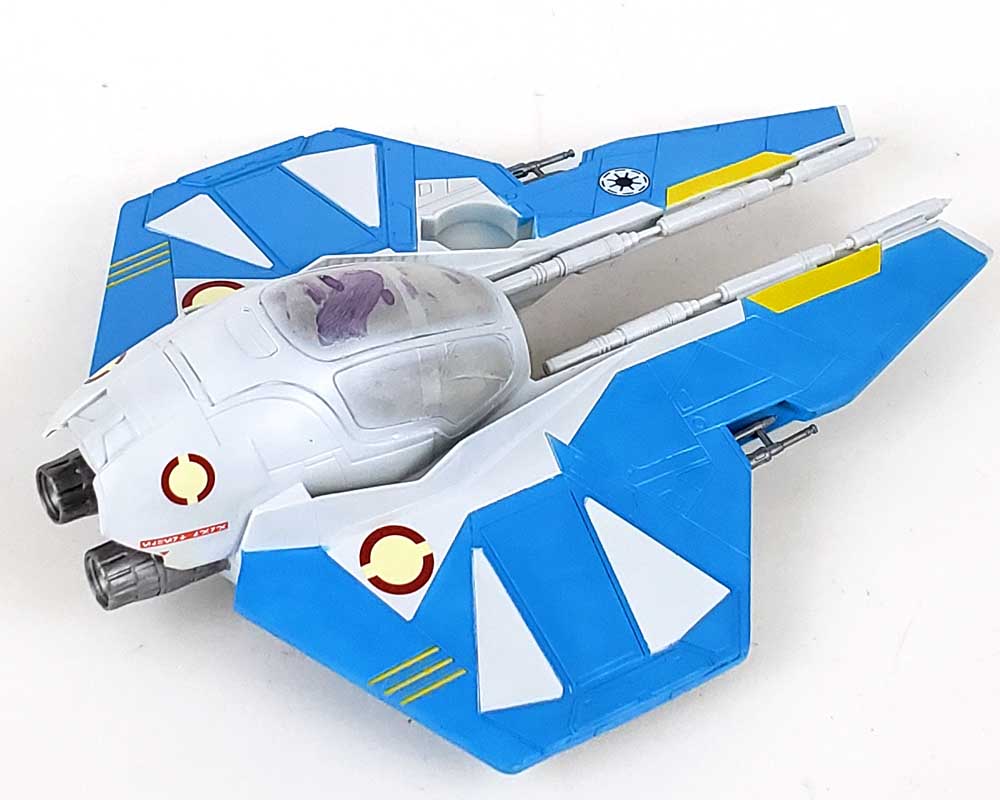
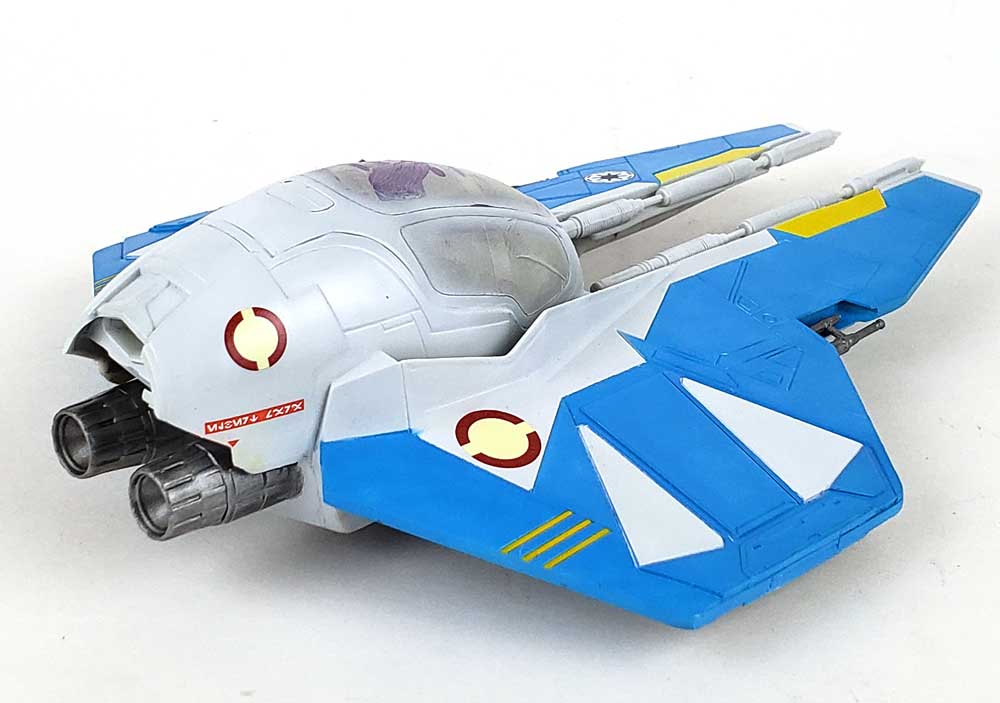
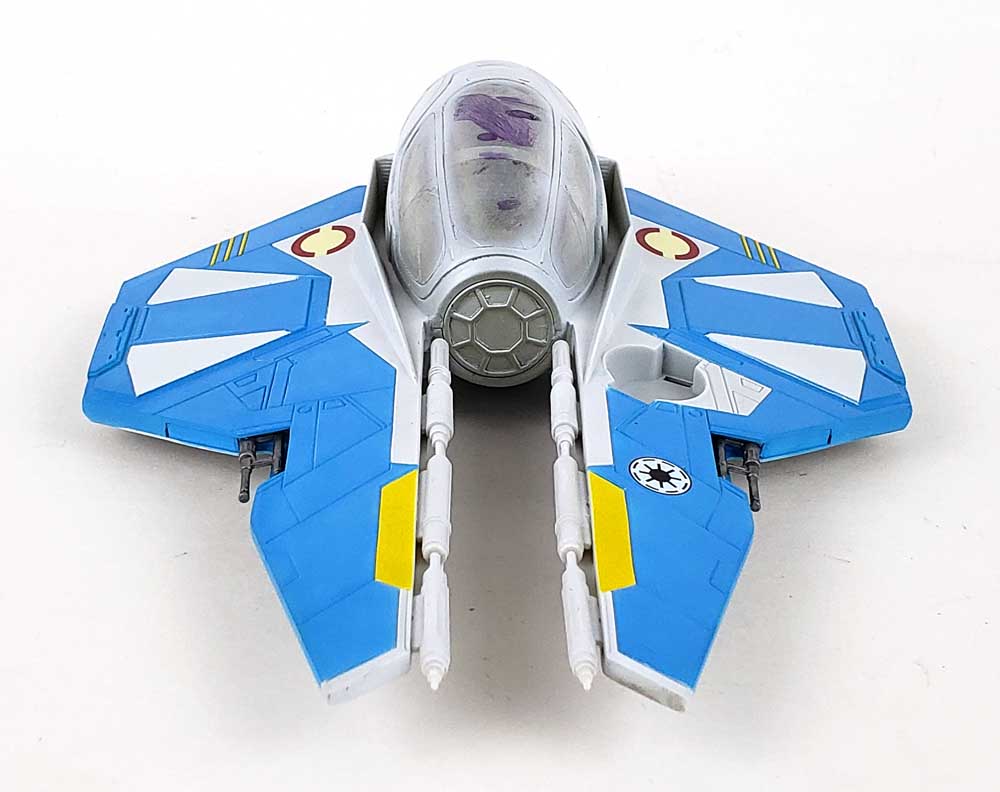
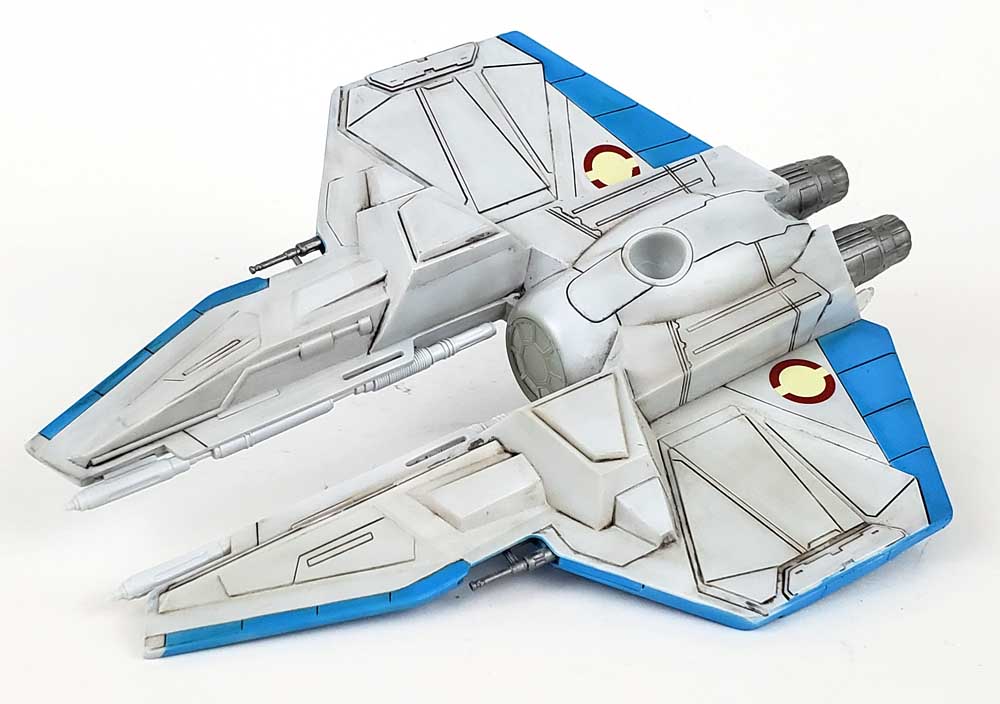
The design, in my opinion, is a bit lazy. While it has several nods to the original Star Wars designs, the overall look is not one that I find very appealing. The cockpit area looks like a downsized Falcon cockpit. Panels that fold from the upper and lower wing surfaces evoke images of the X-Wing Fighter. The inside of those pop-up panels is pure TIE fighter. The droid’s position on the ship is almost an afterthought, and the engine placement is virtually impossible in terms of physical space.
Still… it’s scifi, so we allow leeway to let the fun go on.
An argument could be made that because this was supposed to have come before the X-Wing, TIE Fighter, and others, canonically those would have looked similar to this one. From a backstory standpoint, that may work.
But after such iconic and groundbreaking designs in the Original Star Wars Trilogy, this Jedi Starfighter is a bit weak.
But I’ll Build It Anyway
Regardless of all that, it looks cool enough, and it is Star Wars, even if it’s from those “other” episodes. 🙂 The fun will be in the building of it.
Test fitting showed it to be very typical AMT. While everything fit well generally, none of it was precise. Thick parts, wide but soft panel line detail, and some odd engineering choices showed themselves immediately. None, happily, were major obstacles.
While I normally like to do as much pre-assembly as possible, the low parts count and the build sequence meant there was little to do ahead of time. The engine nozzle area aft of the cockpit was assembled, and a few bits glued on to the cockpit sidewalls. Test fitting showed that the two larger guns on the inboard edge of the wings could be fitted after assembly by simply notching their alignment holes. The instructions showed these had to be sandwich between the upper and lower hull halves, but my quick modification worked nicely. The same held true for the small outer gun/probe/thingies on the outboard wing edge – just notch the alignment hole and they can be slipped in later.
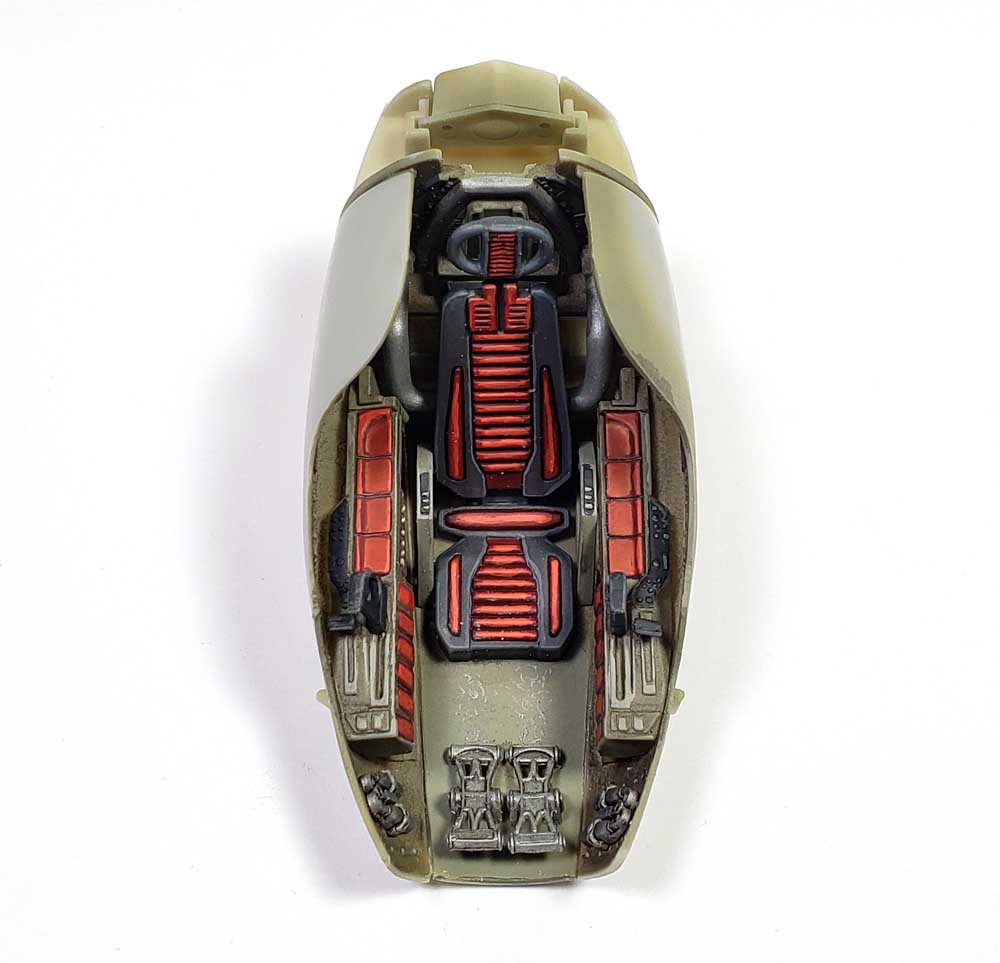
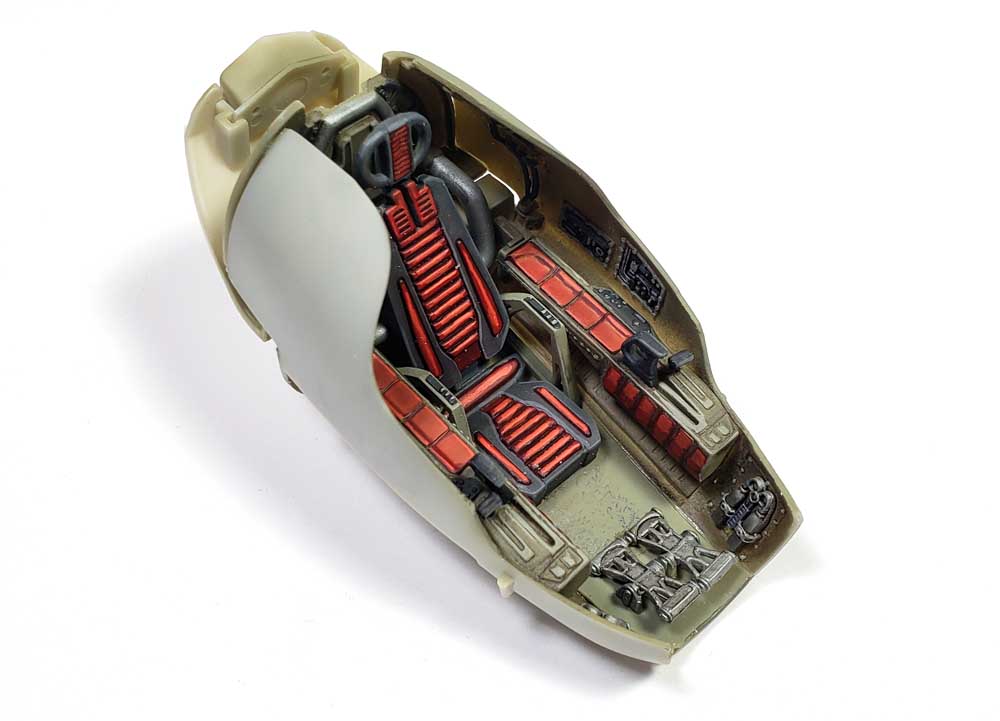
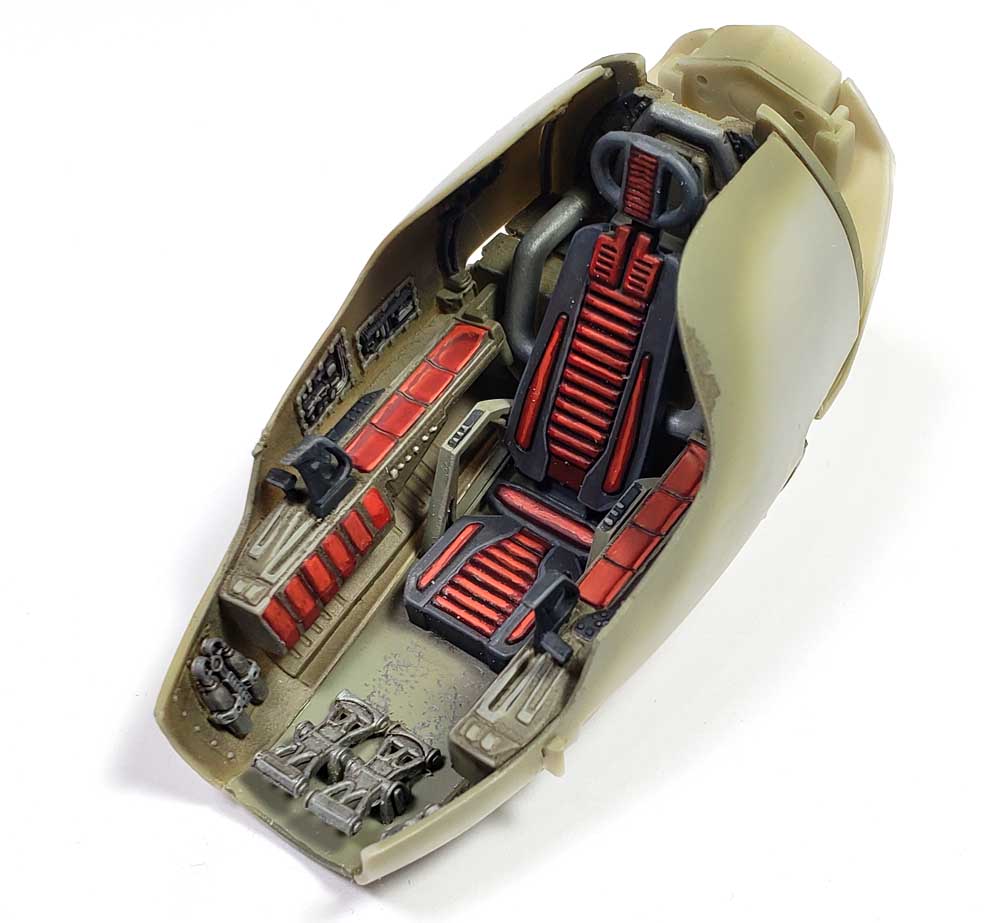
Oh That Cockpit
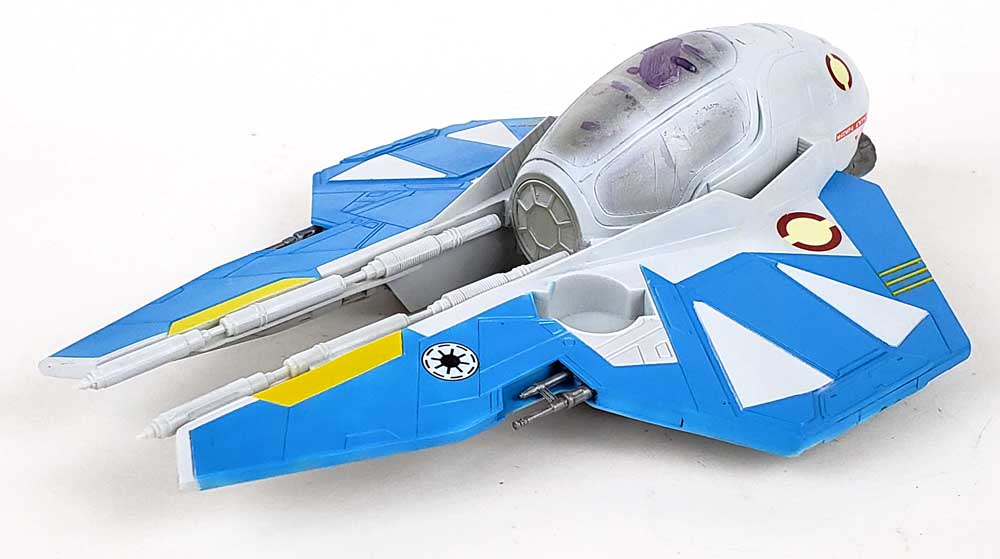
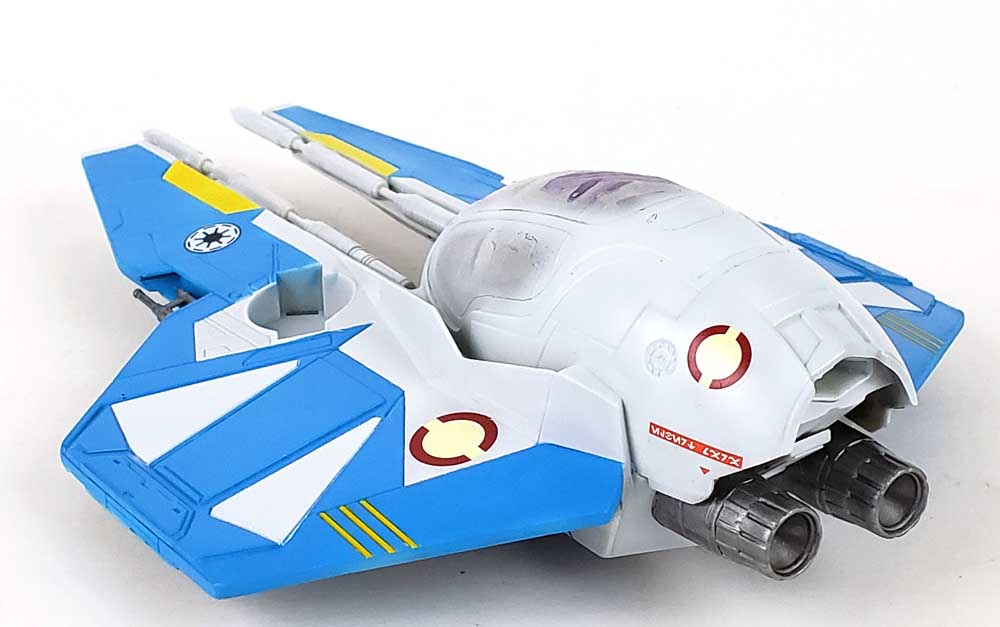
The standout feature of this model is the cockpit. While not sharply cast, it does have enough greeblies to allow it to look good out of the box. I assembled all of the sidewall parts, as well as the aft interior parts. I did leave the seat back out to make painting easier.
Test fitting the large canopy had convinced me a closed cockpit build was best, so my goal was not a highly detailed cockpit, but rather a “contrasty” one that would sell itself when viewed through the canopy.
I chose Mr. Color’s RLM02 as the base of the interior. It’s a nice gray/green color that sort of melts into the background, allowing other parts to show better. Various sidewall panels were picked out in black, with Vallejo Sky Gray used for dials and switches. I feel this color works well in that role – it “reads” as white against the black, but is not so bright as to seem overpowering or comical.
The seat and armrests along the consoles had the appearance of padding to my eye. I opted to give it a bit of a “race car” look with bright read padding. I started with a base of Vallejo Game Color Gory Red, and then layered up from there to give it a bit of volume. The “rudder” pedals were done with Citadel’s Leadblecher, to help them stand out from the RLM02. Everything was given a drybrush of Vallejo Sky Gray, and a wash with Mig Productions Dark Wash.
The cockpit was assembled and set aside to be fitted into the hull.
Making a Starfighter Sammich
Assembly of the major portion of the airframe is pretty simple – in theory. A top section is mated to the bottom section, with the cockpit sandwiched in between. But simple is not always “simple”.
As I’d mentioned earlier, the hull sandwich fit good generally. There were no egregious overhangs or gaps. But the entire perimeter of the join called for some level of filling and sanding. Careful preparation of the mating surfaces ahead of time will minimize the work, but I don’t believe it can all be eliminated. While two surfaces may touch, the edge of the join is less than clean.
Still, it wasn’t hard work. I simply thinned some Tamiya Basic Putty with the same maker’s Extra Thin Cement, and applied it on all the gaps that needed to be filled. Areas that were supposed to be panel lines were given a thick coat of Mr. Surfacer 500, and the excess wiped away with cotton buds soaked in alcohol. Later, the puttied areas were sanded smooth. While it took a little elbow grease, none of this process presented a problem that even a fairly new modeler could not tackle.
Two Areas Of Special Attention
One section that did need a slight bit more work was the canopy. It aligned with the fuselage opening in reasonable fashion. However, because the model was intended to have a working canopy that opened upwards from the front, the aft part of the canopy left a fairly significant gap to allow clearance for the movement. In my mind that necessitated either an open or closed canopy only. Because no landing gear were supplied, only a display stand, I opted for the closed canopy.
The fix was simple enough – I added a few shims of plastic sheet to the aft clear section, testi fitting as each layer was added until I had a good fit. Everything was sanded smooth, and some RLM02 was brush on the interior to mask the plastic surgery. The canopy was masked, glued in place, and treated to Mr. Surfacer to fill in the cracks.
The second place that needed special attention were the folding wing panels. Two on top, and two on bottom, each folding via hinged plastic parts, held together by a small metal rod. While the system worked fine, it looked horribly out of place. After deciding to go with a closed panel build, I glued them in place. The hinge parts were clipped away from the outer wing edges, and it was all sanded flat. Several stripes of sheet placic were then added, and a few panel lines scribed in. I wasn’t trying to get it too detailed – doing so would look out of place on the kit. However, I wanted it to look organic, so this simple solution worked nicely.
The Paint
Based on the box art and some online reading, it appeared that each Jedi would choose their own personal colors. I decided to paint one of the lesser known Jedi, Jon-obi Bius-walker. He had a minor role in Episode II, having gotten lost in the big battle at the end of the movie, and thus missed the whole fight. He finally wandered in out of the desert, famously quoting “did I miss anything?” All of the other Jedi had a good chuckle, except Yoda, who was overheard saying “idiot he is”. Anyway…
A layer of Mr. Color Gundam Color MS White was applied first. This is a nice “scifi white”. It’s a bit on the cool side, and while it looks white by itself, is far enough from pure white to allow highlights to be added. A lacquer paint, it goes on very smooth, and is super durable.
Large quantities of Tamiya tape were applied around the model next, and Gundam Color MS Blue was then added. A few smaller areas were masked, and Gundam Color MS Yellow rounded out the base colors.
A gloss coat was then applied, and the few kit decals set in place.
Mask The Mediocrity In Mud
While I am certainly enjoying this kit, I’d be lying if I did not say it’s a fairly mediocre model. Much like AMT’s automobile kits, it suffers from simply being cheap. Had this been produced in a high-quality injection process, I have to believe it would be much sharper and fit better. But not everyone can afford to put out things to the level of Bandai, Tamiya, and Eduard. So we’re left to do the best with what we have.
And as I’ve often heard it said, if you want to build one – this is it.
It’s not difficult or bad by any stretch. Mediocre really does describe it. I just hate that this seems to represent the standard when it comes to Western scifi kits. Japanese manufacturers know that there is a massive market for this genre, but outside of there, everyone seems to be happy squirting out lower quality stuff. Which leaves modelers in the position of “build this or build nothing.”
So I build it. And hope for better to come along. With Disney in charge, I’m sure it will happen. {snort}
Stay tuned for the next episode when this little Starfighter gets weathered up!


Leave a Reply